How to Make Electronet Fence Easier to Work With
Electronet fencing is a modern miracle. It makes it faster and easier for homesteaders to pasture animals and is critical for many small-scale regenerative farms and homesteads. Unfortunately, it can also be very difficult to work with.
I was tired of struggling with a 160 foot sheep and goat net every day so I devised a way to make electronets easier to work with. It has helped me tremendously. I hope it helps you, too!
This post includes affiliate links. If you make a purchase using one of these links, Together Time Family will receive a commission at no additional cost to you.
I used this technique on a sheep and goat net. It would also work well for cattle or hog nets. Because of the number of strands involved, it would be time-consuming to do with a poultry net. You could do it, though. You’ll just need a lot more crimps.
Materials needed
You’ll need a few materials to turn your longer electronet into multiple shorter, easier one handle ones. Here’s what you’ll need:
- Electronet (I used the 164′ Premier1 sheep and goat net)
- Wire crimps
- Sturdy scissors
- Long channel lock pliers or connector crimping pliers
- Spare polywire (Only a few feet. I used about 12 feet.)
- Extra electric fence posts


How to make an electric net easier to use
Keep scrolling past the written directions to watch a step by step video on working with your electronet. The video can also be found on our YouTube channel.
First, determine how many new, shorter nets you’d like to make from your longer net. I had a 160′ net that I turned into 4 40′ nets.
Count the number of posts in your original net and divide by your intended number of nets to determine where you need to cut the net. My net had 14 posts, which meant I needed to cut every 3.5 posts.
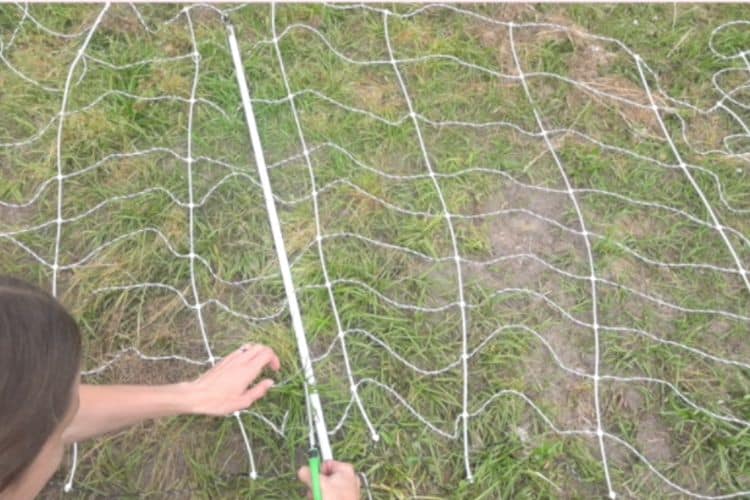
Use sturdy scissors to cut the polywire in the correct place. Cut in the middle between the appropriate pair of plastic vertical spacers
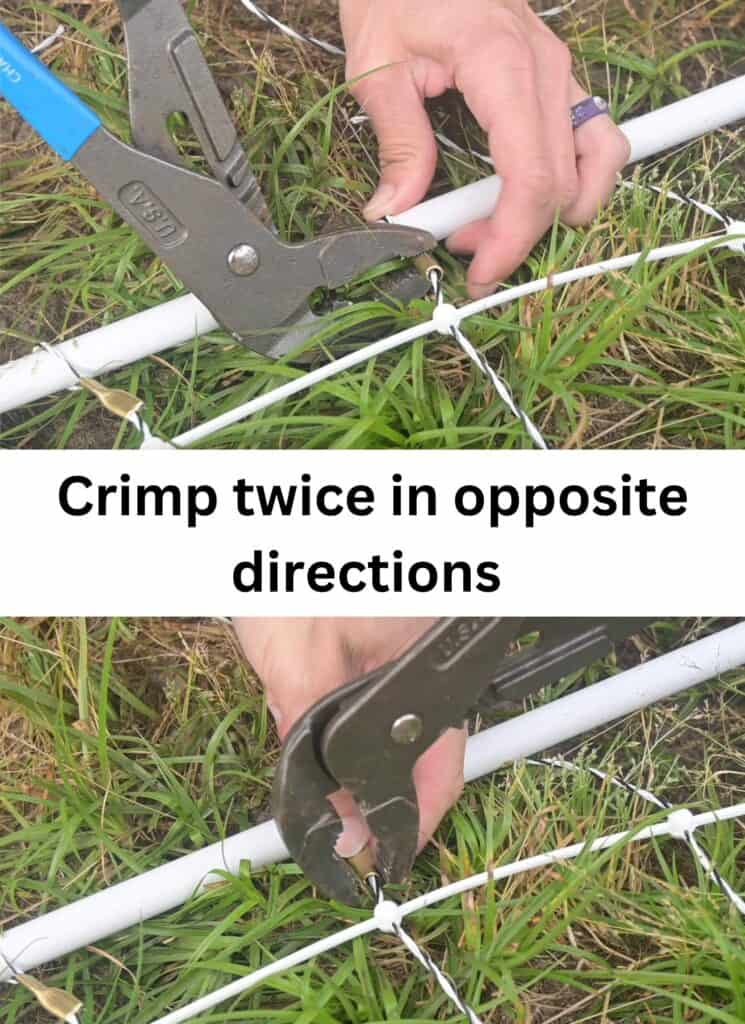
Grab and extra post and re-secure the polywire. If you’re using crimps, slide the crimp onto the wire, wrap the wire around the post, then re-insert it through the crimp.

For a tight connection, use your channel lock pliers (or official crimping pliers) to smash the connector in two different directions. Press once to flatten the connector from your perspective, then turn the pliers 90 degrees and press again.
Repeat, repeat, repeat until you’ve cut and rejoined all the sections of your net! The very bottom strand on your fence may not be electrified. You can leave it loose or use something easier to work with like a zip tie.
Some new fence sections need one additional step. The outer sections will have the vertical connection piece that came with your original net. Your nets from the inner sections will need to have all the horizontal strands electrically reconnected.
Take several feet of spare polywire (the height of your fence plus 8-10″ extra). Secure it to the top loop of polywire at one end of the fence. Bring it down and through the next polywire loop. Make a few turns or tie a knot like a clove hitch so the wires are touching.
Continue down the post, securing your extra piece of polywire to each horizontal strand. Secure the polywire to the last electrified strand.
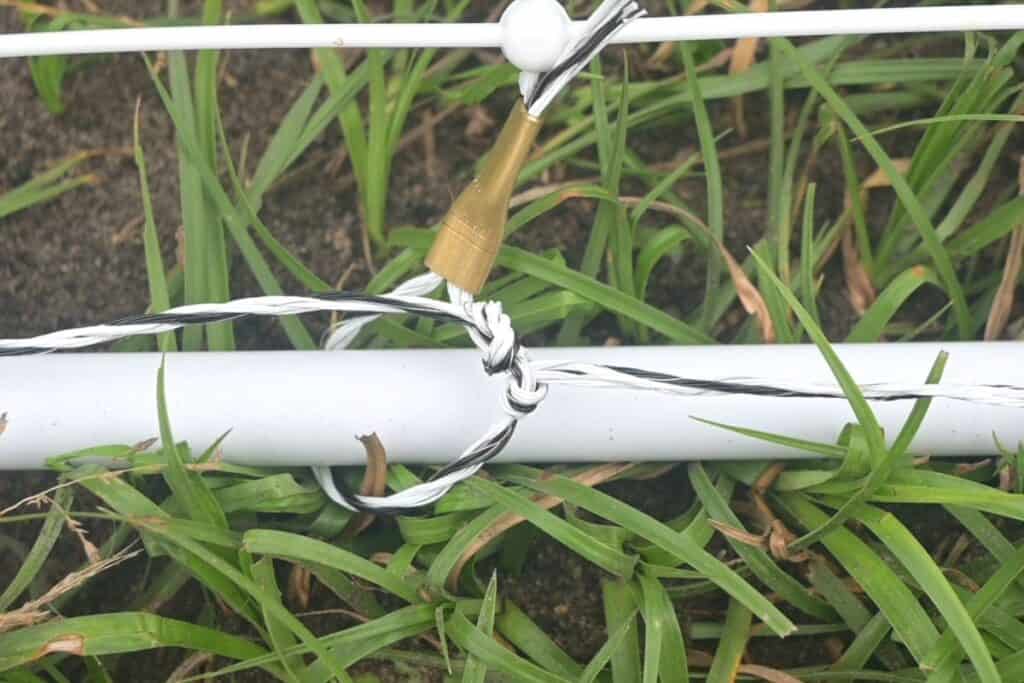
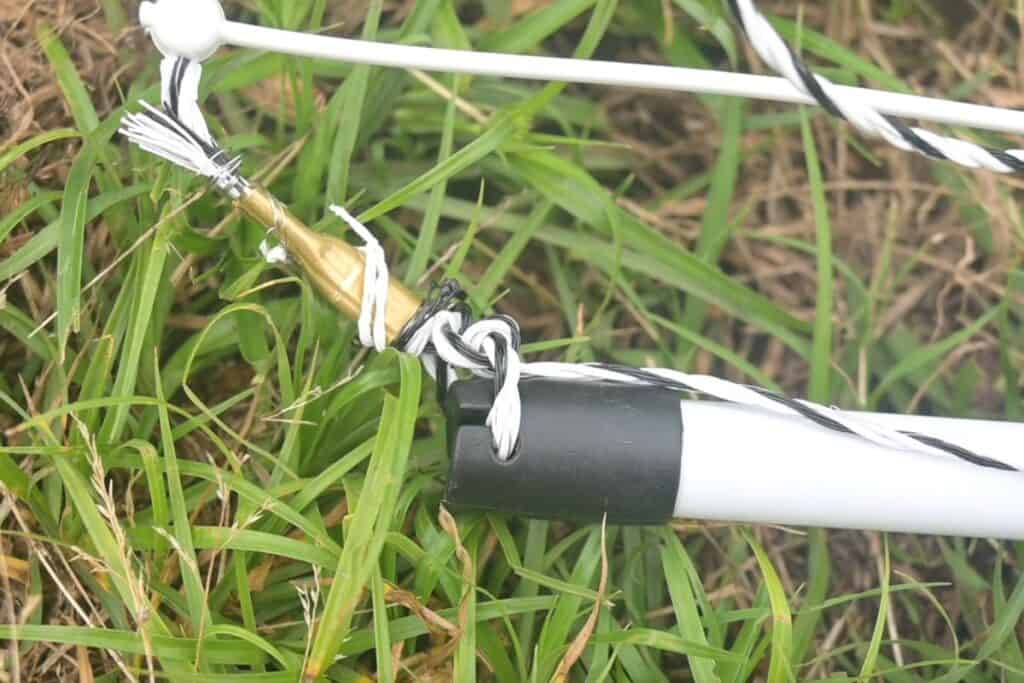
For a great electrical connection, trim and burn away excess plastic on both ends to expose bare wire. Wrap these exposed wires around the horizontal fencing strand.
Watch the whole process step-by-step in the video below:
The benefits of shorter electric netting
Congratulations! You’ve now made your electronet much, much easier to handle and move.
There are other practical reasons to use shorter electronets, too. It’s difficult to make a square paddock with a long fence. This means you’ll end up wasting grazing space at each “corner” as you move the net. Using squares or rectangles ellminates these wasted areas.
It’s challenging to move your animals when you’re just using long electronets without reel fencing. With shorter sections, you can build the new paddock off any of the four sides without worrying about which way the electronet opens.
You can also easily add a short electronet to a larger one in order to make a bigger paddock when grazing is poor or animals have greater feed needs.

I hope you enjoy using your new, shorter electric fences! If you’d like to see how I use these short electronets to make rotational grazing easier, please leave a comment and let me know.