How to Harvest Parsley (without killing the plant)
Discover how to harvest parsley without killing the plant so you will have an abundant harvest all season long! Bonus tips for storing and trying your parsley are included, so keep scrolling to learn how to keep your parsley for later.
Parsley is one of those staple herbs to grow in your garden or in a pot on your porch. Once thought of as merely a garnish, parsley has a bright and fresh flavor that brightens up both cooked and raw dishes.
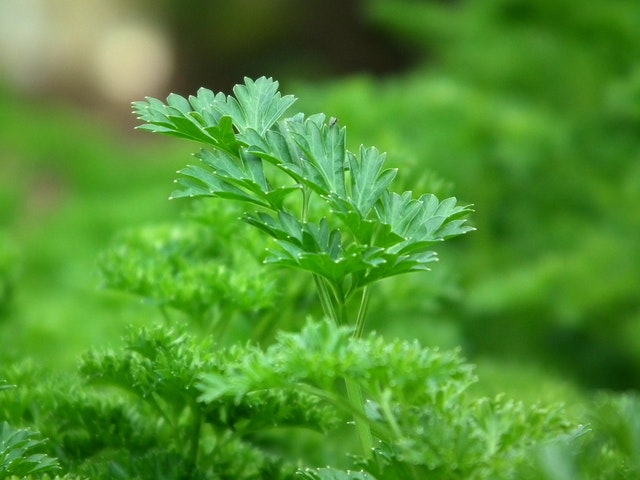
Parsley (Petroselinum crispum)
Zones: 4-9
Needs: Moist, well-drained, loamy soil and full to partial sun
You may not know it, but this herb is also good for you. It’s got lots of nutrients, especially vitamin A, vitamin C, and iron. Learn more about parsley’s benefits.
Parsley is a ‘cut and come again’ herb, which means you can harvest often without harming the plant. Here are some growing tips, how to harvest parsley without killing it, and some storage options if you end up with extra.
This post includes affiliate links, which means I may earn a commission on purchases made at no additional cost to you.
Want to know what herbs to plant with parsley? Discover which herbs to plant together.
Parsley Growing Tips
Knowing just a little about parsley will help you get a great harvest.
- Parsley is a biennial herb. As a biennial plant, it sends up leafy growth the first year and only sends up flower stalks in the second year of growth.
- Many gardeners treat parsley like an annual herb and replant every year. This is a great option because when herbs flower they start losing flavor and become bitter. You don’t have to worry about this at all with parsley during its first year. That’s right, you won’t see a single flower stalk on your parsley herbs during their first growing season!
- Parsley plants grow best in cool weather, so plan to do most of your harvesting before it gets really hot. Get your plants started early in spring to get a head start. If the weather’s hot, give your parsley some afternoon shade.
- Even though parsley enjoys cool weather, it prefers full sun. The exception is that parsley benefits from partial shade during high summer temperatures.
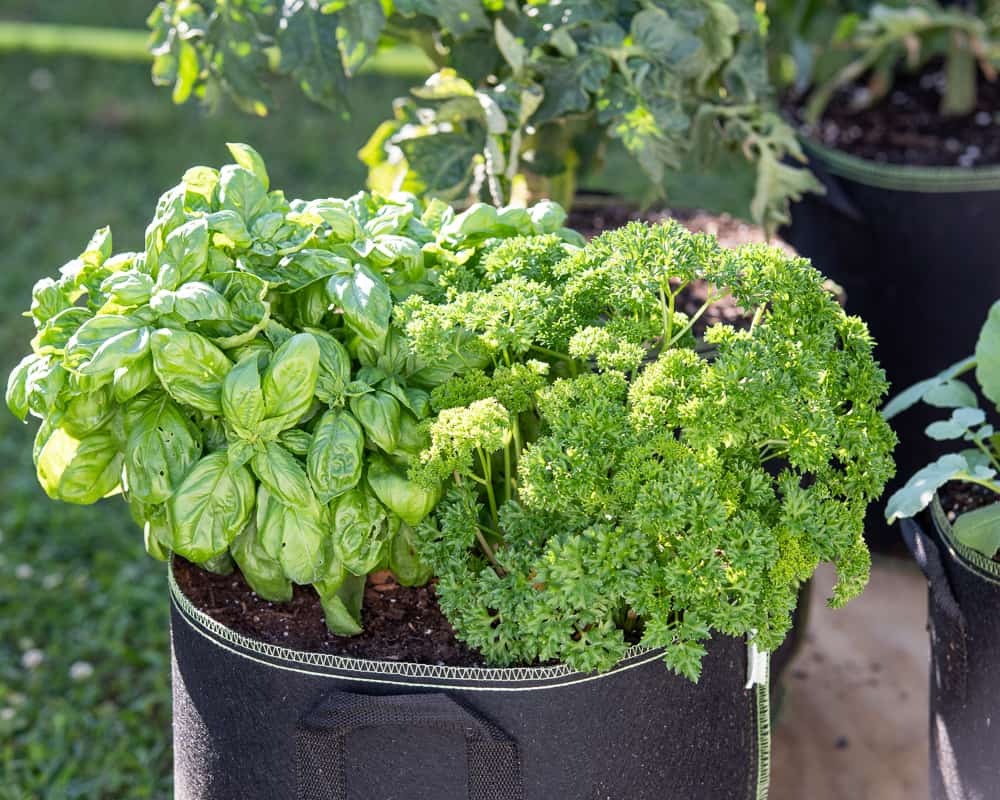
- There are two main types of parsley: curly leaf and flat leaf. Both have great flavor, but the curly leaf variety tends to grow half as big as the flat leaf. That may be great for you if you’re short on space, or you might want to choose flat leaf to get a bigger harvest.
- Parsley can withstand light frosts and in warmer climates will overwinter and reemerge in the spring. It’s also easy to start from seed: just soak them overnight for better germination.

- Oregon Family Farm Business - Our company is family owned and operated on our 65 acre farm in rural Oregon. Each Spade To Fork indoor garden kit...
- Entire Kit Is Certified USDA Organic - Most kitchen herb garden germination kits only include organic seeds, but their soil and pots are sometimes...
- The Perfect Special Gift - Our indoor herb seed kit makes a fun gift for virtually anyone -- man or woman, vegetarian or vegans, mom on mothers day,...
When to Harvest Parsley
The method of harvesting parsley the best way is the same for all varieties of parsley including flat-leaf parsley, Italian parsley, and curly parsley.
Most parsley varieties will take 70-90 days to mature, but you don’t have to wait that long to start picking leaves.
To get technical, you can start harvesting when the leaf stems have three segments. You can check on this by examining one of the leafy stems that branches off the main stem. You’ll see segments that each have a set of leaves. Once there are three of these, you’re good to go.
If that sounds a little too complicated for you, just wait until your plants start getting bushy with lots of leafy stems branching out to harvest.
Like other herbs, parsley benefits from harvesting and is a forgiving plant, so don’t worry too much about choosing the perfect time.
How to Harvest Parsley Without Killing It
Parsley is one of the easiest herbs you can harvest and grows back quickly. You just need to learn how to harvest parsley without harming the plant so that it will keep producing.
Wait to harvest your plant for the first time until it has multiple stems. I like to leave at least four parsley stems on the plant.
Once plants are large enough, you can simply cut or break off outer stems as needed. Leave the inner stems and leaves to keep growing. It’s a good rule of thumb to always leave ½ – ⅔ of the plant intact when harvesting.
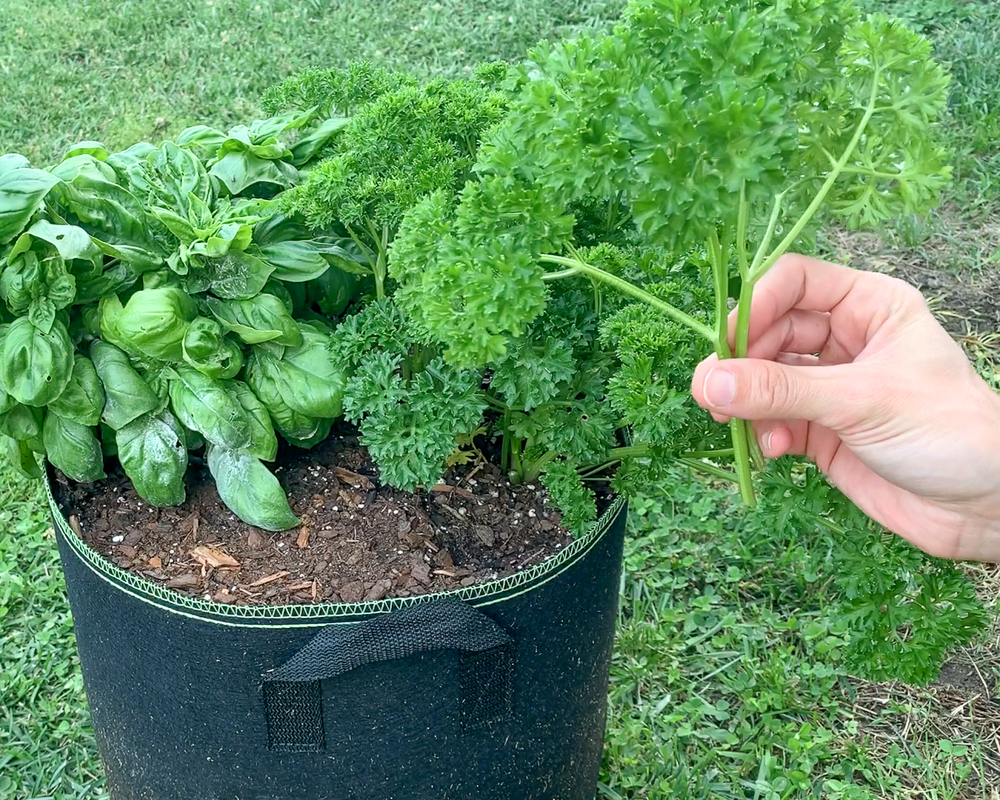
Any time you pick parsley, you’ll want to pick the stems at their base. This will be either where they connect to the central stem if there is one or right at soil level.
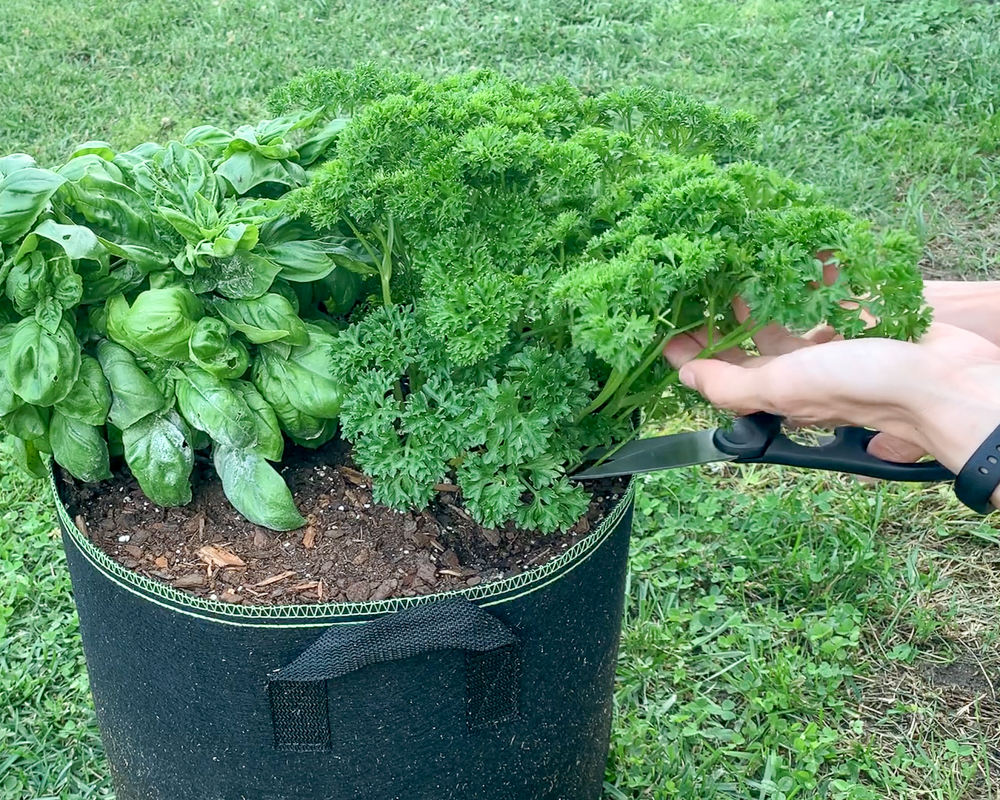
Picking stems this way encourages your plants to put out more stems and leaves. If you just pull individual leaves off, the plants won’t be as vigorous and you won’t get as good a yield.
Give your parsley about a week to recover after you harvest from it. Once the inner stems look mature, have larger leaves, and you notice new stems shooting out, you can harvest again.
Want to see the parsley harvesting process in action? Check out this video of me giving my curled parsley plant its first haircut of the season:
How to Harvest Parsley for Fall
Harvesting parsley in this way will keep your plants producing for weeks and sometimes months.
However, at some point your plants will start to lose vigor and leaves will begin turning yellow. This typically happens as the weather gets hotter, although with plenty of water and shade in the heat of the day, parsley can last all summer.
But if you notice plants doing this or if a hard frost is coming at the end of the season, you can harvest the whole plant to use any remaining good leaves.
To do this you simply cut all the stems off at the base of the plant where the stems meet the soil. Sort through the parsley and take off nice, healthy-looking leaves to use, discarding any yellow or brown ones. Parsley has a huge taproot, so you may see new growth the following spring if you don’t remove it.
If you live somewhere with mild winters, you can leave your plants intact so that they’ll come back strong in the spring. Just remember that your plant will grow seed heads next year.
Options for Storing Parsley
Now that you know how to harvest parsley, let’s talk about storage options.
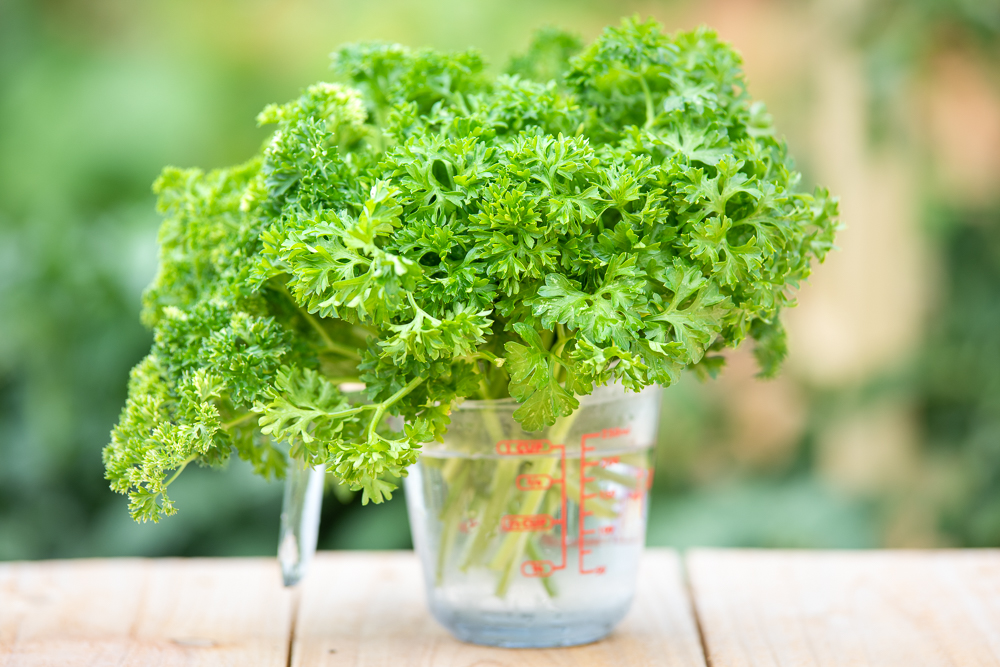
Parsley is one of those herbs that tastes best fresh. You can store parsley for about a week in the refrigerator by wrapping stems in a damp paper towel and sealing them in a plastic bag. Or you can place the cut end of the stems in water and keep them fresh that way.
I personally put my parsley in a jar or cup of water and cover it with a bag, as shown below, and place it in the fridge. A gallon ziplock bag works well. Parsley can stay fresh for 10+ days when stored like this. The parsley shown below is curly leaf parsley, but this method works equally well for flat leaf parsley.
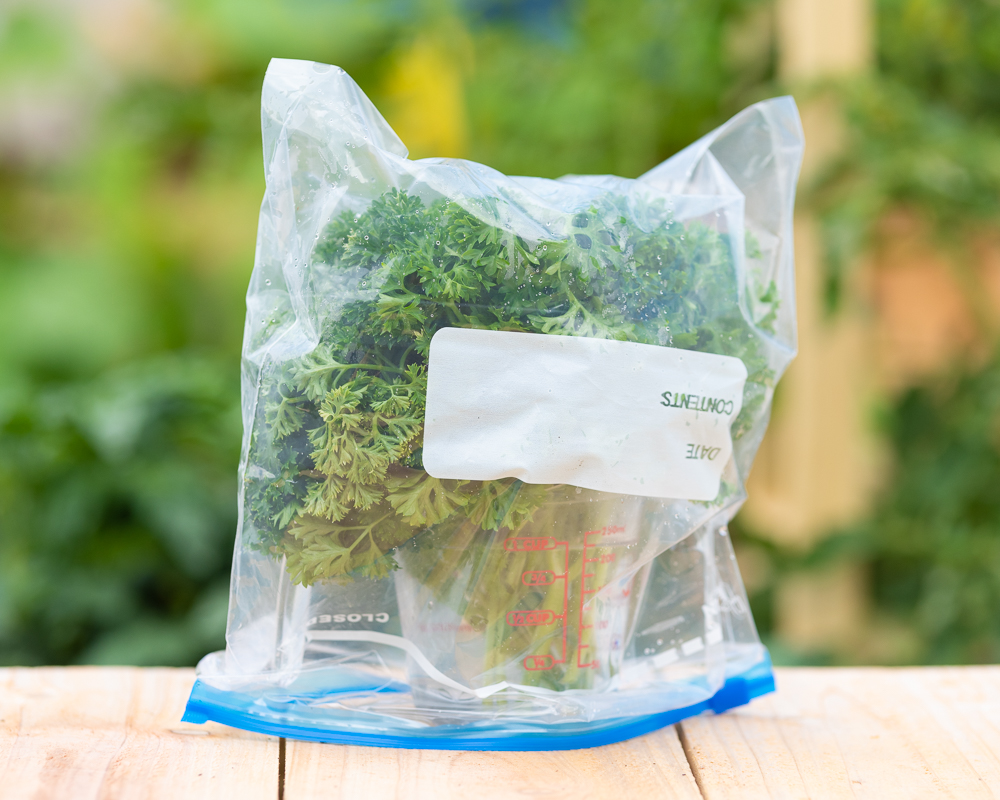
Although I show a disposable bag in the photo, I prefer reusable silicone zip top bags that are better for your health and for the environment.

- 𝐏𝐨𝐰𝐞𝐫 𝐏𝐚𝐜𝐤 𝐒𝐢𝐥𝐢𝐜𝐨𝐧𝐞 𝐒𝐭𝐨𝐫𝐚𝐠𝐞 𝐅𝐨𝐨𝐝 𝐁𝐚𝐠: In this set of...
- 𝐏𝐫𝐞𝐦𝐢𝐮𝐦 𝐐𝐮𝐚𝐥𝐢𝐭𝐲: Crafted from food-grade materials, our 100% silicone easy zip food storage bags are...
- 𝐅𝐫𝐢𝐝𝐠𝐞 𝐎𝐫𝐠𝐚𝐧𝐢𝐳𝐚𝐭𝐢𝐨𝐧 𝐄𝐬𝐬𝐞𝐧𝐭𝐢𝐚𝐥: Elevate your kitchen storage...
Although your parsley will lose some of its flavor, it can be dried or frozen for later use.
Before storing your parsley, make sure to wash and dry it. I’m always surprised by how dirty the water is when I wash my herbs!
Rinse your parsley in cool water. Give it a whirl in your salad or herb spinner then place it out on paper towels or a clean kitchen towel to dry fully. If you don’t have a salad spinner, you can pat the leaves dry with a towel. This is the herb spinner we personally use.

- Maximum Lettuce-Drying, Minimum Effort: Use the OXO Salad Spinner's one-handed pump to thoroughly dry greens, beans, even use it as a fruit washer....
- Touch-Button Spin: This is a lettuce spinner with force, thanks to the touch-button spin and the patented brake that stops the basket immediately....
- Salad Spinner Small Enough to Store Neatly: Press the lettuce keeper pump handle down, then slide the storage lock into place. This holds the pump...
How to Dry Parsley
To dry it, gather stems together in small bundles and hang them upside down in a warm, dry, and shady spot for 2-3 weeks. When leaves are crispy and crumbly, store them in airtight containers away from heat and light.
If you live somewhere humid (we do!), use your oven or dehydrator so your parsley doesn’t mold or mildew before it has the chance to dry.
For best flavor, store your dry parsley leaves whole and crumble them just before use.
I store dry herbs in glass mason jars and use my Food Saver with a jar sealer attachment to vacuum seal the lids. This keeps the parsley fresher and tastier for longer.
Make sure to date and label your jars so you can tell your homegrown, dry herbs apart.
How to Dehydrate Parsley in the Oven
- Separate clean, dry parsley leaves from their stems.
- Place leaves in a single layer on a baking sheet.
- Set your oven to its lowest temperature.
- Use a wooden spoon to prop the oven door open slightly. This allows extra moisture to escape and speeds up the drying process.
- Check on your parsley ever 10-15 minutes starting at 30 minutes. It typically takes me about 2 hours to dry, but ovens vary and it’s easy to scorch your parsley in the oven.
- Store cooled parsley in an air tight container. I recommend a glass mason jar sealed with your Food Saver and jar sealer attachment.
How to Dehydrate Parsley in a Dehydrator
- Separate clean, dry parsley leaves from stems.
- Place leaves in a single layer on your dehydrator racks. Make sure to leave space for air to circulate.
- Set your dehydrator to its lowest setting, or 95º.
- Check on your herbs every hour or so, starting at hour 10. Parsley can take 12-24 hours to dry, depending on the humidity and variations in the parsley leaves.
- Leaves are ready when they’re brittle, fully dry, and crumble easily.
- Store fully cooled parsley in an air tight container. I recommend using a glass mason jar and vacuum sealing it with your Food Saver.
My family has used the earlier model of this Presto dehydrator for 20+ years and it’s still going strong! It’s a stackable dehydrator that’s perfect for home gardeners who need to dehydrate a few things at a time.

- Dehydrates fruits, vegetables, herbs, and spices. Great for jerky and fruit rolls too!
- Includes 6 drying trays. Expands to 12 trays; add-on trays sold separately. Drying trays nest and cord stores in base for over a 40% reduction in...
- Includes 2 fruit roll sheets for making fruit rolls and strips from fresh, frozen, or canned fruit and 2 flexible nonstick mesh screens for...
I mention it all the time, but I truly do use my

- SAVE MONEY AND SEAL FRESHNESS IN: Meat preserved with the FoodSaver System in the freezer can last up to 3 years and still taste fresh, flavorful, and...
- MARINATE IN MINUTES: Get optimum flavor infusion in the least amount of time! Simply connect the handheld accessory to the Quick Marinator (sold...
- INTEGRATED ROLL STORAGE & CUTTER: Convenient roll storage with built in cutter lets you easily create custom-sized bags to suit your needs without...
How to Freeze Parsley
Freezing parsley will keep more of its flavor than drying.
You can freeze whole sprigs of parsley, individual leaves, or chopped leaves. Just lay them flat on a baking sheet and place in the freezer until frozen. Then, you can store them in your freezer in plastic bags or freezer-safe containers.
Another trick is to divide parsley into portions that you’d use for cooking and freeze them in an ice cube tray. That way, you just have to take out one of your pre-measured cubes and drop it in your recipe.
How to Use Parsley
After learning how to harvest parsley, you might be wondering what to do all that fresh parsley!
Parsley makes a great addition to many cooked dishes and is usually added right at the end to preserve its flavor. Try it in omelets, soups, vegetable or meat dishes, fish recipes, rice, and pasta sauce.
To get the most of parsley’s vitamin and mineral content, add it fresh to salads, sandwiches, tacos, and potato salad or use it as a topping for pizza or nachos.
Definitely more than just a garnish, parsley is filled with flavor and health benefits. It’s one herb you’ll be happy you grew! You’ll quickly discover that your fresh leaves taste way better than anything from the grocery store.
I hope you enjoy growing, and harvesting, this great herb! Be sure to check out additional herb gardening resources while you’re here on The Artisan Life:
Herb Gardening Resources
Are you thinking of starting an herb garden? Discover these herb gardening resources including which herbs to plant together, plants that repel spiders, and herb harvesting tips!
Planting Herbs Together (Which herbs to grow together & mistakes to avoid)
Do you know which herbs to plant together in containers? Discover the best herbs to grow together and how to tell if herbs will do well when planted together in this ultimate guide!

11+ Plants That Repel Spiders (plus a DIY spider repellent spray recipe that works!)
Did you know that many delicious kitchen herbs repel spiders? Discover which plants you can grow indoors and outside to help keep spiders away!

How to Harvest Basil (Must-know tip for an abundant harvest!)
Discover how to harvest basil for abundant yields all summer long!

How to Harvest Thyme: tips for picking thyme & preserving your harvest
Thyme is an easy herb to grow and harvest. Once you learn how easy it is to pick and dry thyme, you'll never buy it from the grocery store again!
How to Harvest Mint (and what to do with lots of mint)
Mint is a delicious, easy to grow plant. Learn how to harvest mint and what to do with lots of mint.