If you live somewhere with hot summers and like to grow greens, you’ve probably noticed that most of them fade out as the temperature rises. But here’s some good news: There is a spinach-like green that thrives in warm weather.
Known as New Zealand spinach, this heat-loving plant is perfect to fill in the “summer gap” left by veggies like lettuce, spinach, and arugula— all of which prefer cool weather to grow in.
Here’s a complete guide on how to plant and grow New Zealand spinach so that you can have greens practically all year round.
This post includes affiliate links. If you make a purchase using one of these links, Together Time Family will receive a commission at no additional cost to you.
Table of Contents
What is New Zealand Spinach?
New Zealand spinach (Tetragonia tetragonioides) is not really a type of spinach at all. It’s been given the name of “spinach” because it has a somewhat similar flavor when cooked, but it’s actually a completely unrelated plant.
Native to Australia, New Zealand, and eastern Asia, New Zealand spinach is a perennial in its natural habitat. It thrives in sandy soils and disturbed areas and is also cultivated as a leafy vegetable.
In colder regions (like the northern U.S.), New Zealand spinach is grown as a warm-season annual, although it will overwinter in milder regions. In some areas, this plant is considered to be an invasive species, so be sure to check your local invasive plant list before planting!
Growing Information for New Zealand Spinach
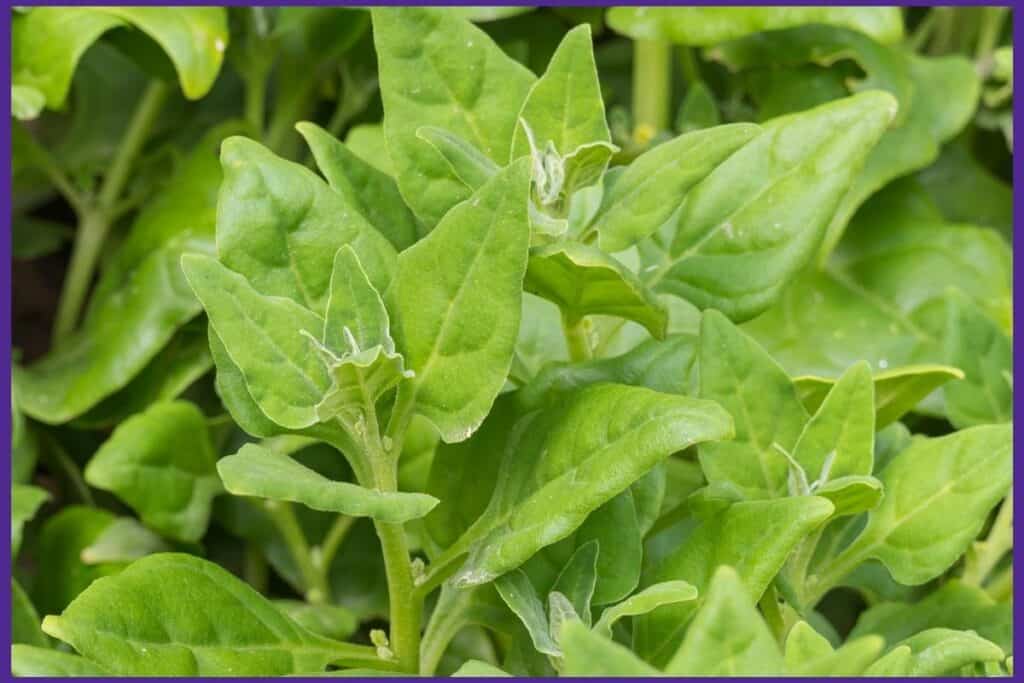
Typically, New Zealand spinach grows to be larger than true spinach. The plants have a trailing habit and grow much like a ground cover. They are also very sensitive to frost and must be planted when temperatures are well above freezing.
You can expect your plants to grow about 2-3’ long and up to a foot tall. They grow equally well in the ground or in containers as long as you supply them with enough water.
Overall, New Zealand spinach is a very hardy and low maintenance plant. However, in order for the leaves to have good flavor, you will need to supply your plants with plenty of water and nitrogen over the growing season.
You’ll be able to harvest young leaves for use in salads, although most gardeners agree that New Zealand spinach is best when cooked. It has a milder flavor than spinach and mellows out even more after being cooked or blanched.
How to Start New Zealand Spinach from Seed
Indoor Seed Starting
Because New Zealand spinach is relatively exotic, you probably won’t find it in stores. It’s best to shop online for New Zealand Spinach seeds. I highly recommend the seller Southern Seed exchange on Etsy. They always ship quickly and have inexpensive packets with reasonable numbers of seeds for a home grower.
Just like with most greens, the first step of how to plant and grow New Zealand spinach is seed starting. The best method for many is to start seeds indoors to get a jump on the season, but you can also directly sow seeds once the weather is mild.
To start them indoors, get your seeds going 3-4 weeks before your last average spring frost date. Use plug trays filled with a good quality, damp seed-starting mix.
To help your seeds germinate, soak them in water for 24 hours before planting them. This helps to soften their hard seed coat. Then, plant them ½” deep, make sure they are all covered with soil, and water them gently.
As long as the seeds are in a warm location (around 70°F), germination should occur in 7-10 days.
Once your seedlings are up, give them plenty of light, and water them regularly until they are ready to go into your garden.
Outdoor Seed Starting
After all danger of frost has passed in the spring and nighttime temperatures are consistently above 50°F, you can directly sow New Zealand spinach seeds in your garden or outdoor containers. For ideal germination, wait until the soil is 60-70°F.
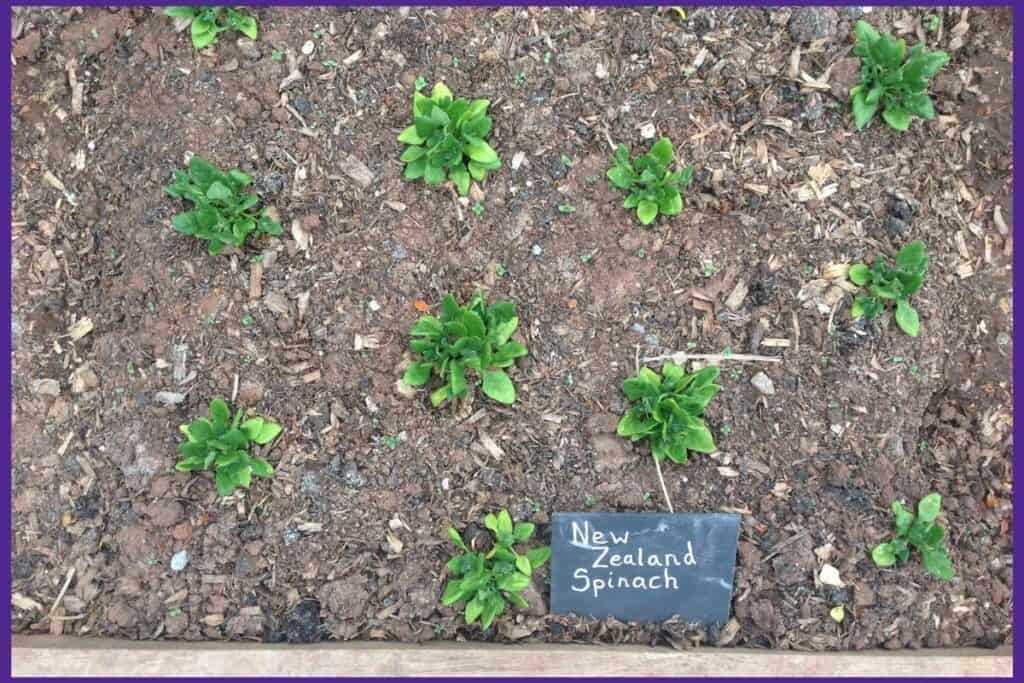
Again, soak your seeds for 24 hours before planting to aid germination. Then, sow them ½” deep and 2-3” apart. Once your seedlings have sprouted and grown a few inches, thin them to a final spacing of at least 10-12” apart.
To help ensure a continuous supply of New Zealand spinach over the summer, you can keep sowing seeds every 3-4 weeks until midsummer.
How to Plant and Grow New Zealand Spinach
When and Where to Plant
It’s very important that you don’t plant New Zealand spinach at the same time as cool-weather greens. It should only go in your garden after all danger of frost has passed and the weather is warm and settled.
If you started your own seedlings indoors, be sure to harden them off a week or two before transplanting them, but never expose them to freezing temperatures. Discover more in this post about how to prepare seedlings for transplanting.
In most cases, you’ll want to choose a spot for your New Zealand spinach that gets full sun. However, in regions with intensely hot summers, it will do better with partial shade in the afternoon.
As far as soil goes, New Zealand spinach likes a spot that drains well and is rich in nutrients. Before planting, you can add compost, rotted manure, or a nitrogen-heavy organic fertilizer to your soil to boost its nutrient content.
Planting Tips
There are two ways you can plant New Zealand spinach.
The first way is the hill method, which is very similar to what you would do for cucumbers, melons, and squash. Simply create low mounds that are spaced 2-3’ apart and plant 1-2 seedlings per mound.
The other method is to use more traditional rows, spacing plants at least 10-12” apart (12-18” if you want larger plants) and leaving at least 3’ between each row.
Or if you want to learn how to plant and grow New Zealand spinach in containers, simply choose containers that are at least 5 gallons in size and ensure they have drainage holes. Fill them with a rich, well-drained potting soil (add compost if necessary) and plant 1-2 seedlings per pot.
Place your containers in a sunny location and allow the plants to trail over the sides as they grow.
Caring for New Zealand Spinach
There are three basic care tasks for your spinach throughout the summer: watering, weeding, and fertilizing.
Even though New Zealand spinach is technically considered to be drought tolerant, it will need to be watered regularly if you want the leaves to remain tender and good for eating. If the soil is dry 2-3” below the surface, water thoroughly and remember that plants in containers will need watered more often than those in the ground.
Weed around your plants regularly, especially when they are young, to prevent competition for water and nutrients. You can apply a light mulch as well to suppress weeds and improve moisture retention.
Finally, New Zealand spinach is a hungry plant, so you’ll need to feed it throughout the growing season. It especially craves nitrogen. High nitrogen natural fertilizers include blood meal, composted chicken manure, and human urine.
Common Pests and Problems
Here’s some good news: New Zealand spinach has virtually no pest or disease problems. In addition, it won’t bolt during hot weather like true spinach and other cool-weather greens.
However, one of the most common problems gardeners can run into is nitrogen deficiency. This particular plant is a heavy feeder and needs lots of nitrogen to thrive. If it doesn’t get it, your plants may bolt (flower and set seed) prematurely, causing the leaves to turn bitter.
The best way to avoid this is to make sure your soil contains a good supply of nitrogen to start with — do a soil test if necessary to find out — and continue to fertilize throughout the season.
How to Harvest New Zealand Spinach
You can harvest New Zealand spinach as soon as the leaves are a good size for eating (about 55-60 days after sowing seeds). Baby leaves will be the most tender, but larger leaves are still excellent for cooking purposes.
To harvest, simply use a sharp pair of scissors to snip off individual leaves or side stems. Cutting off side stems or pinching out the tips of stems will cause your plants to bush out and send out new growth, so don’t be afraid to harvest frequently!
If your plants start to look a little faded or show signs of flowering, cut them back hard right at a leaf node and give them a few weeks to regenerate.
How to Store and Use New Zealand Spinach
Now that you know how to plant and grow New Zealand spinach, what can you do with it?
This versatile green can be used both raw and cooked, but it does contain a high amount of oxalates, which are compounds that can bind to certain minerals. Cooking the leaves greatly reduces oxalate content if that’s something you are concerned about.
The leaves can be cooked much like spinach using a variety of methods: steaming, sautéing, boiling, etc. They can be stored in your refrigerator for about a week, or you can blanch and freeze the leaves for long-term storage.
Whatever you choose to do with it, you’ll be able to enjoy this spinach-like vegetable at a time when most greens have wilted in the heat!
Popular summer vegetables and herbs
Discover how to grow popular vegetables and herbs in your backyard garden or container garden with these in-depth vegetable growing guides.
7 Easiest Vegetables to Grow for an Abundant Harvest (and 5 to avoid!)
Discover the easiest vegetables to grow for beginners so you can have a healthy, successful garden.
Discover these must-know tips for planting yellow squash and common squash growing mistakes and problems.
How to Pick and Preserve Cherry Tomatoes (plus drool-worthy cherry tomato varieties to try)
Discover how to pick and preserve delicious cherry tomatoes.
Must-Know Zucchini Companion Plants (and 5 plants to avoid)
Zucchini are a summer garden must-have. Learn how to companion plant them for a healthier, more productive garden.
How to Harvest Basil (Must-know tip for an abundant harvest!)
One basil plant can provide you enough for fresh eating and drying for homegrown basil all winter long when you discover how to harvest basil the correct way.
How to Harvest Parsley (without killing the plant)
One parsley plant can provide you with an ample harvest all season long...if you know how to pick it the correct way. Discover how to harvest parsley with this comprehensive guide and video!
Harvesting Tomatoes - How and When to Pick your Tomatoes
Discover how to harvest tomatoes and how to tell when they're ready to pick - even heirloom varieties with different colors.
Natasha Garcia-Lopez is an avoid home-gardener and proud owner of 88 acres of land in rural West Virginia. She was a member of the Association for Living History Farms and Agricultural Museums for many years and is currently enrolled in the Oregon State University Master Gardner Short Course program so she can better assist you with your gardening questions.She holds a certificate in natural skincare from the School of Natural Skincare.








Leave a Reply