Sweet corn is a classic summer vegetable. It takes some patience to wait for the ears to become perfectly ripe for harvest, but there’s nothing like freshly picked and cooked corn eaten straight off the cob.
Of course, it can be a little tricky to know when corn is at its peak and ready to be harvested. You can’t actually see the ripening process occurring like you can for tomatoes or peppers. However, with practice, you’ll soon get a feel for the exact timing of your corn harvest.
To help you, here’s a guide to knowing when to pick corn, plus how to harvest and store it.
This post includes affiliate links. If you make a purchase using one of these links, Together Time Family will receive a commission at no additional cost to you.
Table of Contents
Growing Corn at Home
Though corn syrup and corn products have gotten a lot of negative press, eating sweet corn as a whole food is good for you. Corn is a whole grain and contains healthy nutrients such as:
- Vitamin C
- Vitamin B6
- Folate
- Potassium
- Phosphorus
- MagnesiumZinc
- Copper
When growing corn at home, it’s important to realize that your cobs probably won’t end up looking like the ones at the supermarket. They’ll likely be different sizes, and you may end up with a few that have bites taken out of them. That’s okay, though, because your corn will taste so much better than anything you buy at the store.
As you get ready to start picking, be sure that you don’t rely on the size of an ear of corn to tell you when it’s ready. Small ears of corn won’t grow any bigger after a certain point, but they will still ripen like the larger ones.
Knowing When to Pick Corn
Although you can’t go by the size of your ears of corn, there are many signs that will tell you when they are ready to be picked.
In general, most varieties of sweet corn will be ready to harvest 70-80 days after being planted, although this timeline can vary significantly depending on weather conditions. Sweet corn is different from other types of corn, such as dent corn and flint corn, which typically take longer to ripen. A few early hybrids, such as Early Sunglow, can be ready in less than 70 days. If you’re interested in learning more about “staple crop” corns for making flour, not just fresh eating, I highly recommend Carol Deppe’s The Resilient Gardener. Deppe has Celiac Disease and produces all her own flour from the corn she grows.
The first sign to look for is the appearance of silks at the end of each ear of corn. After the silks appear, your corn will be ready to harvest in approximately three weeks.
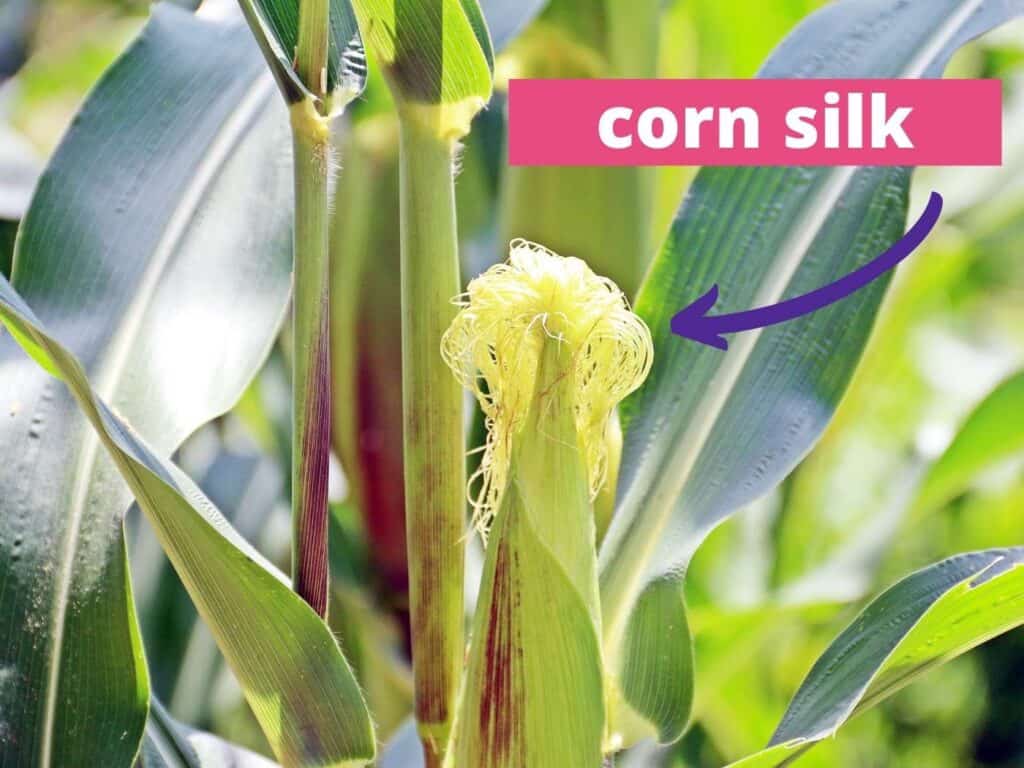
Again, this will vary depending on the weather (warm weather speeds the ripening process up, cool weather slows it down), but it does narrow the harvest range down to about 18-24 days from when the silks formed.
Once you get into the approximate harvest range, here are the specific signs that will tell you an ear is ready to be picked:
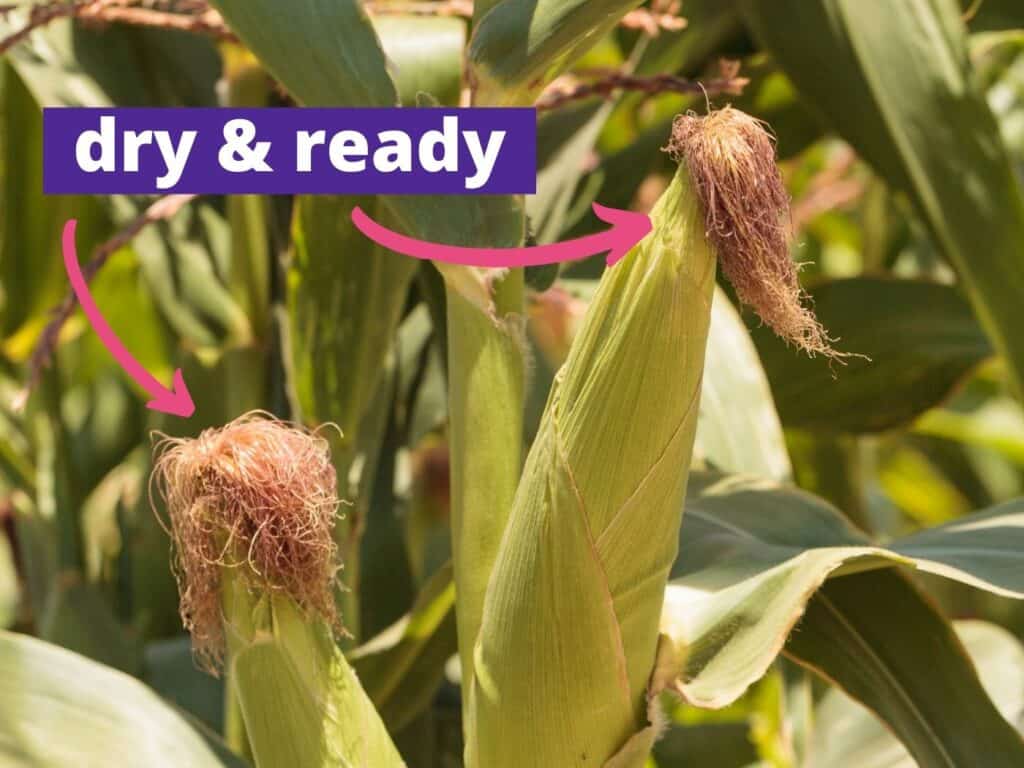
- While the ears of corn are still growing, the silks at the end look yellow-white and silky. When they become ready to harvest, the silks turn brown and look kind of crispy. So if the silks on your ears are already brown and dry, that’s a good indicator your corn is ready to pick.
- Another way to check your corn is to simply feel the cob with your hand. It should have filled out into the husk and feel firm and plump when you press on it. You should also be able to feel the individual kernels through the husk.
- Sweet corn needs to be harvested at what is called the “milk stage”- when the kernels are milky, sweet, and juicy. To double-check whether your cobs are there, you can gently pull back the husk on a test ear of corn or make a small slit in the husk. Look for a kernel a little ways down from the top and puncture it with your fingernail. It should be plump and squirt a milky sap when ready. If the juice is clear, your corn isn’t ripe yet and you should cover it back up.
If you’re not confident in your ability to spot (and pick) perfectly ripe sweet corn, pick and prepare just one or two cobs to see how they taste. Once you’re sure you can recognize ripe corn, you can pick the rest of your crop with confidence. Unlike tomatoes and some other popular fruits, corn does not ripen after you pick it. Corn picked too early will not improve in flavor. In fact, corn loses flavor it’s picked. There’s more on this below. (Want to know more about harvesting your tomatoes for best flavor? Discover when to pick tomatoes.)
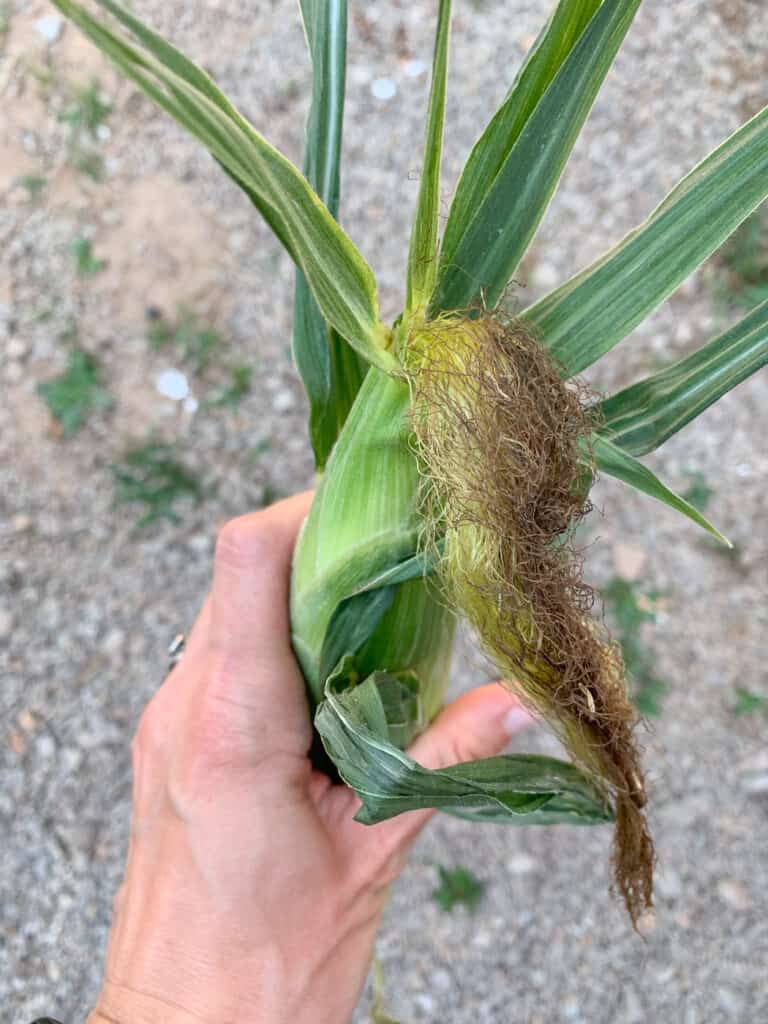
Here’s a top down look at a picked, ripe ear of corn:
How to Pick Sweet Corn
Now that you know when to pick corn, you can start harvesting the ears as soon as they are ready.
Sweet corn is best picked in the morning when the sugar content is highest or right before you’re ready to cook it. Of course, you don’t want to let the corn go past its prime, so be sure to pick fully ripe ears, even if you can’t cook them the same day. My grandfather’s cousin wouldn’t pick corn until the pot of water was already boiling!
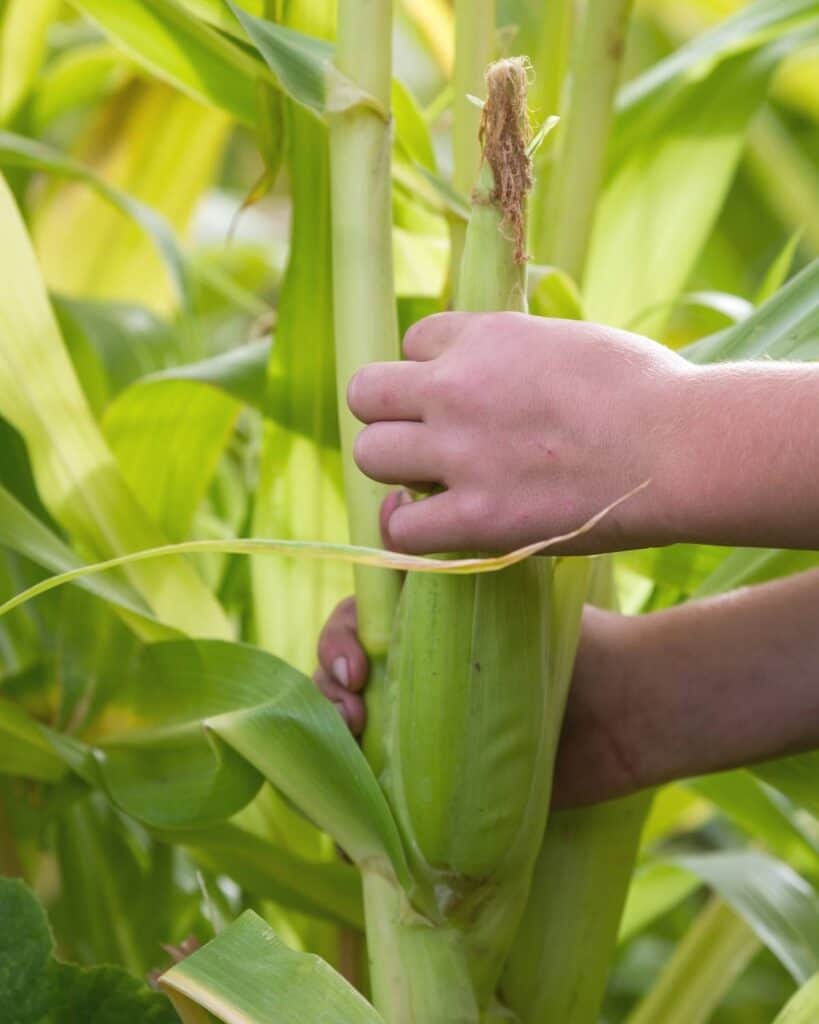
To harvest corn, grab an ear with one hand while you hold onto the stalk with your other hand. Place your thumb towards the top of the ear and the rest of your fingers closer to the base.
Snap the ear of corn against the stalk, then pull upwards. It should come off easily.
Another method is to grab an ear and gently twist it downwards until it snaps off, while holding the stalk with your other hand. Both methods can be equally effective, so use whichever one works best for you!
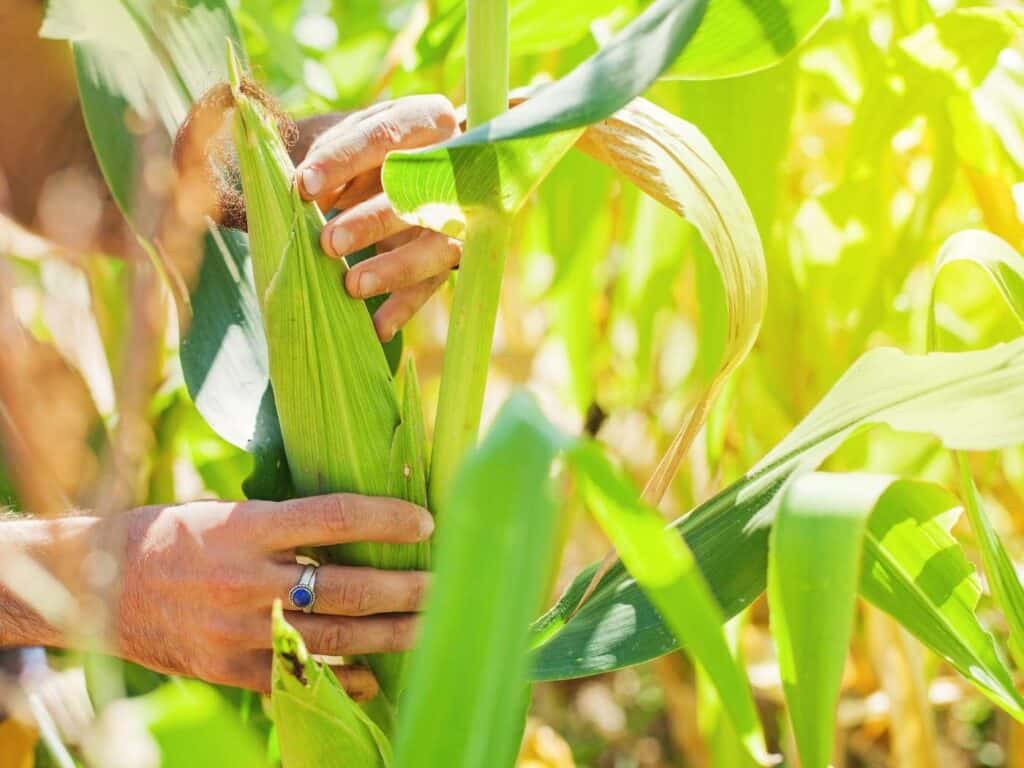
Although you may need both hands on the ear of corn after you’ve snapped it free, stabilize the stalk with one hand while snapping or twisting. The photo below shows the “wrong” way:
For greater success, use one hand to hold the corn stalk:
Storage & Cooking Tips
If you can, cook your sweet corn soon after harvesting it for the best flavor. Once off the stalk, the sugars in corn begin converting to starches within hours. An ear can lose up to 25% of its sugar content within 24 hours, so freshest is truly the best. Even today’s sugar enhanced and supersweet varieties convert sugar to starch quickly, they just have more sugar to begin with. The Green Thumb 2.0 has an excellent explanation of what these terms mean if you’re curious to know more about sugar enhanced and supersweet corns.
How to shuck corn quickly
Shucking corn (removing the husk and silk) is the most time-consuming part of preparing corn. Luckily, it’s pretty quick and easy if you use your microwave. The folks at America’s Test Kitchen found that the microwave is the quickest and easiest way to shuck corn.
Use a large, sharp knife to cut the bottom off the ear of corn. Cut through the entire cob a couple of rows up from the bottom. Microwave for about three minutes, pull it out of the microwave with oven mitts, take firm hold of the silks and husks on top, and shake the cob of corn free. It doesn’t get every single piece of silk off, but it is so much faster that picking every single silk off by hand. This trick actually does work – I recently used it on a dozen ears of corn I prepped for dehydration.
Boiling corn is the most popular cooking method, but you can also microwave it, bake it, or grill it. Air frying corn on the cob is another option. I’m personally not a huge fan of air frying corn on the cob, but my husband likes it this way.
To store corn for a few days, you can wrap it in a damp paper towel and stick it in the refrigerator. For longer term storage, freezing is by far the best option.
Before freezing your corn, you’ll first need to boil it in water and let it cool in an ice bath (a process known as blanching). Then, you can either freeze the cobs whole or slice off the kernels for easier eating later. The traditional way is with a knife:
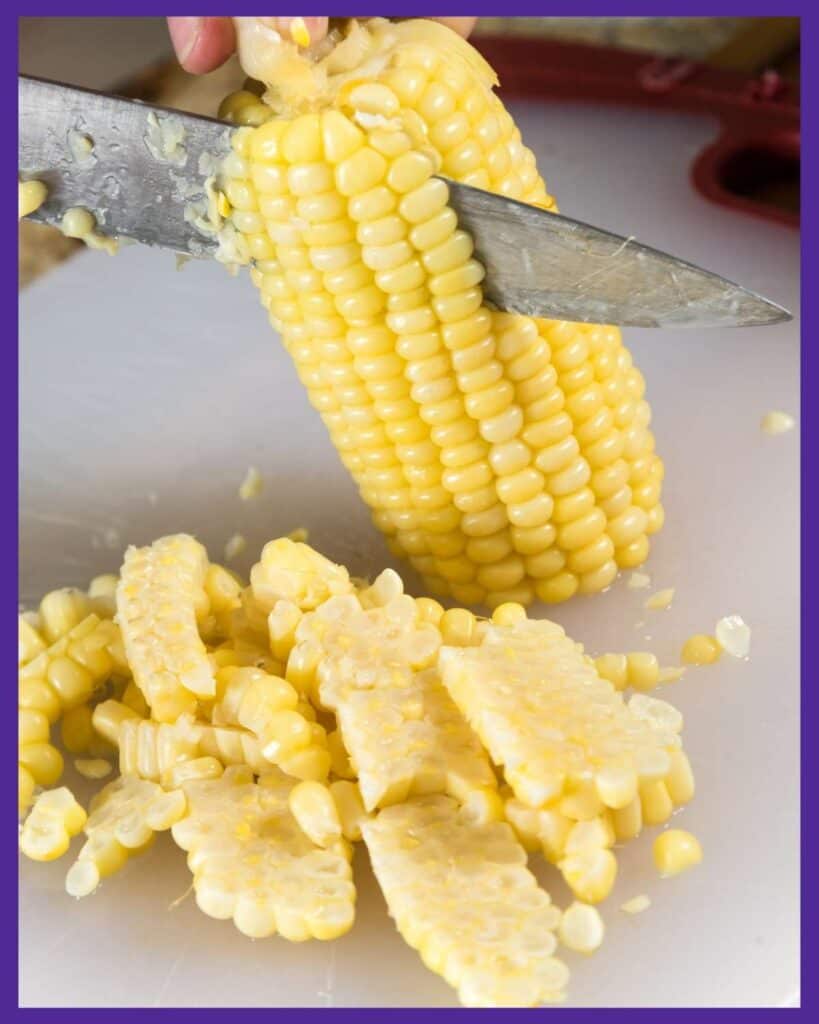
I personally have a poor track record with knives and prefer to use my OXO corn prep peeler. It is amazing! It makes cutting corn off the cob quick and easy. No more half-wasted kernels because you cut too little or chunks of cob because you cut too much! It’s also dishwasher safe, which makes clean up easy.

Corn can be canned at home. Make sure to use a pressure canner and follow a tested recipe from a book like the Ball Book of Canning.
You can also dehydrate sweet corn with a more powerful dehydrator like an Excalibur. Shuck the corn, cook it until the “milk sets” (the kernels don’t leak a white, milky substance), cut it off the cob, and dehydrate at 125ºF until completely dry. Using a corn peeler can speed up the process and reduce waste. Cutting corn off the cob with a knife frequently either leaves a lot of the kernel behind or cuts away bits of cob, too.
If you have an Excalibur, it may have come with a recipe book that details how to tell when corn is ready. The instructions are on page 57 of my book. If you don’t have an Excalibur, or can’t find your original book, The Dehydrator Cookbook is a fantastic resource with recipes for drying and using your dried items.
Dehydrated corn is perfect for throwing into soups like chicken tortilla soup. Dehydrating can preserve more nutrients than canning because the food is processed at a lower temperature.
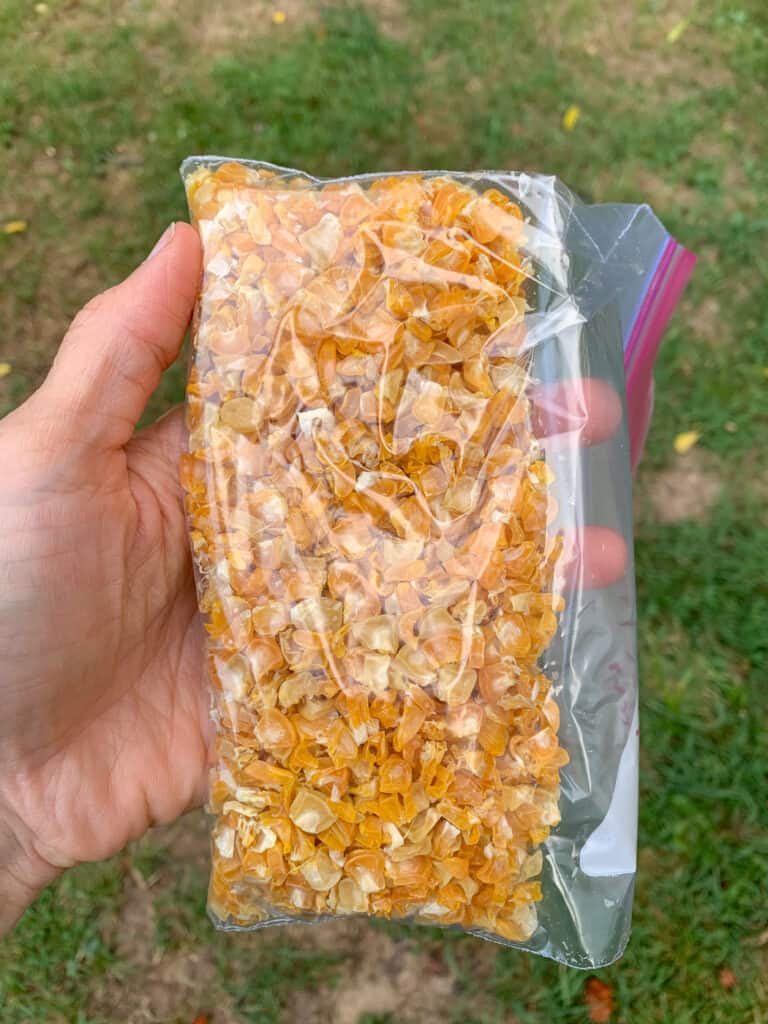
Dehydrated corn also takes less shelf space than canned corn and doesn’t rely on constant electricity like frozen corn. I recently made the jump from a stacking dehydrator to an Excalibur. I’ve had it running virtually every day this gardening season! The bag below has four ears of dehydrated corn:
Sweet Corn Varieties to Try
If you have success this year with learning how and when to pick sweet corn, you may find yourself soon planning next year’s crop.
Here are a few of the tastiest and most popular varieties you might want to try:
- ‘Early Sunglow’– A quick-maturing yellow variety especially good for northern gardeners. Because of its fast growth, ears are smaller and slightly less flavorful. (But still far better than “store” corn!). It allegedly grows to 3-4 feet, but in my heavy clay soil it is shorter.
- ‘Early Golden Bantam‘ – This is another shorter, faster variety that can mature in just 70-75 days. Like with Sunglow, the stalks are shorter and the ears are smaller than with full sized corn.
- ‘Silver Queen’– Late-season variety with a pale color, rich flavor, and tender kernels.
- ‘Martian Jewels’– Stunning white kernels with with purple cobs and husks.
- ‘Sugar Buns’– Extra sweet yellow corn with a long harvest period.
- ‘Peaches and Cream’– Bi-colored sweet corn that grows well in almost any region.
- ‘Ambrosia’– Super sweet and plump bi-colored variety.
Whichever variety you choose to grow, it will only take a season or two before you have a sixth sense about when to pick corn. Once you know the signs to look for, it’s just a matter of keeping an eye on the cobs and harvesting when they are at their peak!
Popular summer vegetables and herbs
Discover how to grow popular vegetables and herbs in your backyard garden or container garden with these in-depth vegetable growing guides.
7 Easiest Vegetables to Grow for an Abundant Harvest (and 5 to avoid!)
Discover the easiest vegetables to grow for beginners so you can have a healthy, successful garden.
Discover these must-know tips for planting yellow squash and common squash growing mistakes and problems.
How to Pick and Preserve Cherry Tomatoes (plus drool-worthy cherry tomato varieties to try)
Discover how to pick and preserve delicious cherry tomatoes.
Must-Know Zucchini Companion Plants (and 5 plants to avoid)
Zucchini are a summer garden must-have. Learn how to companion plant them for a healthier, more productive garden.
How to Harvest Basil (Must-know tip for an abundant harvest!)
One basil plant can provide you enough for fresh eating and drying for homegrown basil all winter long when you discover how to harvest basil the correct way.
How to Harvest Parsley (without killing the plant)
One parsley plant can provide you with an ample harvest all season long...if you know how to pick it the correct way. Discover how to harvest parsley with this comprehensive guide and video!
Harvesting Tomatoes - How and When to Pick your Tomatoes
Discover how to harvest tomatoes and how to tell when they're ready to pick - even heirloom varieties with different colors.

Natasha Garcia-Lopez is an avoid home-gardener and proud owner of 88 acres of land in rural West Virginia. She was a member of the Association for Living History Farms and Agricultural Museums for many years and is currently enrolled in the Oregon State University Master Gardner Short Course program so she can better assist you with your gardening questions.She holds a certificate in natural skincare from the School of Natural Skincare.








Leave a Reply