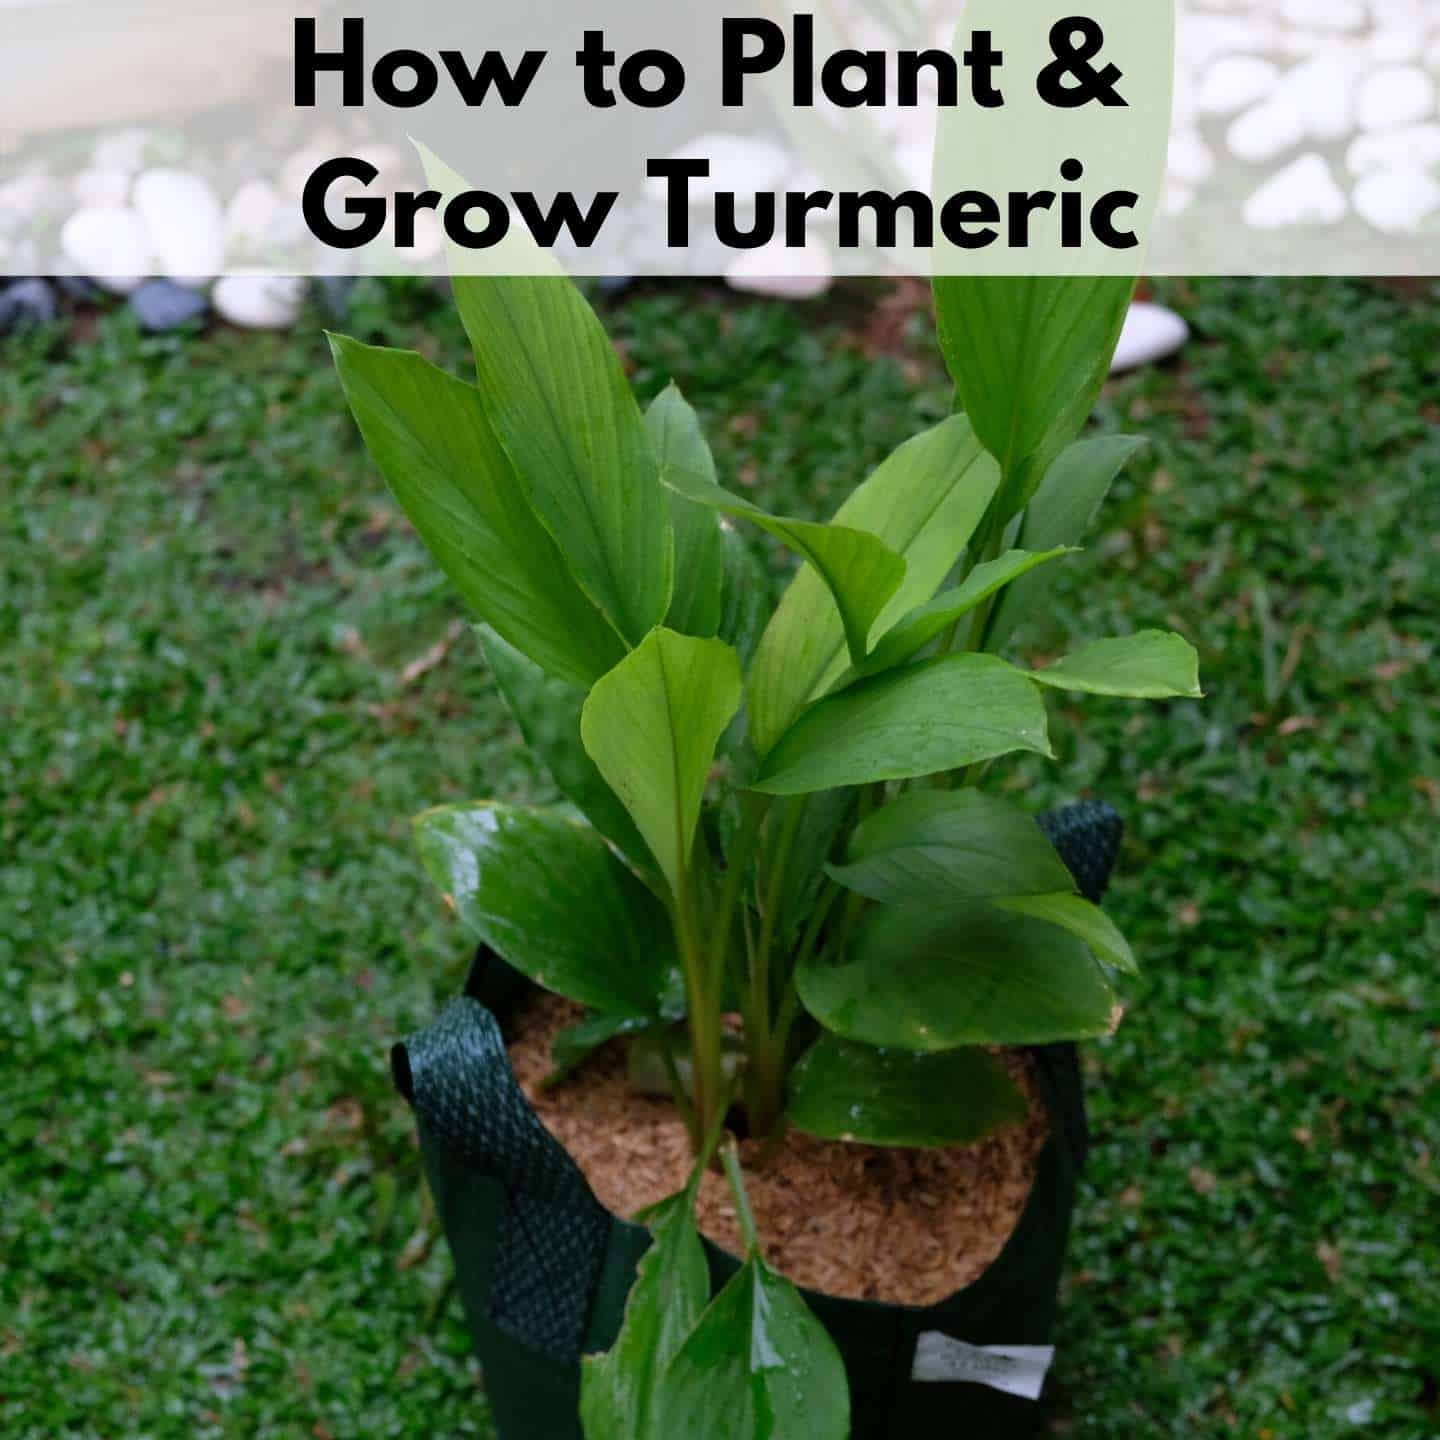
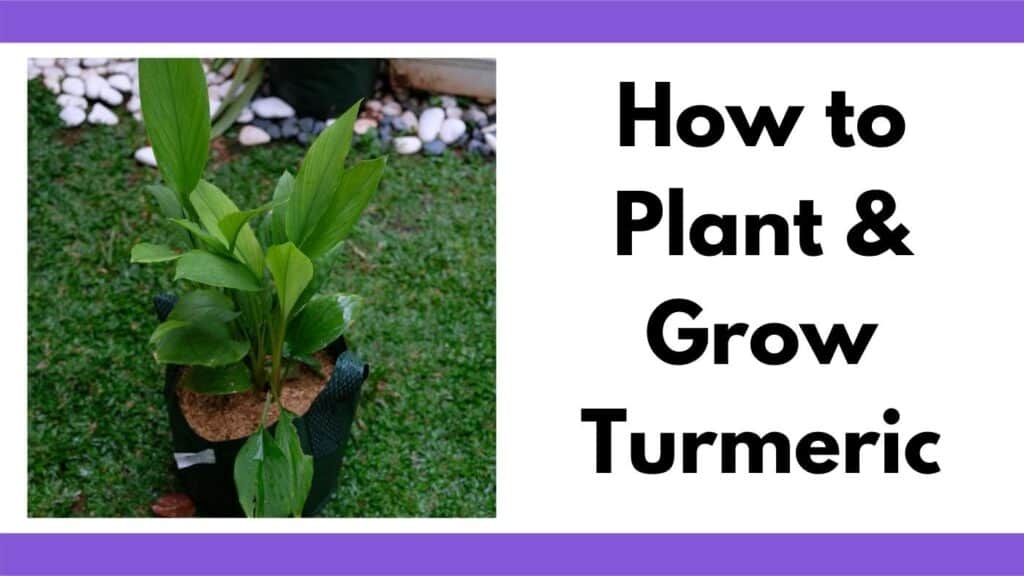
Growing Turmeric – How to Plant and Grow Turmeric (even in cold climates!)
Turmeric has become a well-known superfood in recent years. Most often used as a yellow-orange powder, the fresh rhizome can also be used and chopped or grated much like ginger root.
Of course, this leads to both gardeners and wellness enthusiasts wondering whether turmeric can be grown at home.
The short answer is: Yes! Turmeric can be grown in pretty much any zone (even northern ones), though the method is different depending on where you live.
If you want to be able to harvest this superfood fresh from your garden, here’s a guide on how to plant, grow, and harvest turmeric successfully.
This post includes affiliate links. If you make a purchase using one of these links, Together Time Family will receive a commission at no additional cost to you.
The Basics of Growing Turmeric
Turmeric (Curcuma longa) is a perennial flowering plant native to regions of India and Southeast Asia. It’s closely related to another familiar spice, ginger, and is grown primarily for the bright yellow-orange roots (known as rhizomes) that are used as a flavoring and for multiple health purposes.
When it comes to growing turmeric, the main challenge is that it needs a long growing season with 8-10 frost-free months before it’s ready to be harvested.
Turmeric also thrives best in conditions that are warm with plenty of rain (think tropical climate), which not many gardeners, particularly in northern regions, can get for most of the year.
However, growing in containers is a great and easy solution if you want to grow turmeric in USDA zones 7 and below. The plants can be started indoors, taken outside when the weather warms, and harvested before the first fall frost.
On the other hand, if you are gardening in zones 8 and up, you can grow turmeric in the ground, either as an annual that you harvest in fall or as a perennial in areas that don’t get frost. If you’re growing in zones 8a or 8b, you may need to provide frost protection for your turmeric at some point. Row covers and electric strand lights (aka “Christmas lights”) can provide the protection your plants need on chilly spring or fall nights.
We garden in zones 8a and 6a so we’ve grown both ways. Both methods have their pros and cons. Container planting is more convenient in some ways, but also requires a bit more care because the soil dries out more quickly.
Are Turmeric Leaves Edible?
You probably already know that turmeric root is edible as a seasoning and an anti-inflammatory and antioxidant dietary supplement. Curcumin, the active ingredient in turmeric, has been studied extensively for its ability to reduce inflammation, support memory, and more. For additional information about the benefits of curcumin, check out this exensive review of curcumin’s effects on human health.
What you may not know is that turmeric leaves are edible, too! Turmeric leaves are frequently used in curries and in some desserts.
Finding Rhizomes to Plant (aka finding turmeric seed)
The first step to learning how to plant, grow, and harvest turmeric is finding good quality rhizomes to grow your plants from. Turmeric is started from rhizomes (the part that you also eat) rather than from seed, and they can be a little tricky to find.
One option is to buy turmeric at a local grocery store, natural food store, or Asian market. If they’re available you will find them in the section with ginger root and other fresh produce.
Gardeners have been very successful with using store-bought turmeric to start new plants, but you should be careful to buy organic rhizomes. Non-organic turmeric may be treated with chemicals that inhibit sprouting, which means they likely won’t grow for you at all.
Another, and sometimes better, option is to order turmeric seed rhizomes online. This is what I typically do.
Turmeric Varieties
Though you only ever see one standard turmeric root in the stores, there are actually several different varieties. What you can get depends mostly on availability, but here are a few options to look for:
- ‘Red Hawaiian’– Standard orange variety that grows well and has a nice yield and slightly sweet flavor.
- ‘Indira Yellow’– A bright yellow variety that has a strong flavor and matures more quickly than other types. Great for cooking with.
- ‘White Mango’– A unique turmeric with whitish roots and a taste similar to green mangoes. Best for cooking and pickling.
Each variety has a slightly different flavor and growth habit, which can be fun to explore and experiment with. But if you mainly want to grow turmeric for health reasons, go with an orange variety because they tend to have the highest curcumin content.
For a faster harvest, look around for sprouted turmeric rhizomes available online from Etsy sellers and other independent growers.
How to Plant and Grow Turmeric
When and Where to Plant
Planning when to plant turmeric is simple. You just need to calculate 10 months before your first average frost date in the fall.
In milder climates, this could mean a planting date in March for a harvest in December. In many colder regions, this would mean planting in December or January (indoors) to harvest in September or October.
As far as growing location goes, turmeric prefers full sun but will benefit from afternoon shade in hot and dry climates. It enjoys getting lots of water, yet may rot in soggy soil, so choose an area or potting soil that drains well.
Shade cloth is an easy way to provide shade if your temperatures are consistently over 90ºF. People also use patio umbrellas to provide shade for plants, but they cost more than shade cloth if you don’t already have one sitting around.
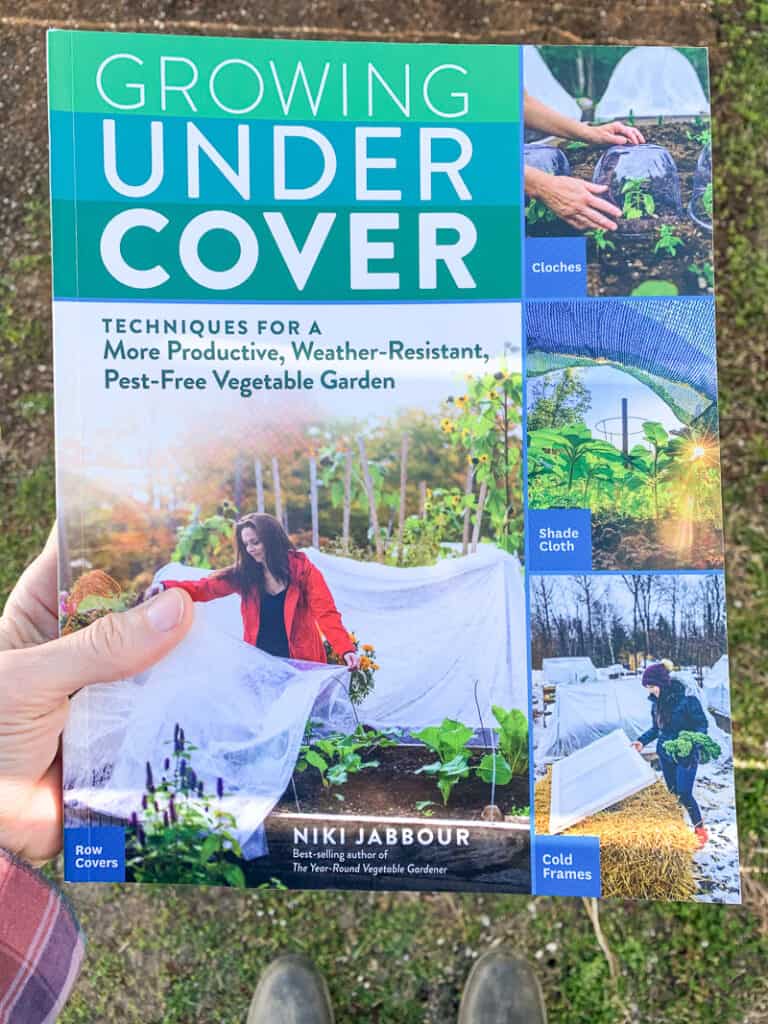
If you’re curious about using covers like season-extenders, row covers, and shade cloth, check out Nikki Jabour’s book Growing Under Cover. She details a variety of ways to grow under covers in all seasons for a more productive garden. The book is fresh, modern, and filled with lovely photos.

- Jabbour, Niki (Author)
- English (Publication Language)
- 216 Pages - 12/22/2020 (Publication Date) - Storey Publishing, LLC (Publisher)
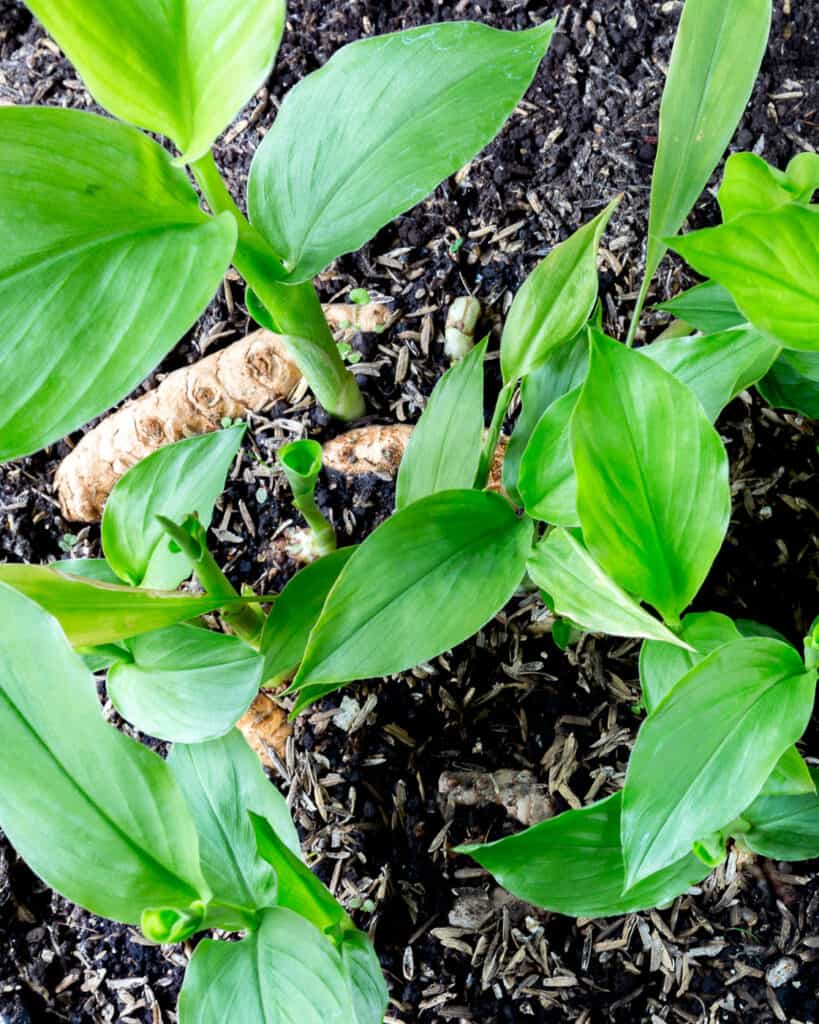
In the garden, turmeric plants do well in sunny raised beds with compost or another type of organic matter added to the soil. Because the flowers are decorative, you can also plant turmeric in among ornamental plants as part of your landscape. The flowers look similar to ginger flowers and can be pink, yellow, or white.

In areas with shorter summers, you’ll need to grow your turmeric in containers.
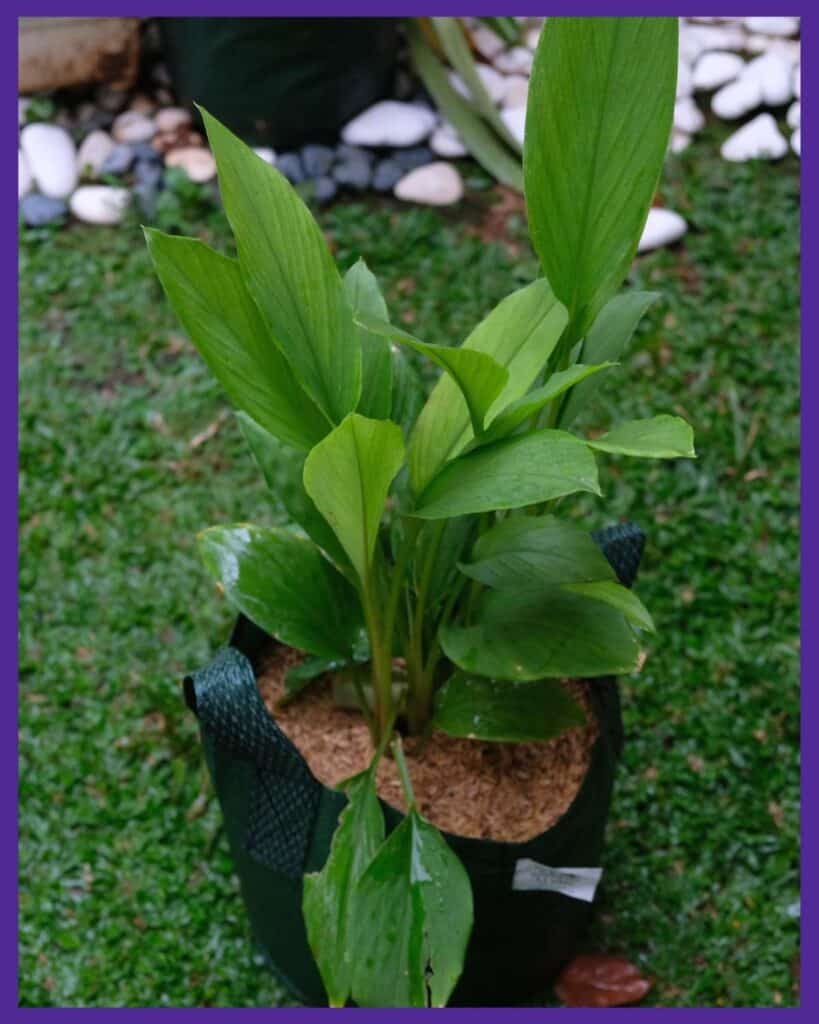
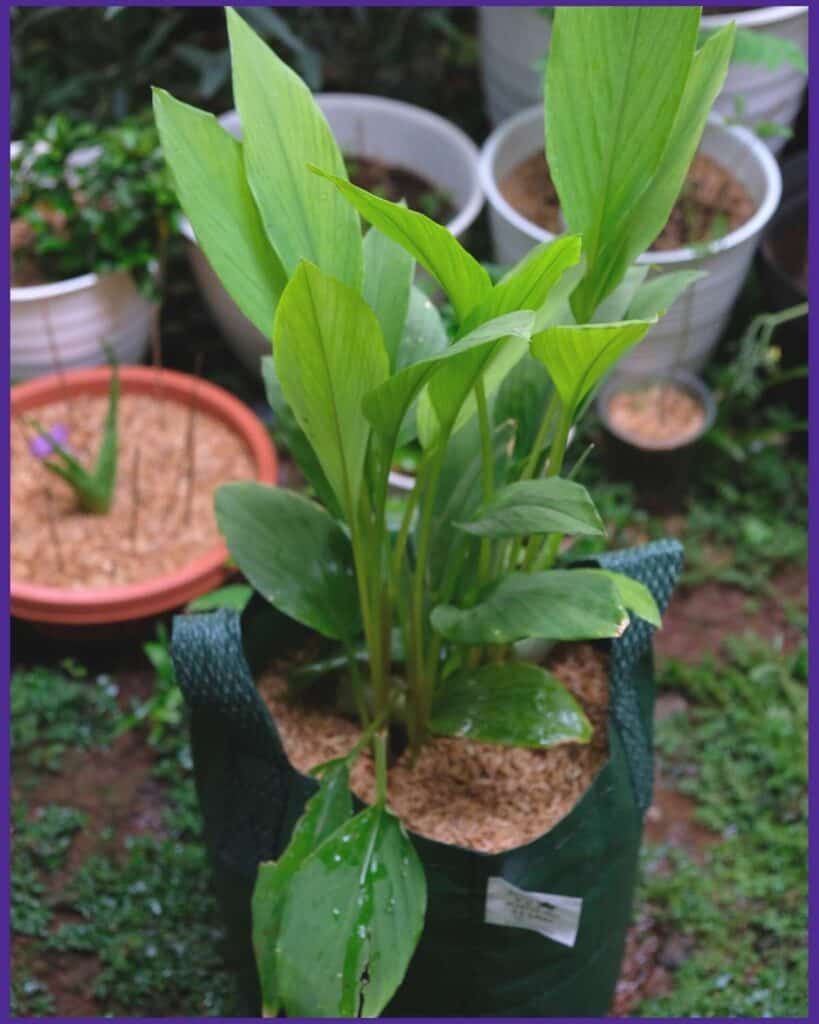
Choose wide containers that are about 10″ deep with a wide opening. Turmeric grows laterally so provide it with surface area, not excessive depth. Turmeric rhizomes aren’t carrots!
Wine barrels and other containers with a large diameter are the best choices. Fabric grow bags can be a good choice. Fabric grow bags help ensure your plant’s roots can breathe and water doesn’t pool in the container. Standing water is the nemesis of root crops since it makes them more prone to rotting.
If you’re using a solid material container, like a plastic, resin, or terra cotta pot, make sure it has draining holes. If it doesn’t, drill drainage holes before planting.
A standard quality potting soil with some compost mixed in will be perfect for your plants.
Preparing the Rhizomes
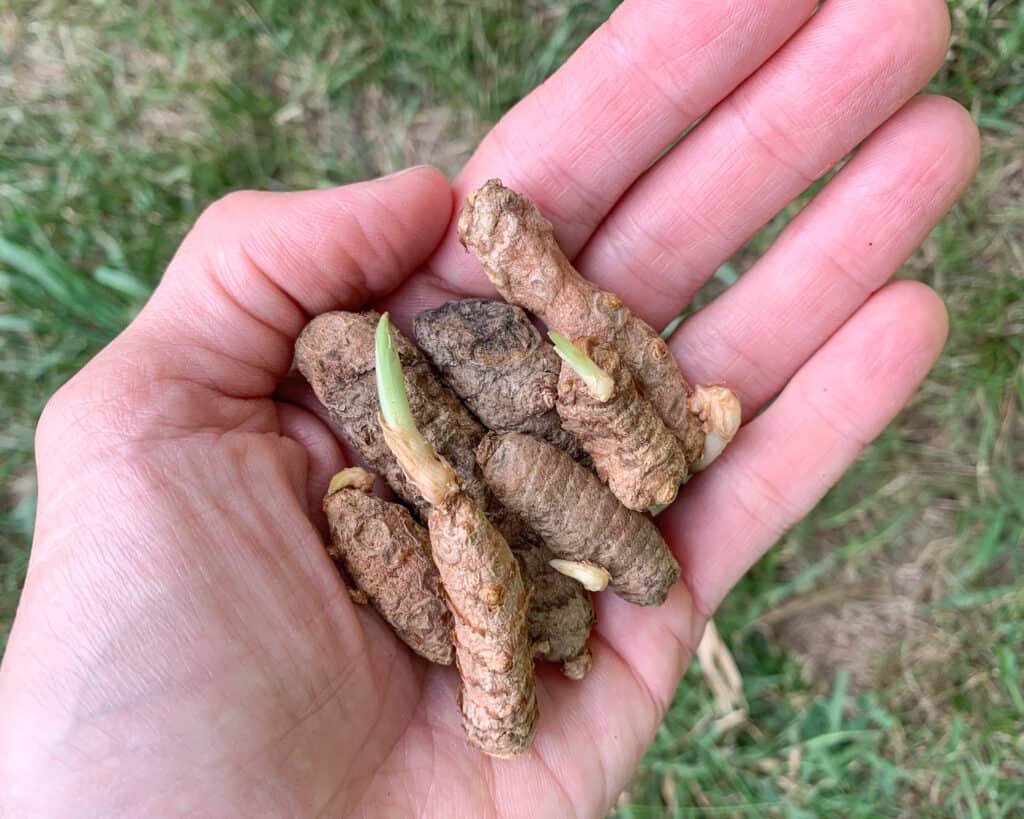
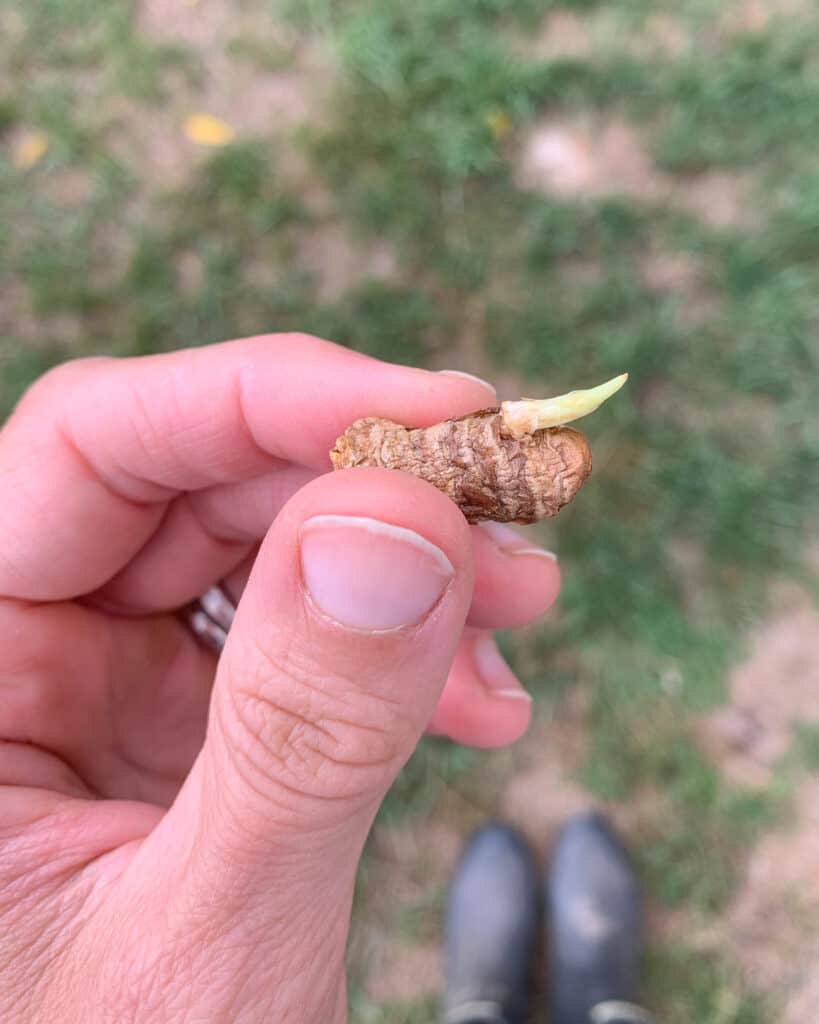
Before being planted, your rhizomes will most likely need to be cut into smaller pieces like you would do for seed potatoes.
If you look at a large turmeric rhizome, you’ll notice that it looks a lot like a hand with little “fingers” sticking out. Some rhizomes will have nubs that are smaller than the “fingers” but both represent where the turmeric will sprout when it’s planted.
You should cut your rhizomes with a sharp, sanitized knife into sections that have 2-3 fingers or nubs. You can also cut off any sections that are shriveled or look unhealthy.
When your pieces are cut, leave them somewhere safe, dry, and dark until the wounds scab over. Then, they are ready for planting!
Planting the Rhizomes
Once your turmeric seed is all prepared, it can be planted when the time is right.
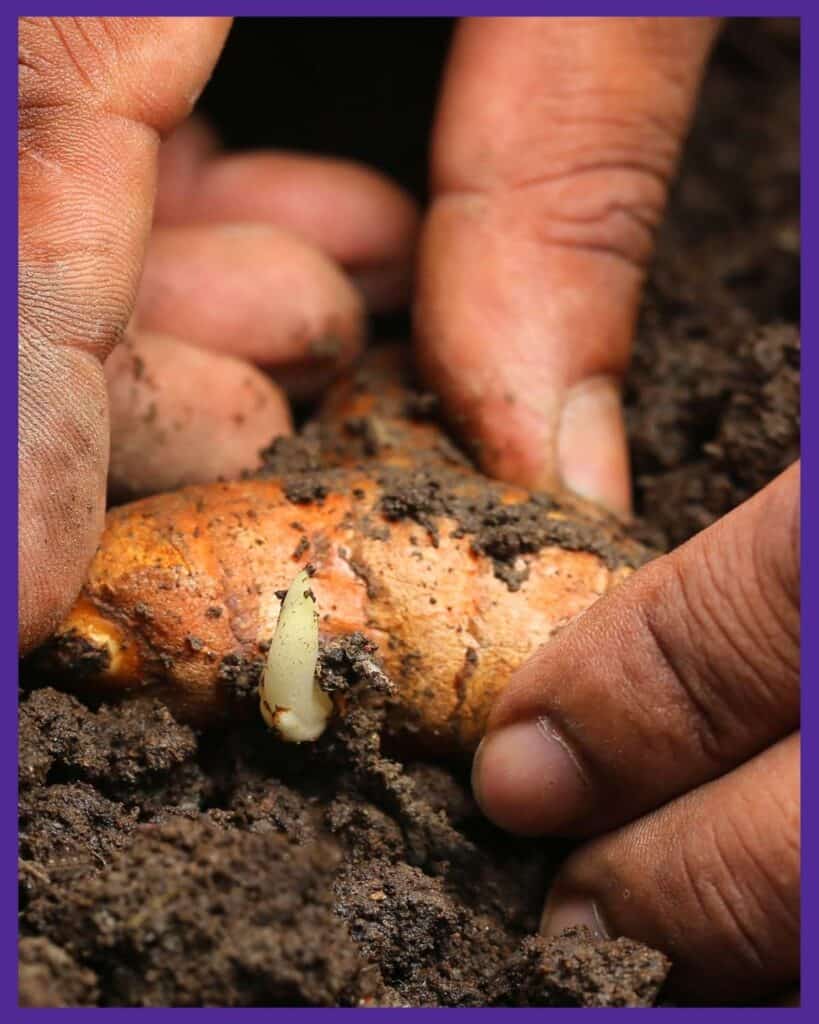
Plant each individual seed rhizome about 2-4” deep and space them at least 4-6” apart. Greater spacing is better and increases yields. A study done in Okinawa found that planting rhizomes 30 cm apart in a triangular pattern produced the best yields.
Place them in the soil with the small fingers or nubs facing up, since this is where the sprouts will come from.
Cover the rhizomes with soil and firm them in gently with your hands. Then, water thoroughly.
If you’re growing in containers indoors, place the planted and watered containers somewhere warm and sheltered (you don’t need to worry about light yet). According to the University of Vermont, turmeric should be in a room that’s 70-80ºF until it sprouts. Since you probably don’t keep your house that warm in winter, consider placing the container on a seed starting mat for warmth. Seed starting mats are surprisingly affordable and very useful. Make sure to select one that’s large enough for your pot. You can remove the mat once you see sprouts.

- PROFESSIONAL HEAT MAT - Provide your seedlings with a warmer environment to speed up germination, raise success rates, and increase growth rates; A...
- DURABLE & RELIABLE - Made with heavy duty PVC material that is durable and resists wear and tear; multi-layer structure with built-in insulated wiring...
- STABLE HEATING SYSTEM - Automatically warms root area 10-20℉(5-11℃) over the ambient air temperature, which will increase the success of seedlings...
Turmeric Plant Care
Turmeric can take a long time to sprout, so have patience and don’t despair if it doesn’t seem like anything is happening! One neighbor told me she was about to throw her container away after waiting for weeks when she finally noticed shoots appear.
Planted in the ground, the rhizomes can take up to 4-5 months to sprout (depending on how warm the soil is), though they may come up sooner indoors. Just keep the soil from drying out completely (without overwatering) until you see plants poking through the soil.
If you started your turmeric indoors, provide a good light source once they sprout. Although common advice says to station your plants in a south-facing window, most homes don’t actually receive enough window light for thriving, happy plants. You may want to supplement with an LED grow light.
A clip on grow light is an easy, affordable way to ensure your turmeric plant is healthy. I’ve successfully used these clip-on grow lights for smaller, younger plants. The clamp is surprisingly powerful and the gooseneck stays in position pretty well. Place your turmeric in your sunniest window and use it to provide supplemental light.

- 🌻Efficient LED Combination: This LED lamp has grow lights made up of 80 efficient growing LEDs ( 32 red lights, 12 blue lights,20 yellow lights...
- 🌻Upgraded Auto ON/OFF Timer: Plant grow lights come with the circular memory timer function allows to automatically turn on/off every day according...
- 🌻10 Dimmable Modes: Our grow lamps provides 10 dimmable modes to suit varied stages of plant growth. It has 10 levels of light intensity and has 3...
You can take the pots outside when temperatures reach 60°F or above. Your plants won’t start thriving until temperatures reach 70°F, so don’t rush the process.
Be sure to transition indoor plants to life outside gradually by taking them out for a few hours a day at first and working up to leaving them outdoors permanently. This process is called hardening off. Yes, it’s kind of a nuisance, but it helps ensure your plant’s health and success. Learn more about hardening off in this guide to preparing seedlings for transplanting.
Once plants are up and growing, you’ll want to water them regularly but not so much that the soil gets soggy. A week or two before harvest time, you can stop watering and let the soil dry out.
Apply a diluted liquid fertilizer or compost tea every few weeks during the summer to keep the plants healthy. A slow release fertilizer will also work and can be applied every few months. Worm castings are an excellent, natural slow release fertilizer that won’t burn your plants.

- 100% Pure Castings: Each bag of WIGGLE WORM Worm Castings is OMRI listed organic, nutrient-rich, and mineral-dense pure castings, not vermicompost or...
- Improves Soil Structure: WIGGLE WORM Pure Worm Castings are tiny, football-shaped particles which help improve soil aeration, while also creating...
- Easy-to-Use: Apply WIGGLE WORM worm castings into your garden soil above the root zone three times a year or to the hole during transplant or seeding...
Other natural fertilizers to consider include Neptune’s Harvest products and Fox Farms.

- Combined for Maximum Growth: Neptune’s Harvest Fish & Seaweed organic fertilizer is an organic all-purpose liquid plant food formulated with 75%...
- Power of Fish & Seaweed: This fish & seaweed organic plant fertilizer uses hydrolyzed fish and seaweed to supply essential nutrients in a balanced,...
- How to Use: This organic all-purpose liquid plant food is easy to use and highly efficient, requiring only 1 oz. per gallon of water; the liquid...
Common Turmeric Pests and Problems
Serious pests and diseases are not common when growing turmeric, especially if you start with good quality rhizomes.
Two of the biggest struggles gardeners typically face are cold weather and overwatering. Turmeric can be sensitive to temperatures below 50°F and needs consistent temperatures in the 70s to grow and produce well.
Overwatering plants or spacing them too close together is a recipe for root rot and fungal diseases. Give them ample air circulation, well-drained soil, and moderate amounts of water to keep them happy.
Contrary to popular belief, putting gravel in the bottom of a container does not improve drainage. Although I don’t agree with all of Robert’s posts, the site Garden Myths has a great look at why gravel in pots can make your soil more soggy, not less. Be sure to check out his post if you want to learn more, with helpful diagrams.
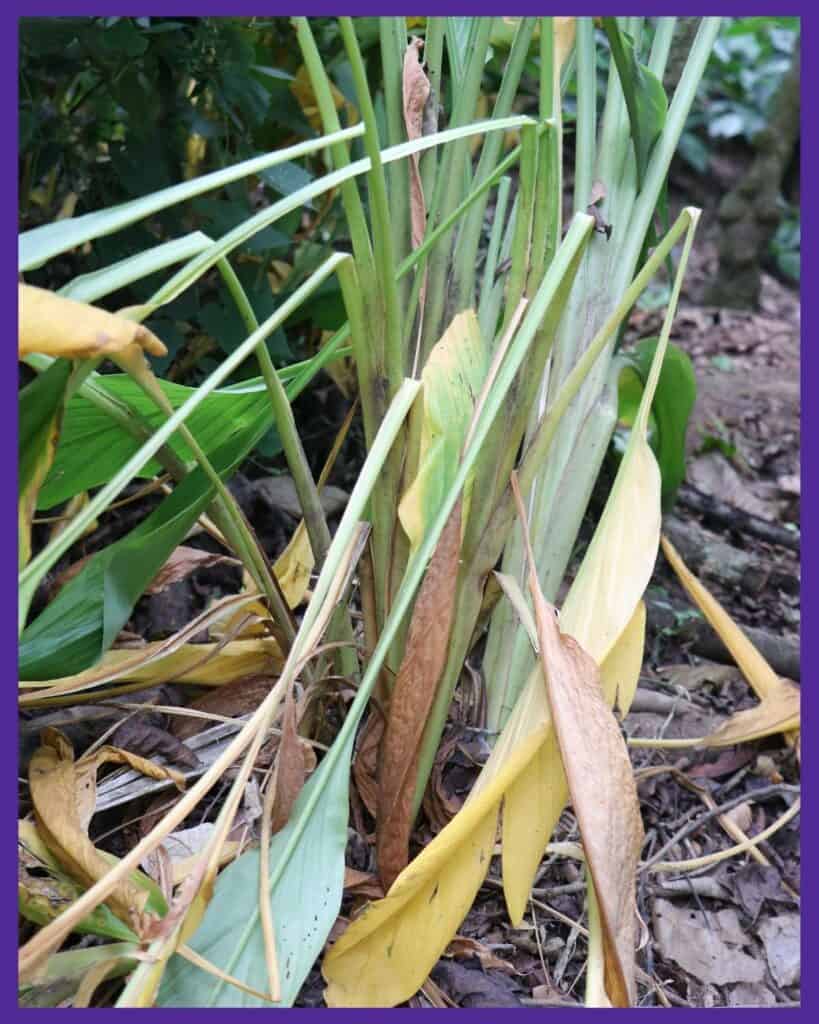
How to Harvest Turmeric
You’ll be able to tell your turmeric is ready to harvest because the leaves will start to turn yellow-brown and dry out. If this happens in the 8-10 month window after planting, you can go ahead and get ready to dig up the rhizomes.
Container planted turmeric is especially easy to harvest.
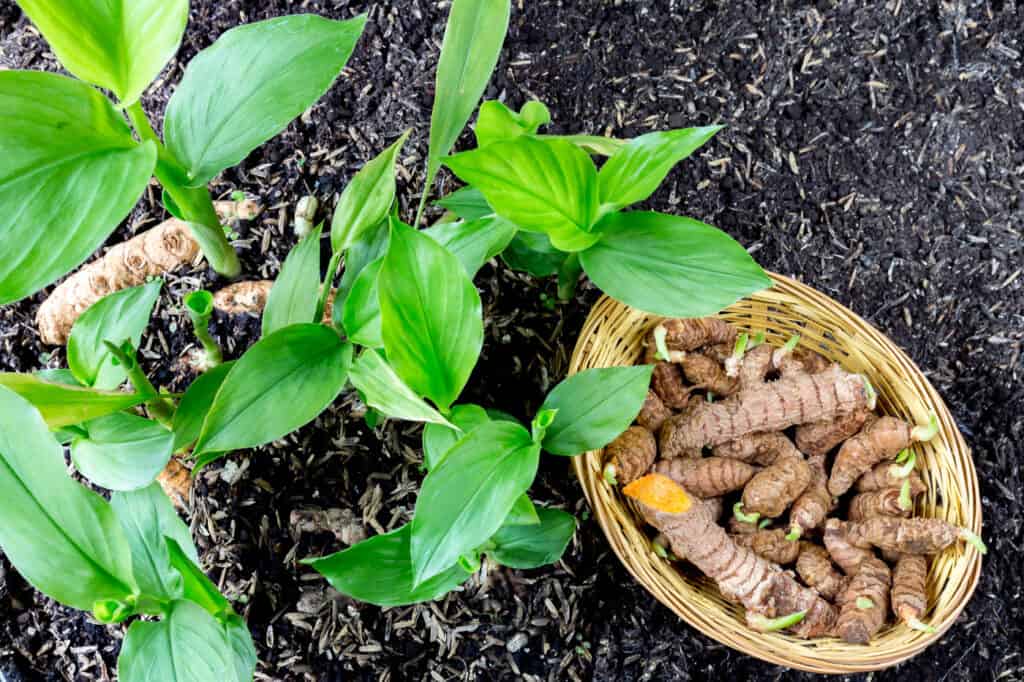
All you need to do is tip the containers over a tarp and slide the plants out, soil and all. You can then use your hands to sort through the dirt and find the turmeric rhizomes hidden there. Gently remove them all and your harvest is done!
If your plants are in the ground, you’ll need to use a shovel to carefully dig in a circle around your plants to loosen the soil. Then, pull the plants out if they’ll come, or dig the shovel under each one and lift them out.
Do not try to pull the rhizomes out by grabbing onto the stems and tugging. The stems will probably just break off.
Once the plants are out, pull the rhizomes off the stems and compost the leaves.
Note: If you are growing turmeric as a perennial, you’ll want to harvest only a few rhizomes and replant the rest to return next year.
Storage Tips for Turmeric
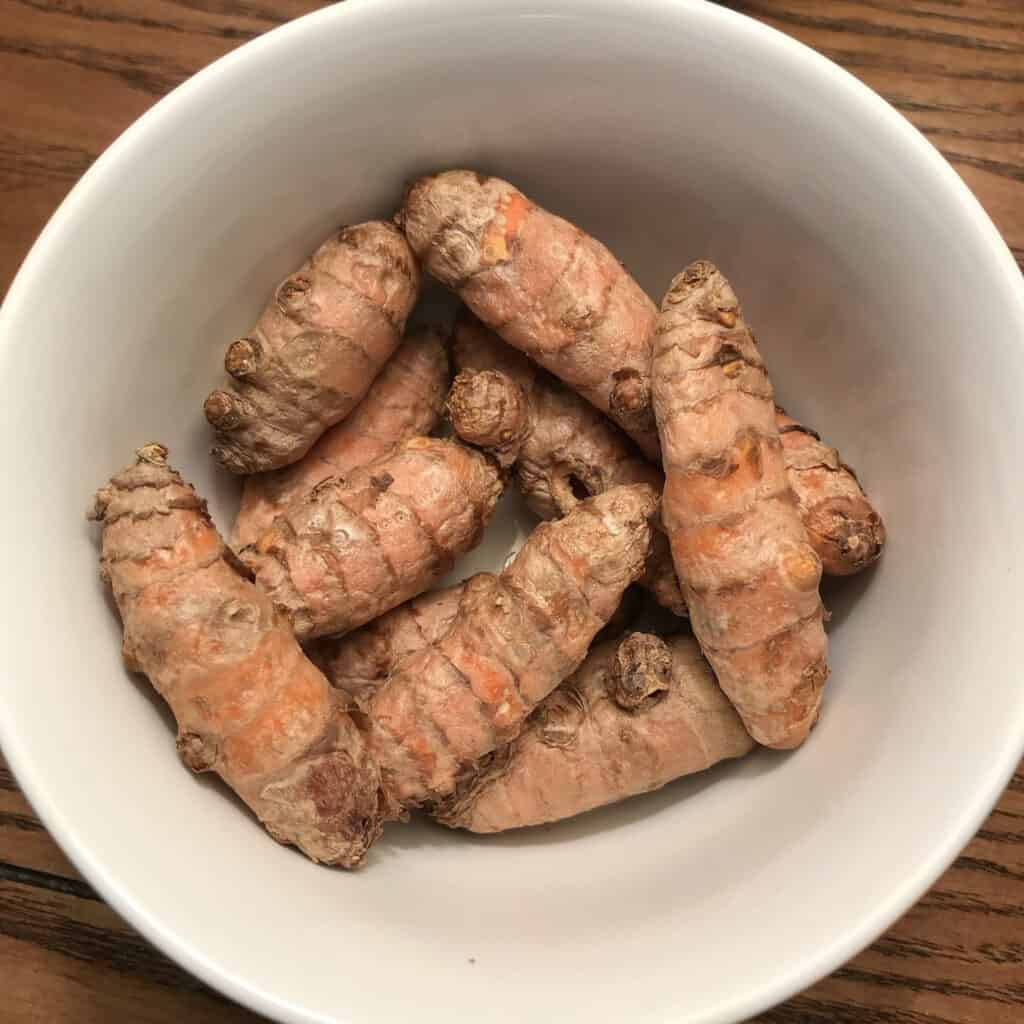
After harvesting, gently brush the dirt off the rhizomes and cut each one away from the stalk. You can also trim off any long, thin roots that are coming out of the rhizomes. You’ll then want to leave them somewhere warm and sheltered to dry out.
When the skins are fully dry, turmeric is best stored in your refrigerator or frozen. The rhizomes can also be stored somewhere cool, dark, and dry packed into a medium like sawdust or peat moss.
You may want to use your fresh turmeric to cook with or make a health-boosting recipe, but you may also want to consider saving a few rhizomes to plant next time around. It will be time to plant again just a few months after harvest, and you can keep them somewhere cool and dark in the meantime.
And now that you know how to plant, grow, and harvest turmeric, you can keep plants going by planting your own rhizomes each year, creating a very sustainable garden!
Popular summer vegetables and herbs
Discover how to grow popular vegetables and herbs in your backyard garden or container garden with these in-depth vegetable growing guides.

7 Easiest Vegetables to Grow for an Abundant Harvest (and 5 to avoid!)
Discover the easiest vegetables to grow for beginners so you can have a healthy, successful garden.
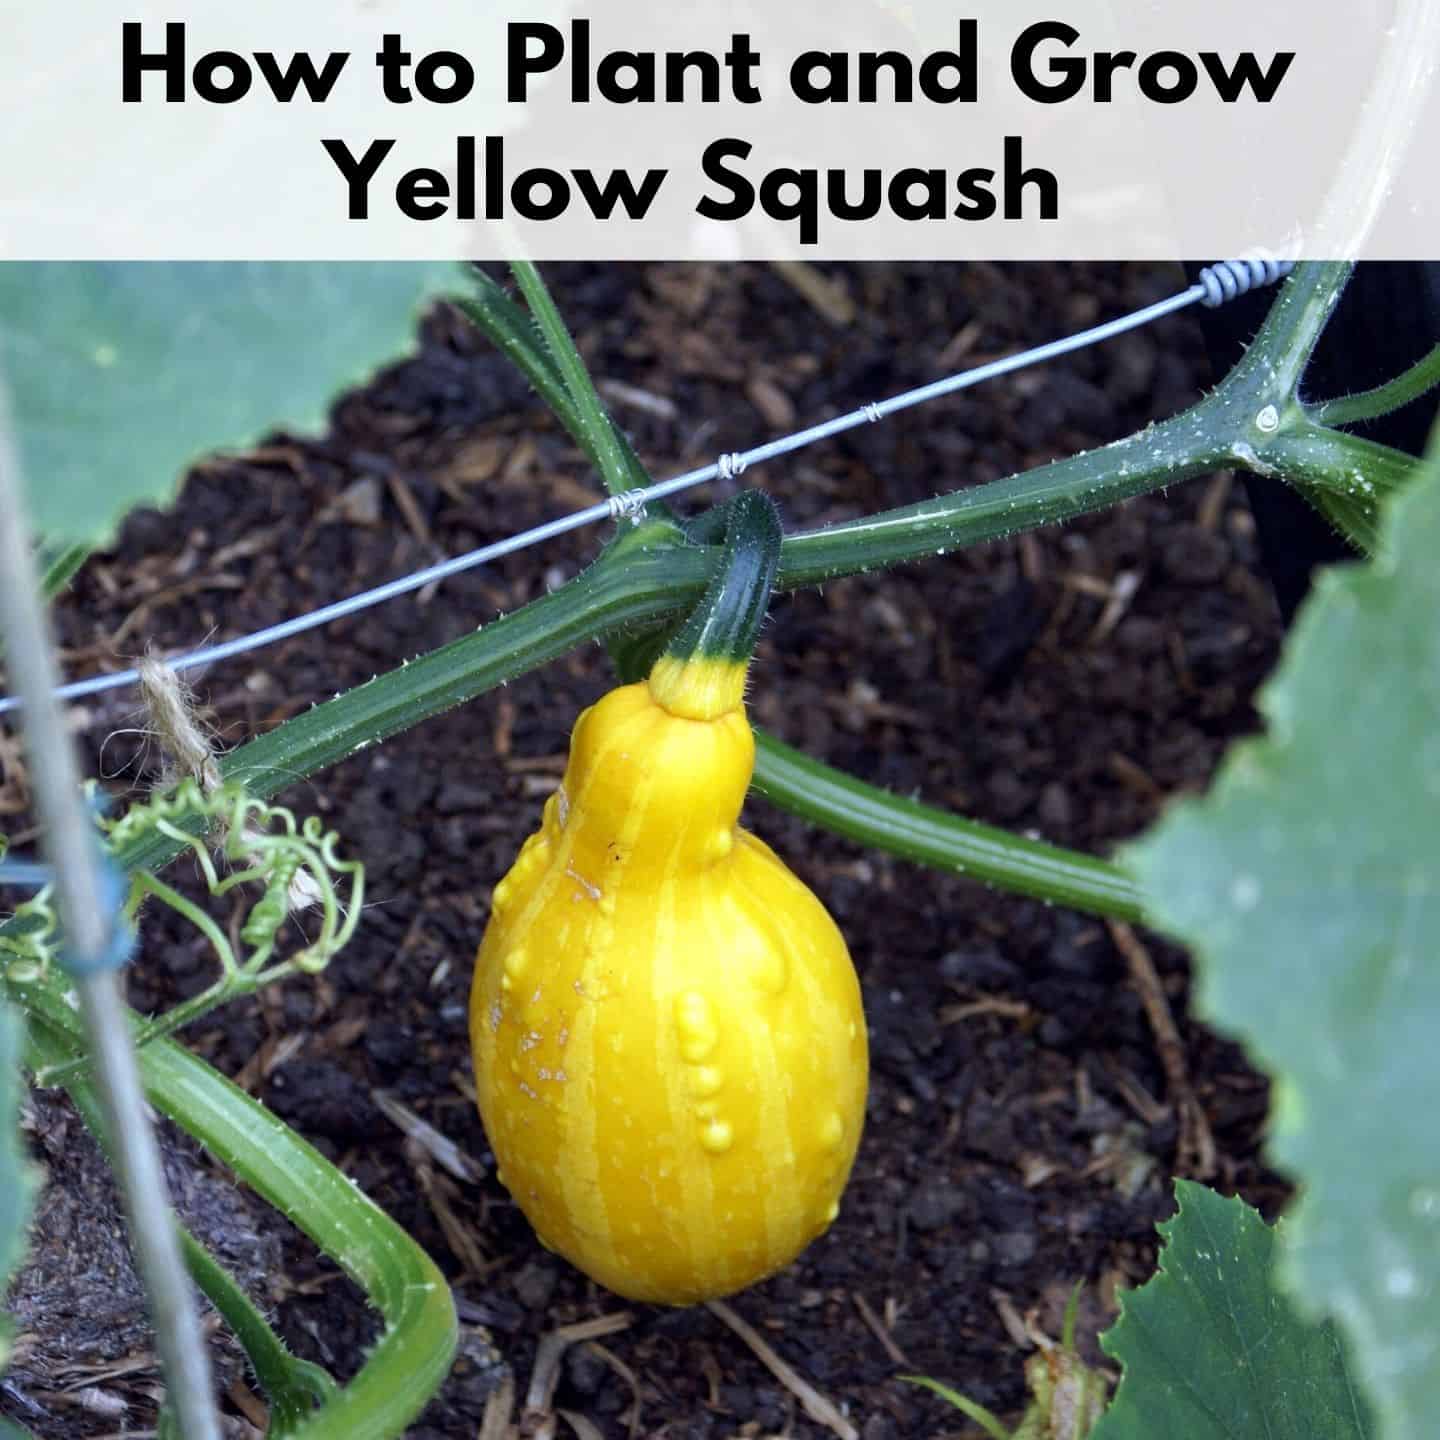
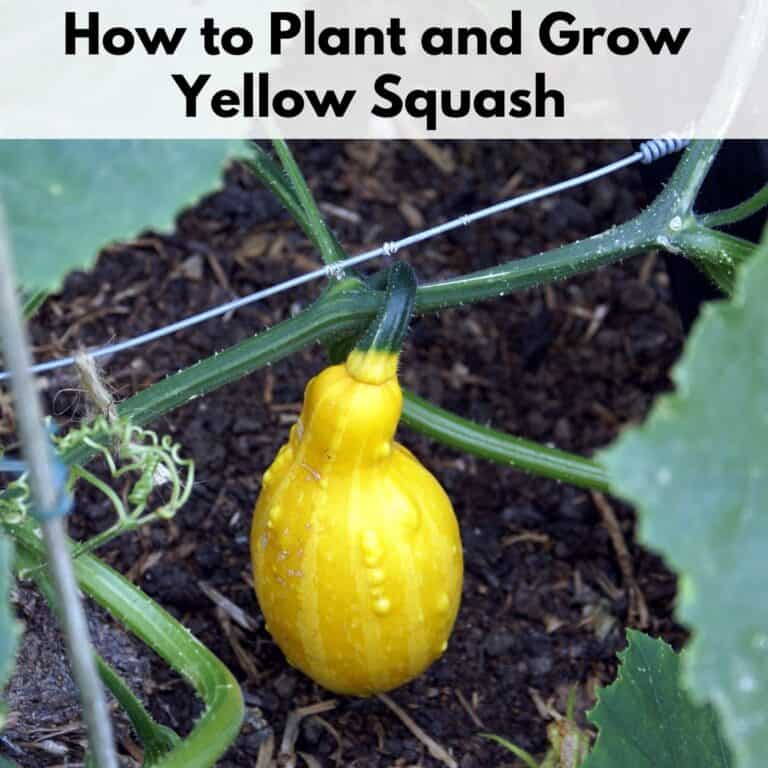
Discover these must-know tips for planting yellow squash and common squash growing mistakes and problems.

How to Pick and Preserve Cherry Tomatoes (plus drool-worthy cherry tomato varieties to try)
Discover how to pick and preserve delicious cherry tomatoes.
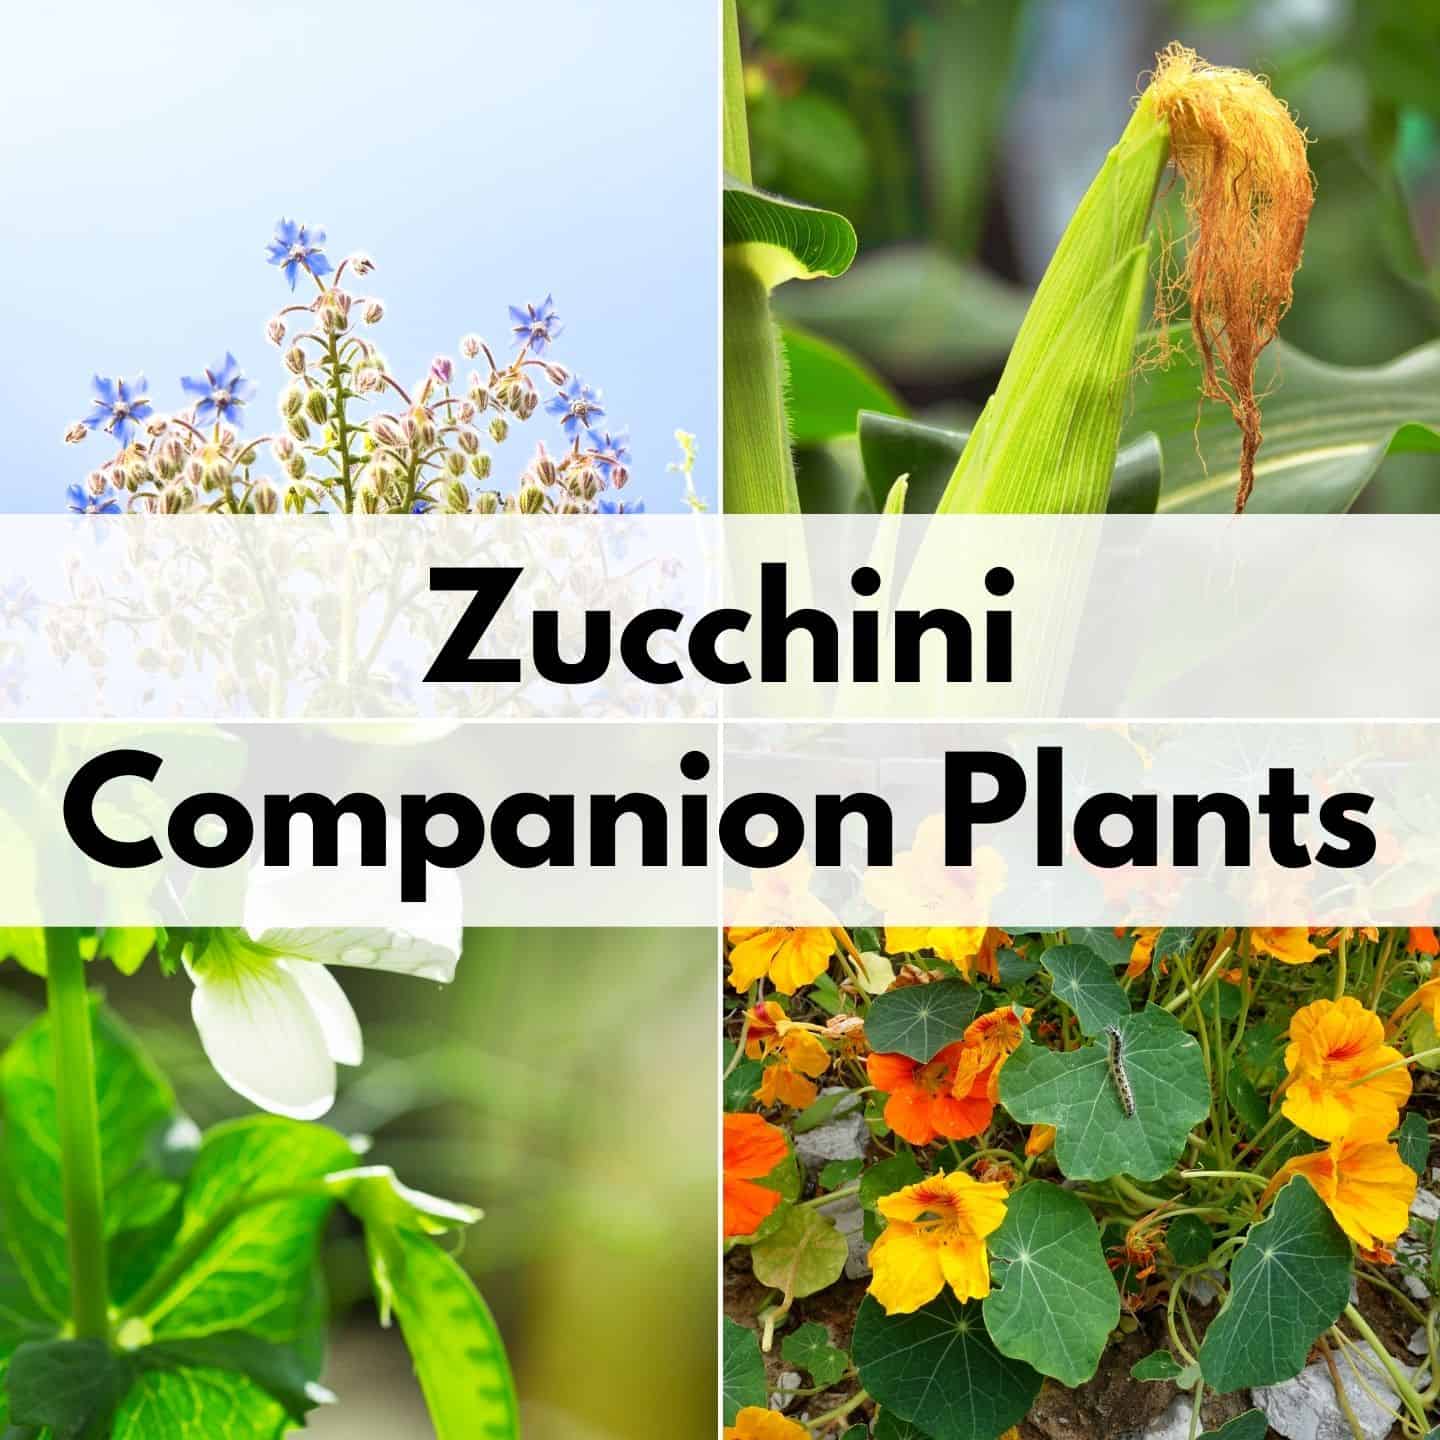
Must-Know Zucchini Companion Plants (and 5 plants to avoid)
Zucchini are a summer garden must-have. Learn how to companion plant them for a healthier, more productive garden.

How to Harvest Basil (Must-know tip for an abundant harvest!)
One basil plant can provide you enough for fresh eating and drying for homegrown basil all winter long when you discover how to harvest basil the correct way.

How to Harvest Parsley (without killing the plant)
One parsley plant can provide you with an ample harvest all season long...if you know how to pick it the correct way. Discover how to harvest parsley with this comprehensive guide and video!


Harvesting Tomatoes - How and When to Pick your Tomatoes
Discover how to harvest tomatoes and how to tell when they're ready to pick - even heirloom varieties with different colors.


Your web site is great, full of useful and interesting information. I am a medical missionary using natural remedies and like the idea of growing my own turmeric and ginger.
I have 2 questions: When you cover your plants for cold weather, do you leave the covers on for the 5 cold months or put them on daily (or nightly) and isn’t that a lot of weight on the plants?
(I guess this will really make it 3 questions.) Would you be open to a visit to your farm? I live near Pelion SC. My grow zone is 8a. I would like to see your garden. I am an old woman, probably would come alone unless a friend, also a woman, in her 40’s can make the day trip with me.
Look forward to hearing from you.
Hi! We have a sort of unique situation. We live in both SC and WV – not normal for someone who gardens, I know! Our acreage is in WV, not SC. We do have a garden (and 6 hens) in SC, but it’s not nearly as exciting. There is someone with a permaculture homestead in Gaston. I think he’s previously said they do have some tours, but I may be misremembering that. This is their YouTube channelL https://www.youtube.com/channel/UC6lWTD9yP8eO9ldaASN9Auw
I’m sorry! I got side tracked looking up that YouTube channel for you and forgot to answer your main question. The answer is…it really depends. A lightweight cover on the plants really isn’t a big deal. Lots of people leave a “fleece” cover on from planting through harvest. Charles Dowding in the UK uses lots of covers for extended periods of time. Do not leave a very heavy or light blocking cover, like an actual blanket, over the plants all winter. Reserve them for the rare nights when it gets into the teens or 20s. In SC, it can be randomly warm in the middle of “winter,” so you could uncover the plant if you wanted to, weather permitting. If you’re using a cloche or mini greenhouse or something, then you definitely would need to vent it during the day. Those things can get hot in a hurry. It’s really going to depend on your exact growing situation and how the plants are situated in your micro-climate. For example, if they’re near the South-facing side of your house or against a brick/stone wall, they will stay warmer than if they’re somewhere away from structures or on the North-facing side. I really hope that’s at least somewhat helpful.