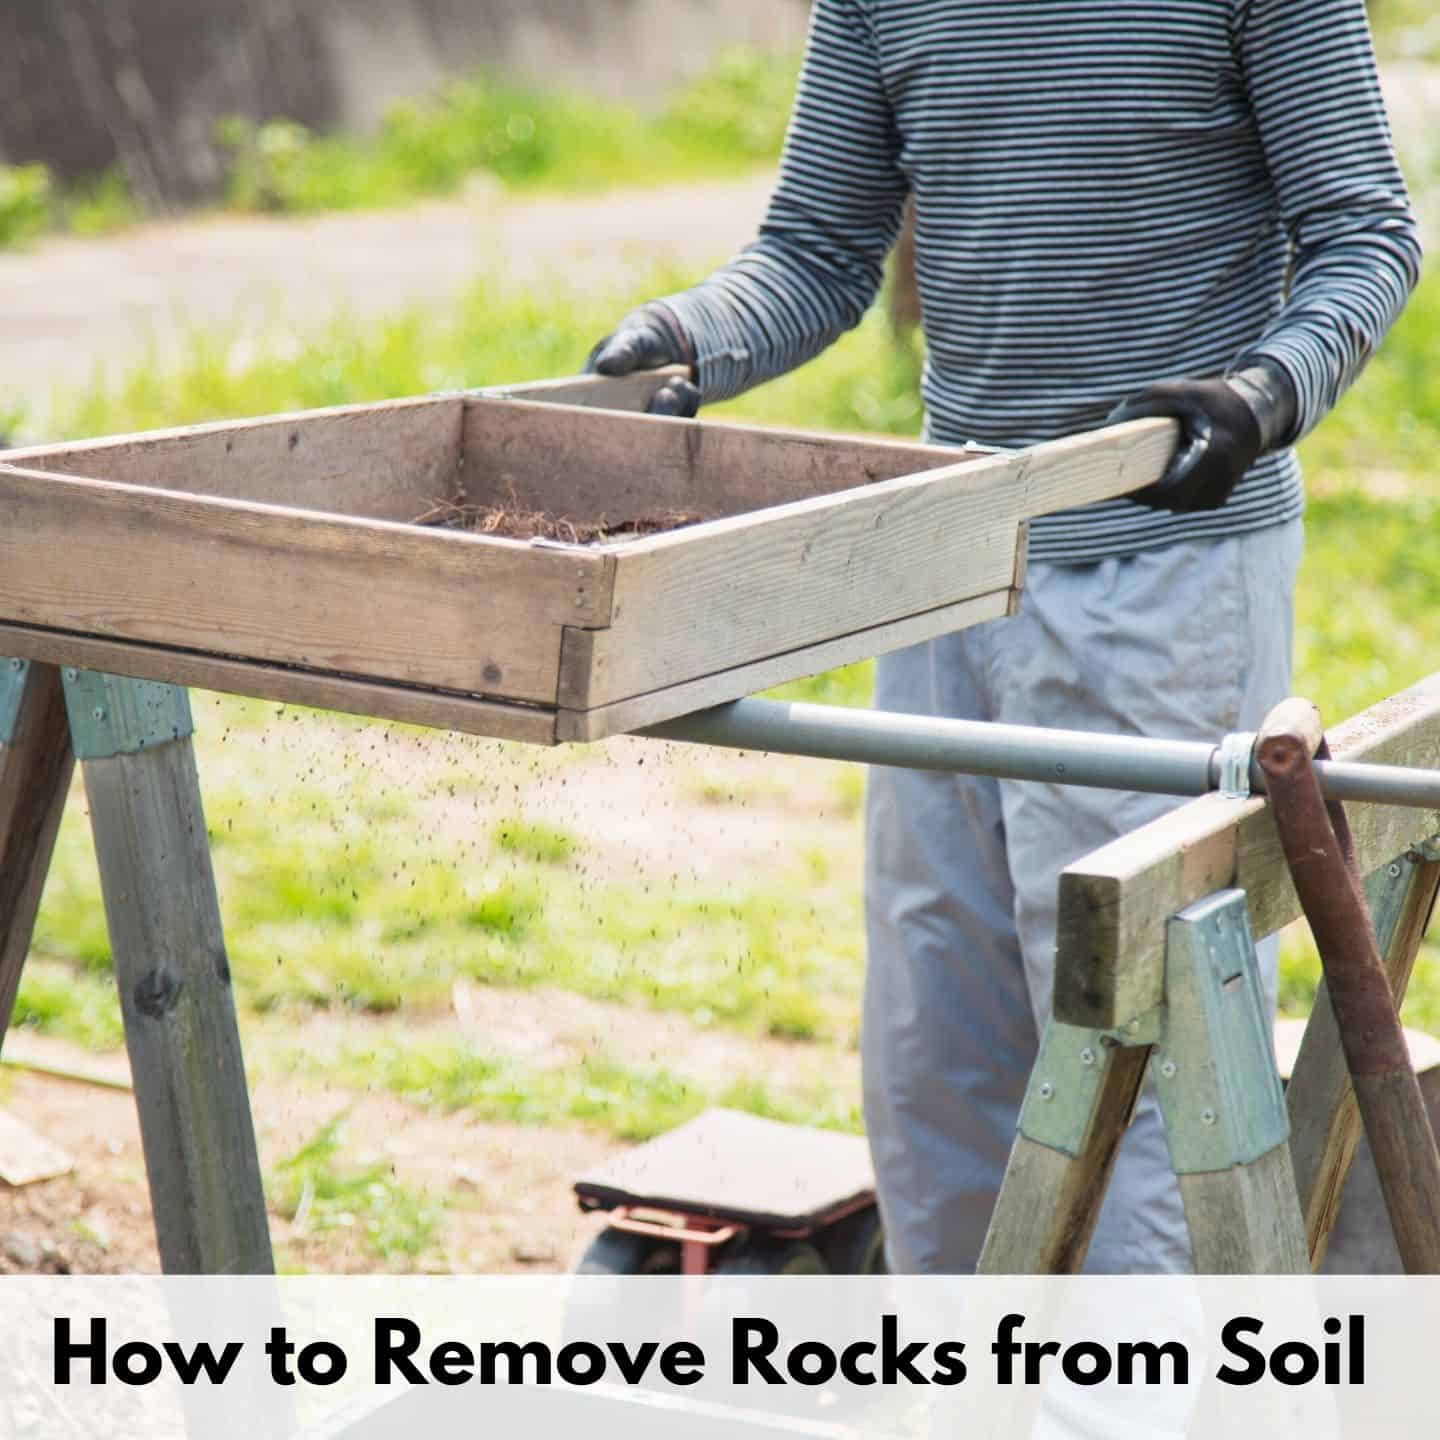
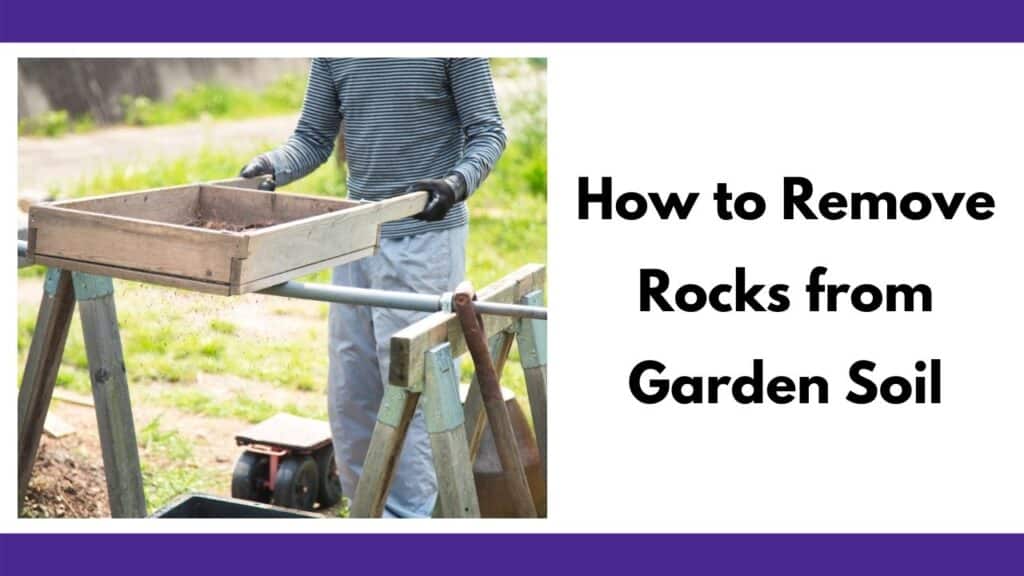
How to Remove Rocks from Soil
Virtually every gardening book and website tells you to ensure your soil is “rock free.” This is especially true if you’re growing root crops like carrots or turnips. But how, exactly, do you remove rocks from soil without giving yourself a backache for the next month?
Rocks can be removed from soil either by hand, with a tiller, by using a tractor, or even with a plow.
For most home gardeners, a bit of raking, shoveling, and soil sifting can create rock-free soil without the need for heavy, and expensive, equipment. Let’s take a look at how to remove rocks from your garden soil.
This post includes affiliate links. If you make a purchase using one of these links, Together Time Family will receive a commission at no additional cost to you.
Completely Removing Rocks from Soil
You diligently removed all the rocks from your garden beds last year. You head out in the spring, eager to plant. You dig a hole for your transplants and find…more rocks?!
Unfortunately, you may need to rake through your soil for rocks every year. This is due to something called frost heaving.
Rocks are better heat conductors than soil. This means rocks pull heat from warmer soil beneath them, making the soil under the rock colder than rock-free soil at the same depth. The soil under a rock freezes before soil not under a rock (at the same depth). Water expands as it freezes. When the water in the soil freezes, it pushes up on the rock. The rock then travels in the path of least resistance – towards the surface.
Fascinatingly, frost heave moves rocks more than you’d expect based just on how much water expands when frozen. This post has an in-depth explanation of the phenomenon, if you’re interested. The TL;DR version is that you can have a fresh crop of rocks in your garden next year, even if you do a fantastic job of clearing rocks this year.
Some soils are more prone to the effects of frost heave. Depending on where you garden, you may or may not have to thoroughly comb through your soil for rocks every year. I consider it a small piece of cosmic justice that the best soils for growing vegetables are frequently the best soils for growing rocks, too. Those of us with poor, sandy or clay soils are less likely to encounter a large annual rock crop.
The good news is that doing a thorough job this year will lessen the work next year. Just like it’s easier to read a few emails every day than it is to clear your inbox after a vacation, it’s easier to keep tabs on your rock crop with regular maintenance.
Here’s what you’ll need to sift rocks from small areas of soil:
- Comfortable clothes – that allow mobility and comfort. I also like to wear a gardening apron. Read up on the best garden aprons with pockets in this post.
- Scoop shovel – for transferring soil to your sieve.
- Gardening gloves – to avoid you from getting dirty and protect your hands. I always opt for my favorite cut-resistant gloves. Discover the best cut resistant gardening gloves heres.
- Soil sifter – mesh frame that separates the rocks from the dirt. This Japanese-made set of soil sieves is a reader favorite.
- Small bucket or vessel – to put the stones in.
Additionally, you could use kneepads or some sort of cushioning to save your knees. We swear by garden kneelers and use them both in the house and the garden.


Soil sifters are also helpful for sifting roots out of potting soil for reuse and are used to sift large, un-composted chunks out of your compost. Learn more about how to reuse potting soil in this post and discover composting here.
First, make sure you have all your equipment.
Use your shovel to scoop up dirt and place it onto the soil sifter. Keep adding soil until the sifter is full, then shake it from side to side vigorously. The rocks should remain in the mesh as the dirt falls back onto the ground.
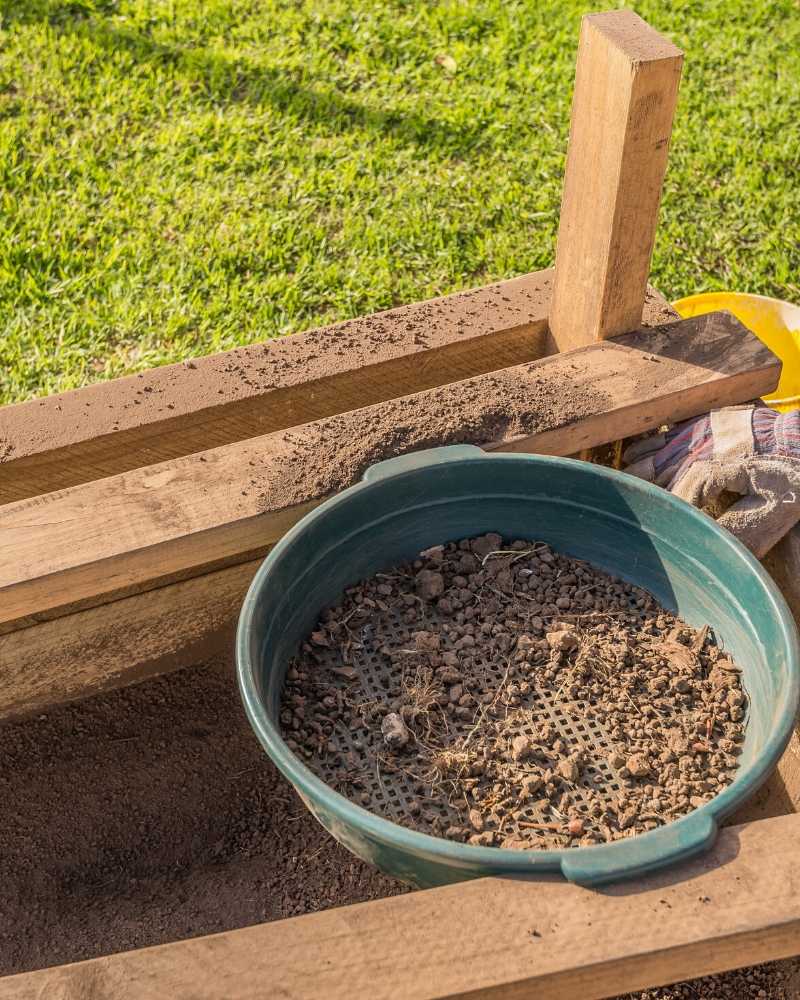
Then, you can take the rocks from the sifter and add them to the bucket. Keep doing so until you have sifted through all the topsoil of the designated area.
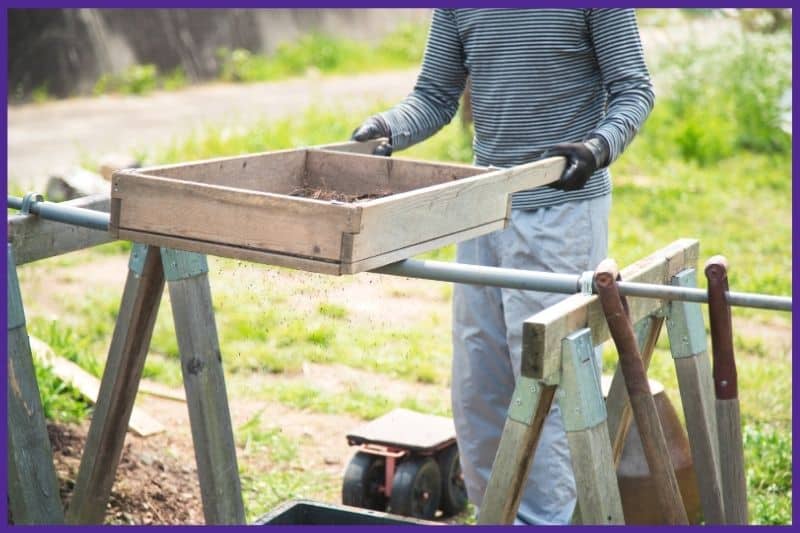
If you have a large area to sift thoroughly, you may want to build a larger soil sifter, like the one you see below. This saves time and your back. Building your own soil/compost sifter is fairly easy and only requires basic tools like a drill and a saw.
Other Methods to Remove Rocks from Soil
Removing rocks by hand can become tedious. Although some crops do need well-sifted soil, it isn’t necessary to personally remove every tiny rock for many crops.
To remove rocks from a larger area:
- Gardening overalls or an apron to protect your clothes.
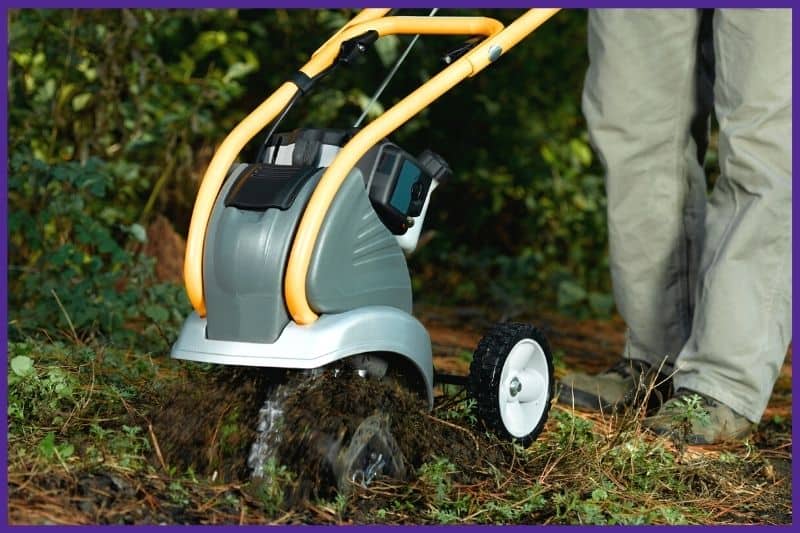
- A cultivator or tiller – This gardening tool is used to uproot weeds, but it is can also bring rocks to the surface for removal. Cultivators are smaller and better suited to smaller beds. Electric models can work in small areas, but larger areas may required a gas tiller.
- Garden rake – You need a tine bow rake with sturdy tines, not a leaf rake.
- Gardening gloves – Again, I recommend cut-resistant gloves.
- Pointed shovel – Pointed, sharpened shovels cut hard dirt easily and allow you to break up any huge clods of dirt where rocks may be hiding.
- Scoop shovel for scooping up your rocks.
- A wheelbarrow or garden cart, to scoop your rocks into and carry them away. We personally use and recommend this Gorilla garden cart.


If purchasing a tiller doesn’t make sense for you, you can frequently rent gas-powered tillers at hardware and home improvement stores. If your neighbors garden, too, you may be able to borrow one from them.
I don’t want regular readers to be confused, so I feel it’s importnat to point out that I am personally not a big fan of tilling. Sometimes it’s necessary, but tilling frequently decreases soil fertility and crop yields.
It’s enshrined in our popular culture that you have to till your garden every single year…and I disagree. For more information about how to grow a bountiful garden without tilling (or so many weeds), Read Charles Dowding’s Book Organic Gardening the Natural No-Dig Way.
It’s true that you may need to remove rocks each year, but that does not have to mean tearing up your soil structure with a power tool each and every year.

- Dowding, Charles (Author)
- English (Publication Language)
- 240 Pages - 02/04/2013 (Publication Date) - Green Books (Publisher)
How to remove rocks with a tiller:
Use a tiller or cultivator to break up the soil. This should bring smaller rocks to the surface. Don’t break your back stooping to pick up. We’ll deal with them in a minute!
You can skip the power tilling if you’d prefer and just gently dig up the soil by hand.
Rake your soil. Rake rocks into a pile. This will catch most small and mid-sized rocks.
Once you have rocks raked into a pile, use your scoop shovel to transfer them to a wheelbarrow to remove. People use removed rocks for a variety of purposes, including building walls, making decorative paths, and using them for garden edging.
Use your pointed shovel, as needed, to dig around and lever out larger rocks.
Repeat, as needed. If you have a lot of rocks, you may need to make multiple passes with your tiller and/or rake.
Removing Rocks from Big Plots of Land
If you have a larger area, such as a field, then renting heavy machinery is the recommended method.
When it comes to farming, most farmers prefer to use a tractor and a plow to turn up their fields. To actually remove rocks and sort soil, people build a very large gravel sorter and dump the soil over it using a power equipment. It’s useful and pretty cool, but far beyond the scope of what most people need for their garden. This video is neat to watch if you’re interested to see what I mean:
If you’re not familiar with operating a tractor (and don’t own one already), it’s best to hire someone to till your field for you.
How Much Does It Cost to Remove Rocks from Soil
The total cost of removing stones from a section of soil varies based on several different factors: area, method, and location.
The Size of the Plot
Smaller plots, like a garden, can be done easily with hand tools by yourself.
With a bigger space, there is more work to be done. This brings increased costs in several ways:
- Equipment rental and fuel costs
- Additional labor costs for extra help
- An increased time cost (your time is valuable, so factor it into the equation!)
Which Method Can Be Used
Although the method used is directly linked to the size of the land, there are several options to choose from in each scenario.
For example, to remove rocks from a garden plot you could just use your hands, buy a rake, or rent a gas powered tiller. Each comes with a different cost.
The Location of the Plot
Although this may seem like an unlikely factor, location can determine how much it will cost. In some areas, labor is less expensive which can considerably change the final costs. However, location does not only affect the cost because of cheap labor, the price can also vary based on the type of soil. Tougher soil is harder to turn over and the bills and time add up.
Removing rocks from a small garden plot with a shovel and sifter won’t cost more than $50 and an afternoon.
Rock removal can be done in many different ways, based on the size, location, and available tools. While smaller pieces of land can be done manually, that is not the case for entire fields. It is impossible to get all the rocks out of a large yield without the use of heavy machinery.
While the shovel and sifter method works the best for completely removing rocks, most garden beds can get away with just being raked. Happy gardening!
Composting & Soil
Healthy soil is a must for a healthy garden.
Discover these signs of bad potting soil so you know if you can use your old potting soil or need to toss it.
Can you reuse potting soil from last year? Or do you need to buy more potting soil each year?

Earthworms improve soil structure and add natural fertilizer to your garden. Discover how to attract more earthworms to your garden this year!

Aerating compost helps keep a pile hot, but it can be backbreaking work. Discover the best compost aerators to save you time and backaches.


I used the sieving method on my first apartment garden. It took two years to get the gravel out, but it was worth it. Now, as I’m moving to my first house — and it’s an old one at that — I’m expecting I’ll use some of these other methods to help me remove stones and rocks from all over the homestead as needed.
We’re lucky to not have much rock at our (future) homestead location. The native rock is pretty much all sandstone. The trade off is that our “soil” is pretty much just clay.The good news is we don’t have to add acid to keep blueberries happy!