How to Carve a Spooky Halloween Figure
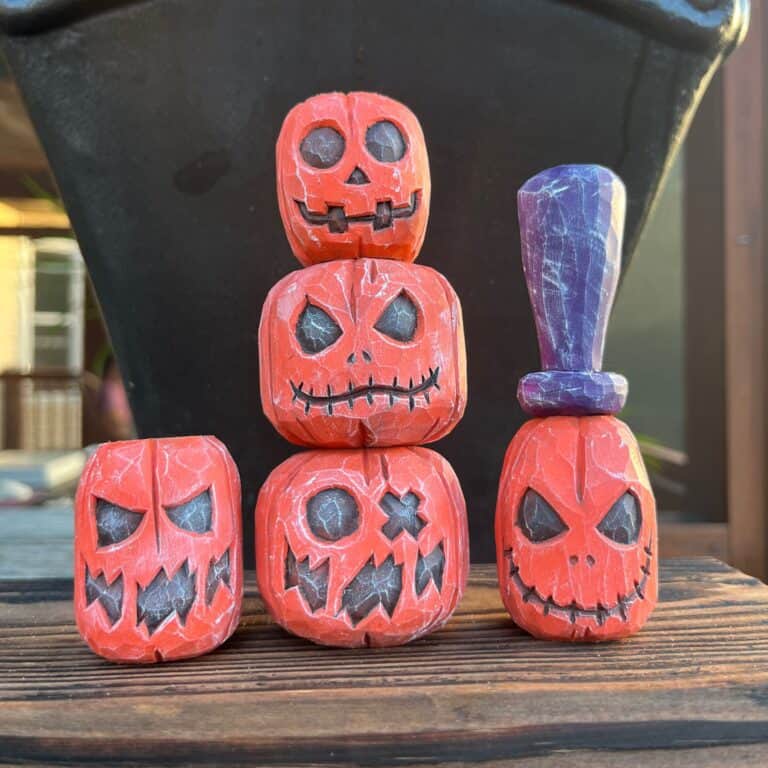
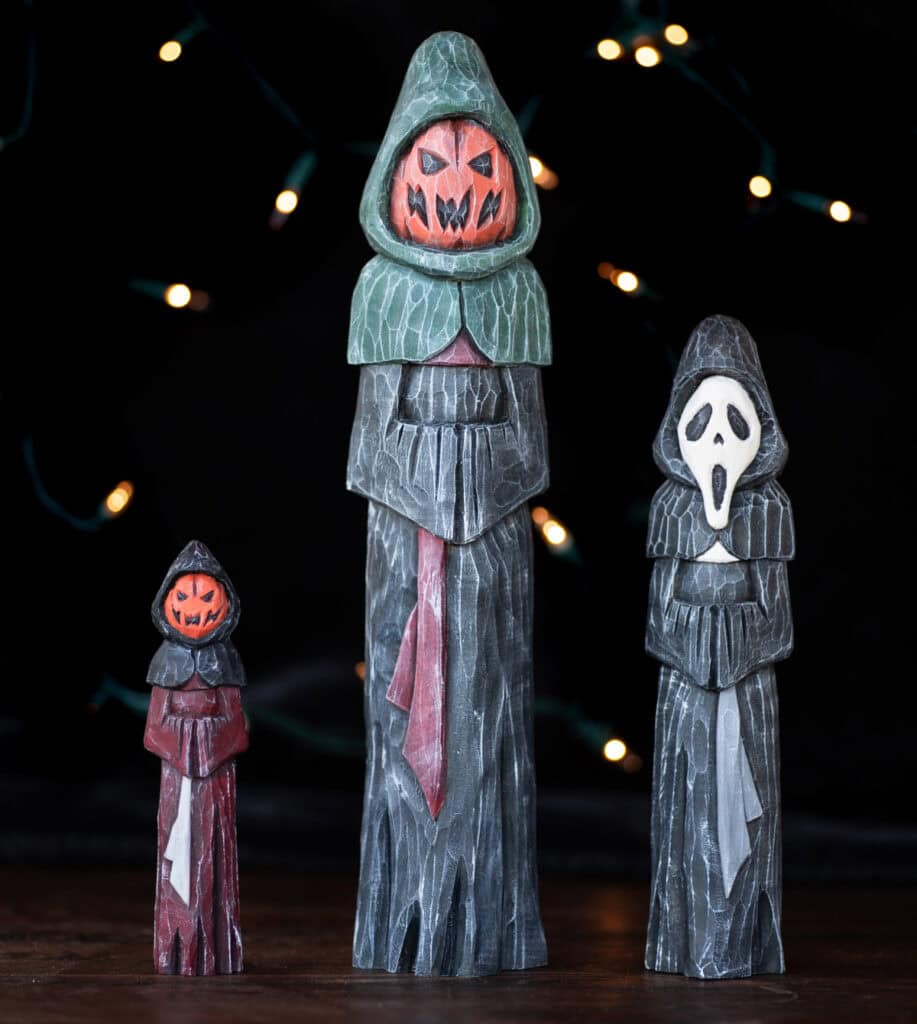
This spooky carving is perfect for Halloween lovers! Carve this Grim Reaper style figure two different ways – with a Jack o’lantern face or a screaming ghost face. Either way it’s an impressive carving.
This post includes affiliate links. If you make a purchase using one of these links, Together Time Family will receive a commission at no additional cost to you.
My wife and I call this carving the “spooky guy.” He’s not quite a Grim Reaper, but he’s definitely spooky!
This set of Halloween carving stencils features something completely new – flexible face stencils that allow you to draw accurate, detailed designs on curved surfaces. Each stencil set comes with both face options.

Get your stencils from our 3D printing partner on Etsy here.
If you’re not already on the email list, make sure to sign up here so you know when new carving tutorials are released.
Tools and materials needed for a Halloween carving
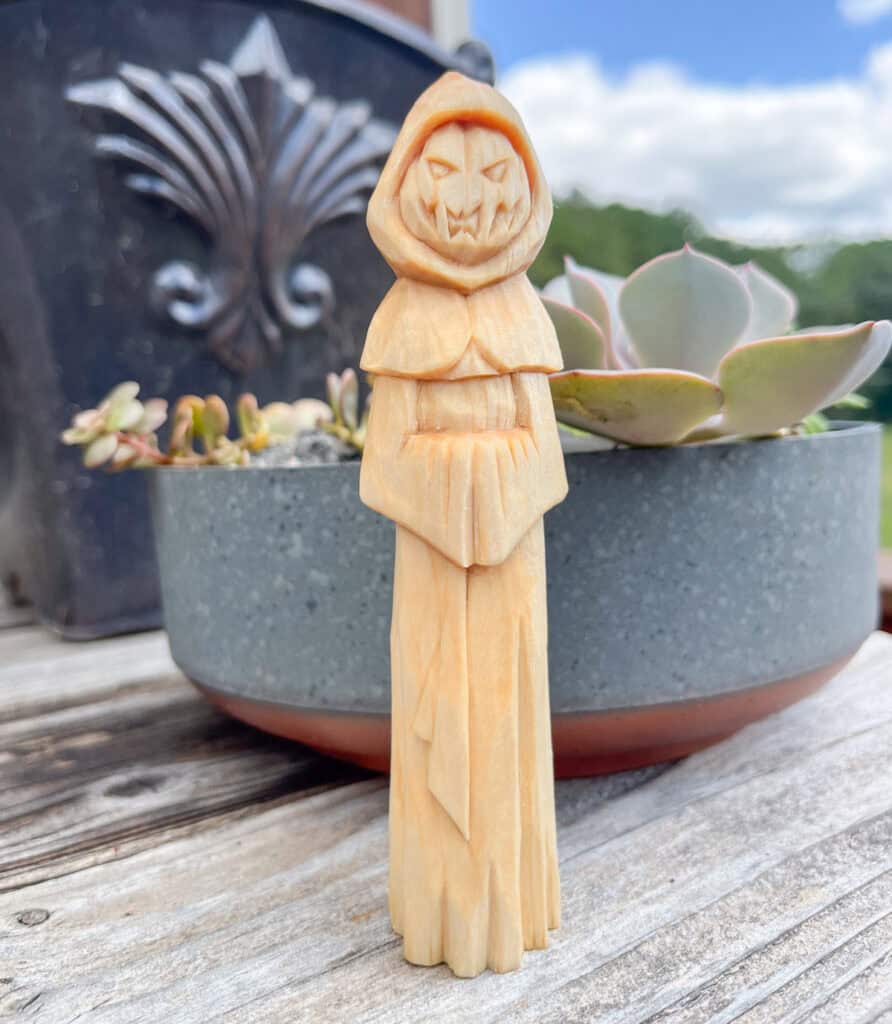
Basswood block. The 1” wide carving is about 6” tall, the 1.5” is approximately 8” tall, and the 2” wide carving is approximately 12” tall.
Spooky guy carving stencils. Optional but obviously very helpful! Get them here.
A mechanical pencils. I use a Uniball. A regular yellow pencil is too thick to fit into the stencil.

- Advanced rotating lead engine ensures 0.5mm nano diamond lead pencil is always sharp and your writing is on point
- A fine 0.5mm #2 lead produces intricate lines for clear text and vivid graphics
- Extra durable diamond-infused lead is stronger than standard lead, delivering strikingly dark marks
Your favorite carving knife. My go to is a Flexcut roughing knife
Flexcut 30 degree/ 5/32” v-tool
Flexcut micro v-tool 45 degree/3mm
How to carve a Halloween Grim Reaper figure
For our recent Christmas tree carving and wood manger, we wrote out some basic directions for a written tutorial.
This Halloween carving is much more complex than either of those carvings. I went through multiple prototypes and made a lot of mistakes along the way!
This carving really doesn’t lend itself well to written directions. There are too many details, grain direction shifts to pay attention to, and other carving tips (like how to tuck the arms under the capelet) to give this carving justice in a written format.
I know it’s’ a longer video, but it’s packed full of tips that will help you not only have a good time carving this Halloween figure, but also help you grow as a carver.
Painting the figure is relatively straight forward, though, so we do have written painting advice for you.
You can click on over to YouTube to watch the video or watch it in browser below.
How to paint a Halloween wood carving
Painting this wood carving is so much fun!
Before painting, treat your carving with oil and allow it to sit overnight. We use boiled linseed oil. If you don’t oil your carving, the paint is likely to wick and bleed.
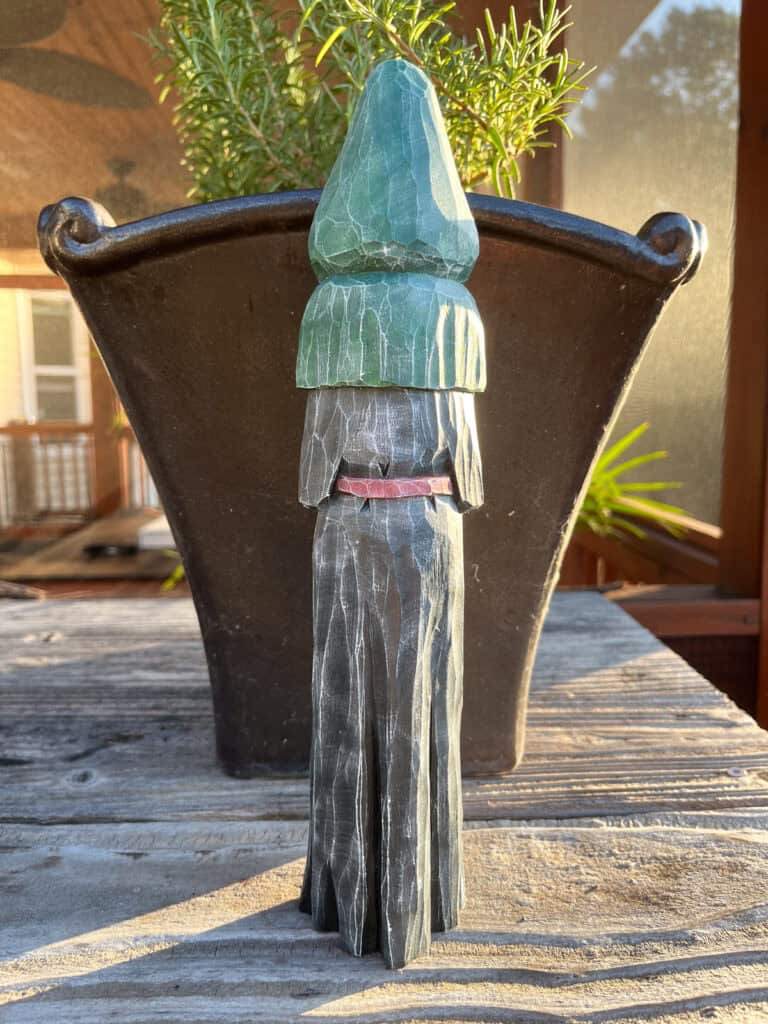
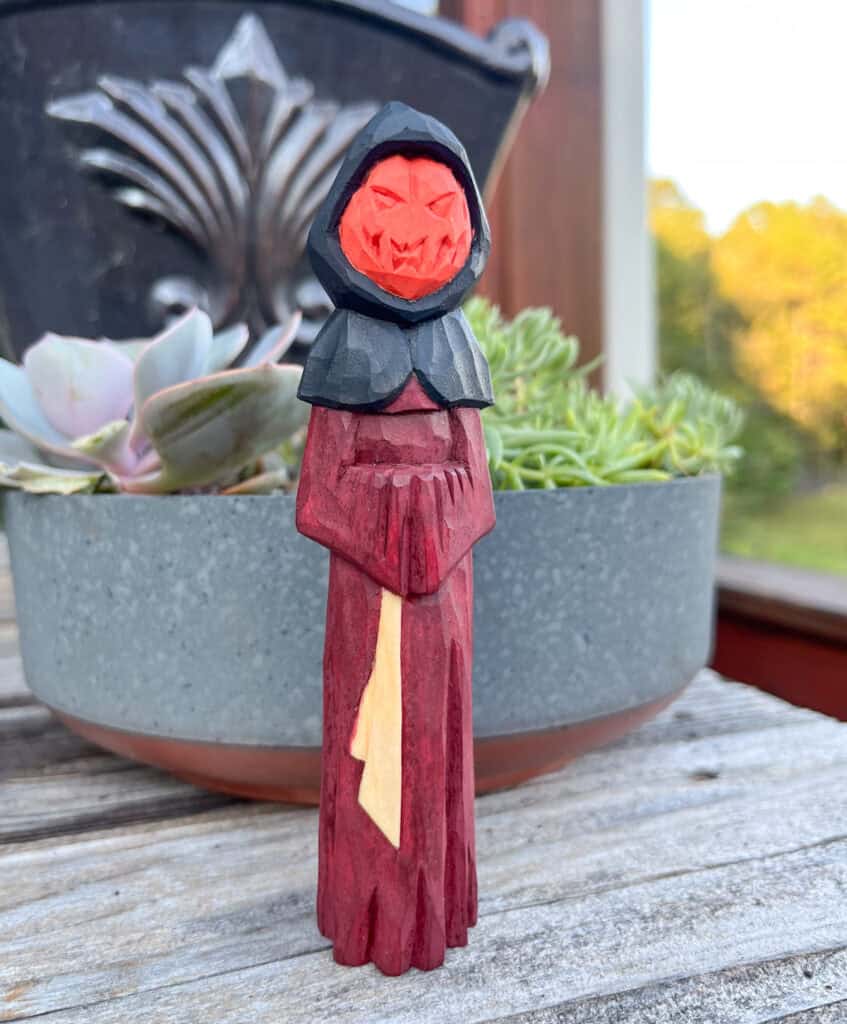
It’s vitally important to remember that your figure needs contrasting tones. Don’t just paint it black and call it a day! Dry brushing is your friend here, as are washes (if you pick a lighter robe color).
The hood and capelet are the perfect opportunity to bring different colors into your piece. You can paint the robe and the cape the same color, but painting the hood a different color can bring interest to your finished piece.
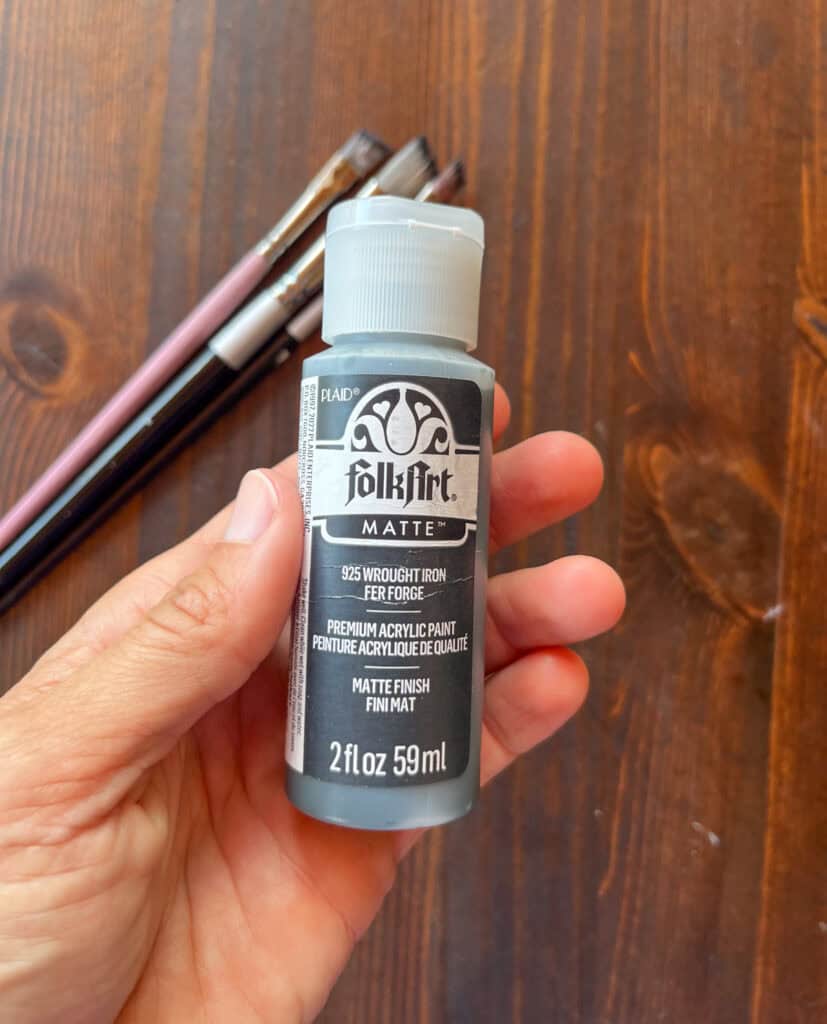
For the two “black” robed carvings shown below, we used Folk Art color “wrought iron.” Black, pure black can look very flat and plastic-y. This wrought iron color has almost green undertones that are much more visually interesting.
Wrought iron doesn’t have one coat coverage, though. If you use it, you’ll probably want to use two coats.
The burgundy color used is Apple Barrel brand “spiced apple”. It also requires multiple coats for sufficient coverage.
No products found.
No matter what color you use, use a large, flat brush to paint the robe. A smaller, flat brush and a mid-sized round brush work well for the front area between the arms and chest.
Pay attention to your stokes. As much as possible paint in long strokes from top to bottom. Do not overwork the paint or scrub it back and forth. Only paint across the grain if it’s needed to get coverage on a particular area.
If desired, paint the hood and capelet a different color. The sash is another great place to use a contrasting color.
For the pumpkin face, we prefer the color “canyon sunset.” To bring extra interest to the ghost face, we used vintage white with titanium white highlights.
When we paint the pumpkin face, we paint everything the orange color, even the eyes. This makes it easy to get the interior edges of the eyes orange.
To paint the eye and mouth on either face option, lightly water down black paint. Hold the carving horizontally and use a small to medium round brush to apply this watered down paint. Watering it down helps it get into the edges. You may need to apply two coats.
We then water the paint down even more to make a wash. This wash is used in the crevices on the pumpkin face. You may need to apply two or three coats, depending on how watered down your paint is.
You can also apply this wash the robe’s folds at the bottom and do anywhere else that would naturally have shadow.
Once the paint and wash are fully dry, it’s time to dry brush. This is a GREAT carving for dry brushing.
You can see how dry brushing and contrast make this carving come alive when you compare this photo:
To this carving with a wash and dry brush:
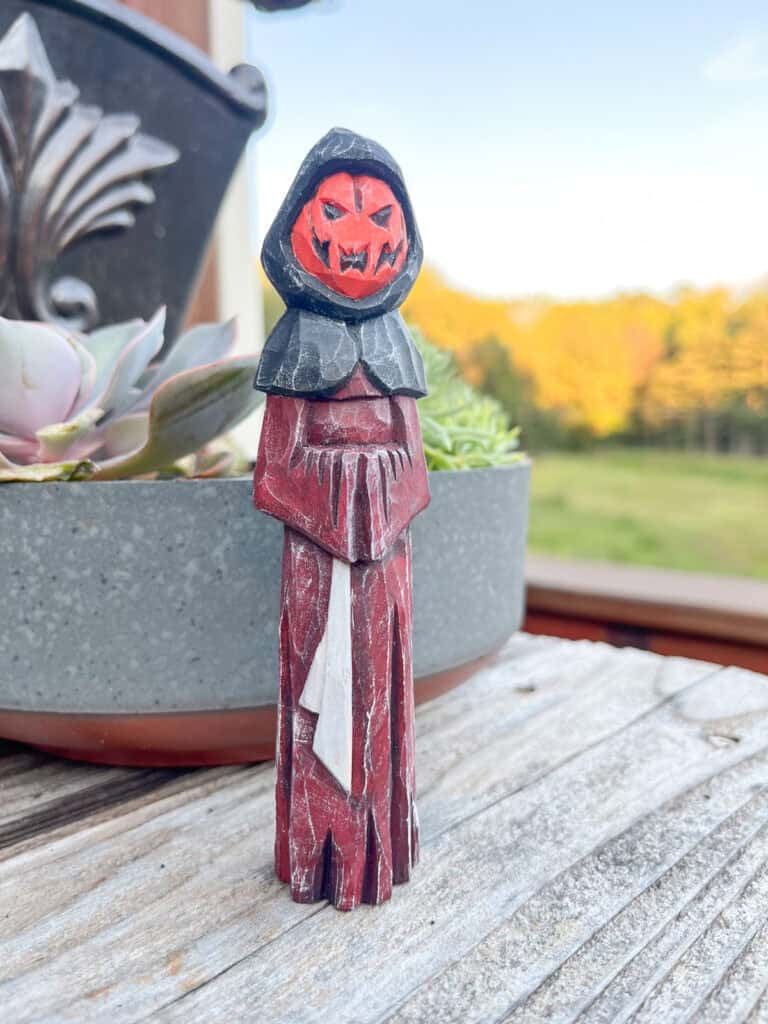
The key to dry brushing this piece is using a large, flat brush. Hold it almost flat to the carving and only make strokes in one direction. Do not scrub the brush back and forth – lift it between strokes. This helps make sure the paint stays on the lifted grain and highlight areas.
These are brushes I used both for painting and dry brushing these figures:
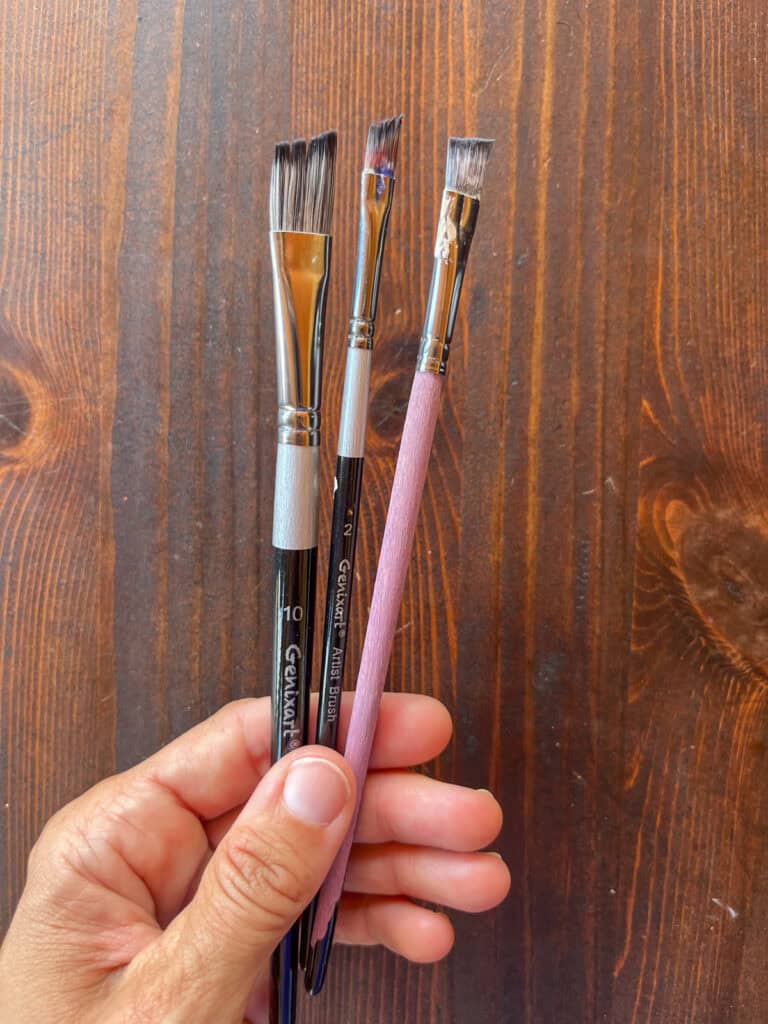
They come from this set of flat paint brushes on Amazon.
No products found.
Size your brush according to the carving’s size and the area’s size. You can use a .5” flat brush on the robe for the larges carving, for example, but want closer to .25” for the smaller carving.
Use a smaller dry brush for smaller areas, like the pumpkin face.
Make sure to follow the Together Time Facebook page for painting videos and tips! This is a separate page that Natasha runs, not Angel’s carving page.
We hope you’ve enjoy carving and painting your own Halloween figure! We look forward to seeing your finished carvings in The Carving Club.