Pumpkins are an incredibly fun plant to grow in your garden. They are one of the most celebrated signs of fall and can be used for baking, cooking, carving, and decorating.
If you’re thinking about growing pumpkins, their biggest needs are room to spread out, lots of sun and warmth, rich soil, and a long growing season. When they get these conditions, plants will thrive with little maintenance.
Here’s everything you need to know about how to plant and grow pumpkins, including how to select the perfect variety for your needs.
This post includes affiliate links. If you make a purchase using one of these links, Together Time Family will receive a commission at no additional cost to you.
Table of Contents
Pumpkins: An Autumn Staple
Pumpkins are a type of winter squash and closely related to zucchini, melons, and cucumbers. They need a long, frost-free growing season of 90-120 days and can generally be grown in USDA zones 3-9.
There are three main squash species grown in North America: Cucurbita maxima, Cucurbita pepo, and Cucurbita moschata. (source) Most Halloween-style pumpkins and pie pumpkins belong to the C. pepo species. Some squashes, like yellow squash and zucchini, are also C. pepo. Unlike winter storage squash, C. pepo squashes and pumpkins only store a few months (at most). Go ahead and bake up your last pumpkin pies of the season by Christmas to ensure the best flavor.
If you’re interested in a very in-depth look at growing squashes as a staple crop, the best book available is The Resilient Gardener by Carol Deppe. She grows an incredible quantity of storage squashes on leased land and has tips for planting and weeding without breaking your back, curing squash, and using squashes as a major source of food.
Deppe has a unique method of planting squash while standing upright using a very simple, affordable, homemade tool. If your back is tired of bending over to poke holes in the dirt, her book will help you in many ways. All of her planting and growing techniques are designed to minimize the amount of bending, stooping, and backaches in your life.
Pumpkins grow on large, sprawling, often prickly vines that can reach up to 15-20’ in one season. Because of this, pumpkins are not usually ideal for small gardens, although there are a few compact varieties that fit in small spaces and even containers.
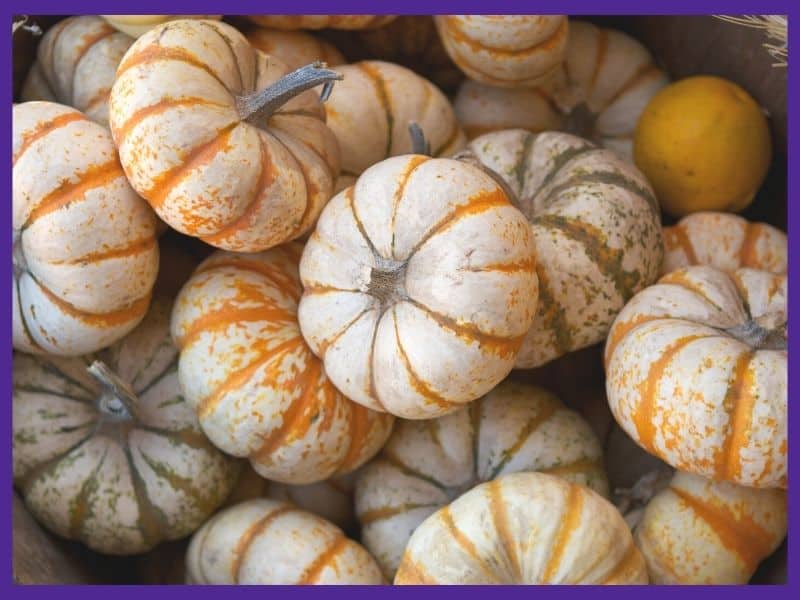
Orange pumpkins are a classic, but you may be surprised at how many other colors they can be: green, blue, red, white, yellow, and tan.
Of course, pumpkins are beloved both as a fall flavor and a fall decoration. Depending on what you want to use your pumpkins for, you’ll need to select a cultivar that matches your needs. Some are especially good for pies, while others hold up well to carving, and others are best for roasted pumpkin seeds.
Best Pumpkin Cultivars
You won’t lack for choices when it comes to pumpkin cultivars. Pie pumpkins, carving pumpkins, miniature pumpkins, giant pumpkins, multi-colored pumpkins- there’s some of everything!
Here’s a look at some great pumpkin varieties to try:
Pumpkin Varieties
These pumpkin varieties may leave you imagining a bigger garden so you can grow new, interesting types of pumpkin!
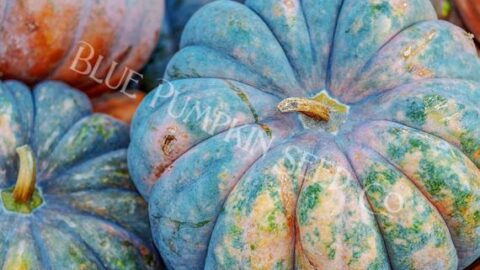
Jarrahdale Blue Pumpkin Seeds
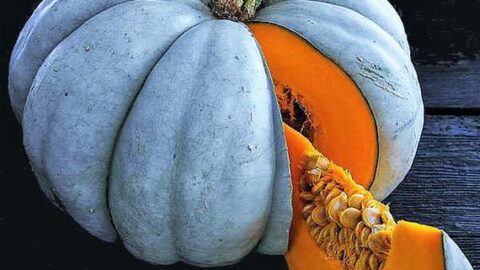
These stunning blue pumpkins have an almost stringless, sweet orange flesh. These pumpkins are delicious for eating and look fantastic as part of your fall decor.
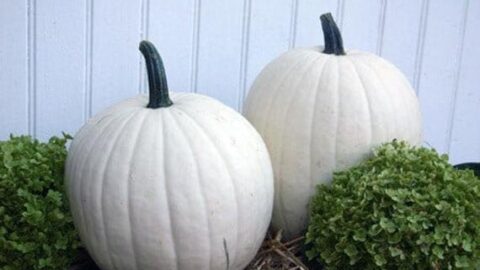
Cotton Candy Pumpkin Seeds
Cotton Candy pumpkins are so fresh and lovely for fall! They maintain their white color long after picking and are perfect for a modern take on Halloween.
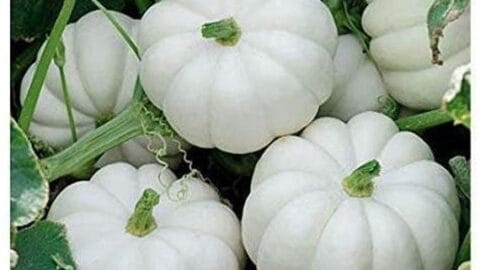
Baby Boo Pumpkins
Baby Boo pumpkins are adorable! These palm-sized white pumpkins are perfect for fall decor and can be eaten. They turn a very pale yellow when fully ripe, so for decorative use make sure to pick them a smidge early.
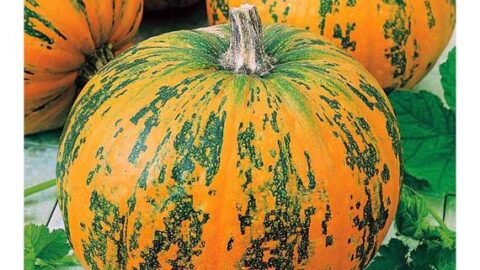
Speckled Hound pumpkin seeds
You won't find this unique pumpkin sold in stores! They're eye-catching, sweet, and tasty.
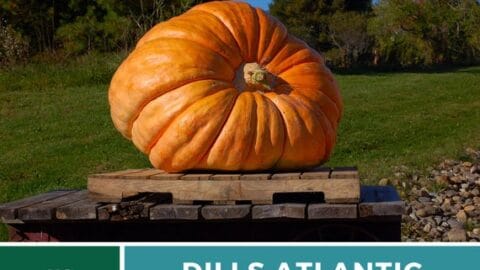
Dills Atlantic Giant Pumpkin
The name says it all with this one! The seller, Southern Seed Exchange, is one of my go-to seed sellers because they always ship quickly and have high quality seeds that germinate well.
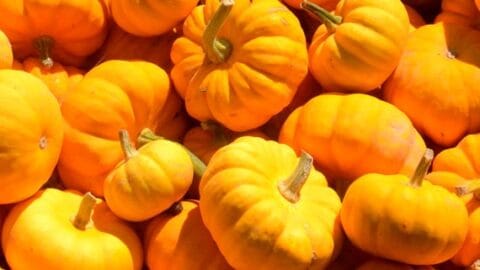
Jack Be Little Pumpkin
These cute, small pumpkins are a fall classic. They're great as part of your tablescape or for cooking. Although they're small, they still need about 95 days to maturity so make sure to plant them on time for cute Halloween decor.
Pepitas pumpkin seeds
If you love to eat pumpkin seeds, this is the one for you! These seeds are "hulless" (they actually have a very thin hull) and perfect for roasting and snacking.
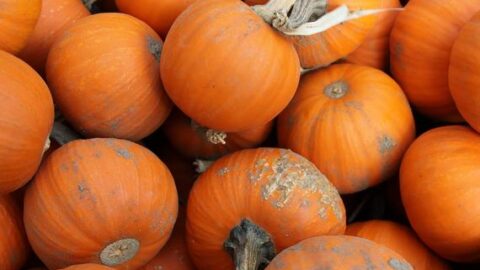
New England Pie Pumpkin Seeds
If you want a holiday dessert like no other, you need New England Pie Pumpkins in your garden. They also make for great looking mid-sized pumpkins for your fall decor displays.
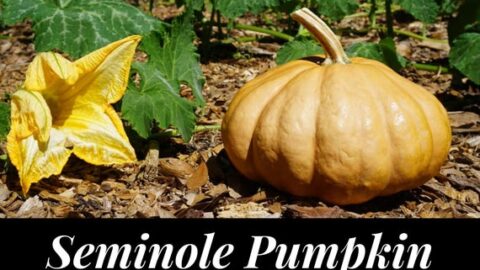
Seminole Pumpkin Seeds
If you live in the Southeast, this Florida native pumpkin is a great choice for you. It tolerates heat and humidity and is naturally resistant to downy mildew. According to the University of Florida, they also resist vine borers. Seminole pumpkins are known for their sweet flesh that's less stringy than many 'traditional' carving pumpkins. Many people consider them to taste similar to a butternut squash.
Before your eyes get bigger than your garden, remember that pumpkins need a lot of space. You might want to plant one of everything (my husband does), but it’s better to have a smaller number of plants with enough space to actually grow and thrive.
Consider your pumpkin-growing goals and pick your seeds accordingly. For example, if you have a shorter growing season and want homemade pumpkin pie for Thanksgiving, select a smaller pie pumpkin. If you want delicious roasted pumpkin seeds for snacking, select pepitas.
How to Plant and Grow Pumpkins from Seed
The easiest way to grow pumpkins in your garden is to start them from seed.
If you have a long growing season, you can start the seeds directly in the ground. If you have a shorter season, you can start them indoors 2-3 weeks before your last frost date in the spring.
To start pumpkin seeds indoors, use peat pots or another type of biodegradable pot. This will help your seedlings transplant better when they go out in the garden because winter squash doesn’t like to have its roots disturbed. Don’t use tiny pots or little cell planters – your pumpkin won’t have enough room to thrive.
Table could not be displayed.Seed-saving expert and homesteader Will Bonsall recommends using a 4″ pot for squashes to ensure they have enough space to grow. His book Will Bonsall’s Guide to Radical, Self-Reliant Gardening is a must-read for anyone who wants to learn about growing their own food with minimal fossil fuel and animal inputs. Yes, he’s a self-sufficient homesteader without animals.
Pumpkin should be planted about 1” deep in a moist seed starting medium. For the best germination, place the pots somewhere warm, ideally 70-80°F. Seeds should germinate in 5-10 days. If you’re not sure what a seed starting medium is, and why you probably want to use it instead of dirt from your yard for starting seeds, stop by this post on potting soil vs seed starting mix.
Care for your seedlings by giving them around 12 hours of light each day. Grow lights can help. Don’t let your seedlings become soggy, but do water them before the soil dries out. Especially indoors without air flow, pumpkin leaves can be susceptible to mildew. Make sure to avoid splashing the leaves with water as much as possible.
An inexpensive clip-on grow light can work wonderings for your indoor seed starting. If you frequently have leggy, pale seedlings, a grow light is exactly what you need to give your plants a head start in the world. I use these two clip-on lights indoors for seed starting. They both have built-in timers that make giving your plants enough light easy.
Table could not be displayed.Harden off your pumpkins for a week before transplanting to your garden in late spring. Yes, hardening off is kind of a nuisance. Yes, it’s important and you need to do it. If you don’t already have a hardening off schedule (or don’t know why it matters), please see this post on how to prepare seedlings for transplanting.
If you’d like to plant seeds directly in your garden, wait until the soil has warmed to at least 70°F. Create “hills” spaced 4-8’ apart, and plant 3-4 seeds per hill about 1” deep. Although many people plant pumpkins in literal mounds, a horticultural “hill” is actually a term for the configuration in which cucurbits are planted in small rings that are spaced several feet apart. Contrary to what you may have heard or seen, you do not have to create some pitchers mound of soil to plant your pumpkins in. Water the seeds well using a gentle watering wand or watering can.
Once seedlings have popped up and grown a few inches tall, thin them to the best 1-2 seedlings for each mound. Cut the other seedlings off at the ground so that you don’t disturb any roots. I recommend a pair of small garden snips like the Fiskar’s Micro-Tips for a quick, accurate cut.
Transplanting Pumpkins to Your Garden
When and Where to Plant Pumpkins
When it comes to how to plant and grow pumpkins in your garden, timing is important. Plant too early and frost will get your plants; too late and they won’t have time to mature.
Pumpkin seedlings can go in your garden in late spring when all danger of frost has passed. Wait until the soil warms to at least 70°F, and don’t rush planting, or you may lose your pumpkins to cold weather.
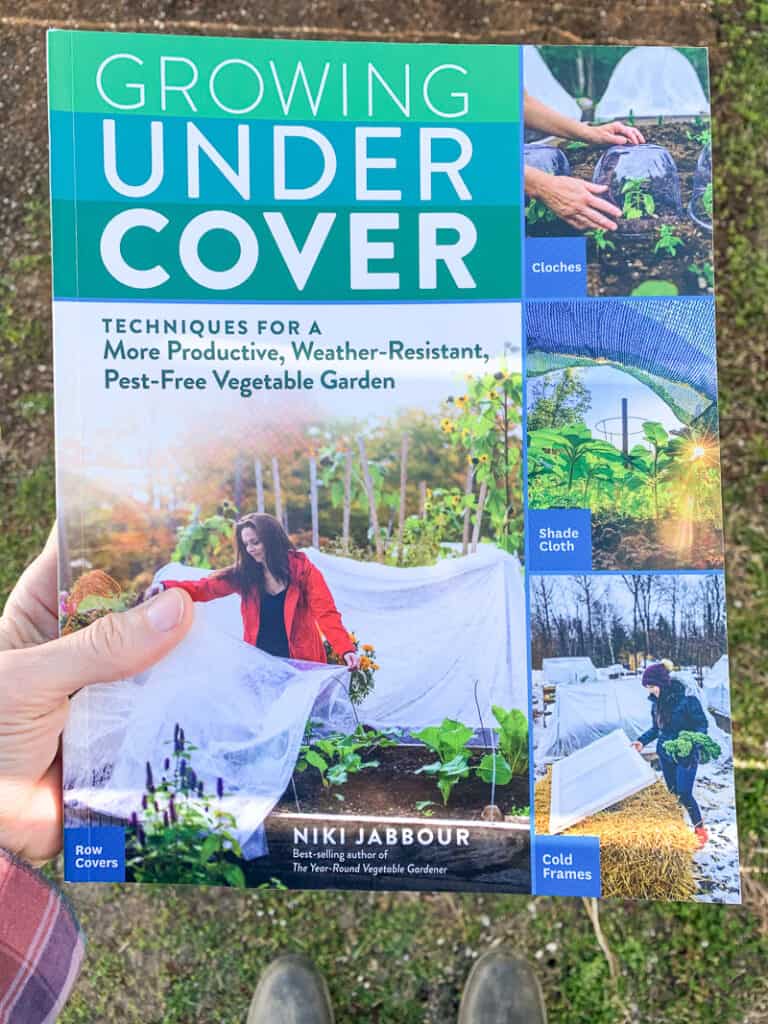
If you live in a colder climate and want to start your pumpkins as early as possible, you can warm the ground with black plastic. Niki Jabbour’s Book Growing Under Cover is a great resource for anyone who wants to learn more about protecting their crops and growing year-round, even in a cool climate. She lives in Canada – if she can grow fresh produce all year, you can, too!
When choosing a planting spot, remember that pumpkin vines can get up to 20’ long. Give them a lot of room, or use trellises to make the most of vertical space.
Pumpkin plants need full sun to grow well, so put them in a sunny spot in your garden. Well-drained soil is ideal.
All winter squash are heavy feeders and will grow best in rich soil. Add lots of compost or well-rotted manure to your soil before planting, and mix it 10-12” deep.
Another option is to create a “melon pit.” This is essentially a hole with unfinished compost. In Compost Everything, David Goodman reports massive success with growing pumpkins this way. He has a few photos of melon pit progress up on his blog.
To make a melon pit, dig a 2-3 foot deep hole and add a bunch of “stuff.” David recommends adding chunks of wood on the bottom followed by literally anything that will break down, event things you’ve been told not to compost like white bread and meat scraps. Make sure there is a thick layer or soil fill on – at least 12″ – to keep scavengers out. Also make sure to pack everything in to avoid air holes and water it well. I’ll be trying this technique out during the summer 2021 growing season, so check back for updates!
For more information about “extreme” composting and throwing the composting “rules” to the wind, be sure to grab a copy of Compost Everything. David has a sense of humor – if you prefer dry gardening books, it probably isn’t your style.
Until we have our own pumpkin pits/melon pits to share, this video from Black Gumbo gardening has great information on the technique:
How to Plant Pumpkins + Tips
Pumpkins need to be spaced 4-8’ apart.
If you’re using trellises, it’s a good idea to set them up when you put the seedlings in. It’s much easier to train the vines up a trellis as they grow than it is to put a trellis into a mass of grown vines.
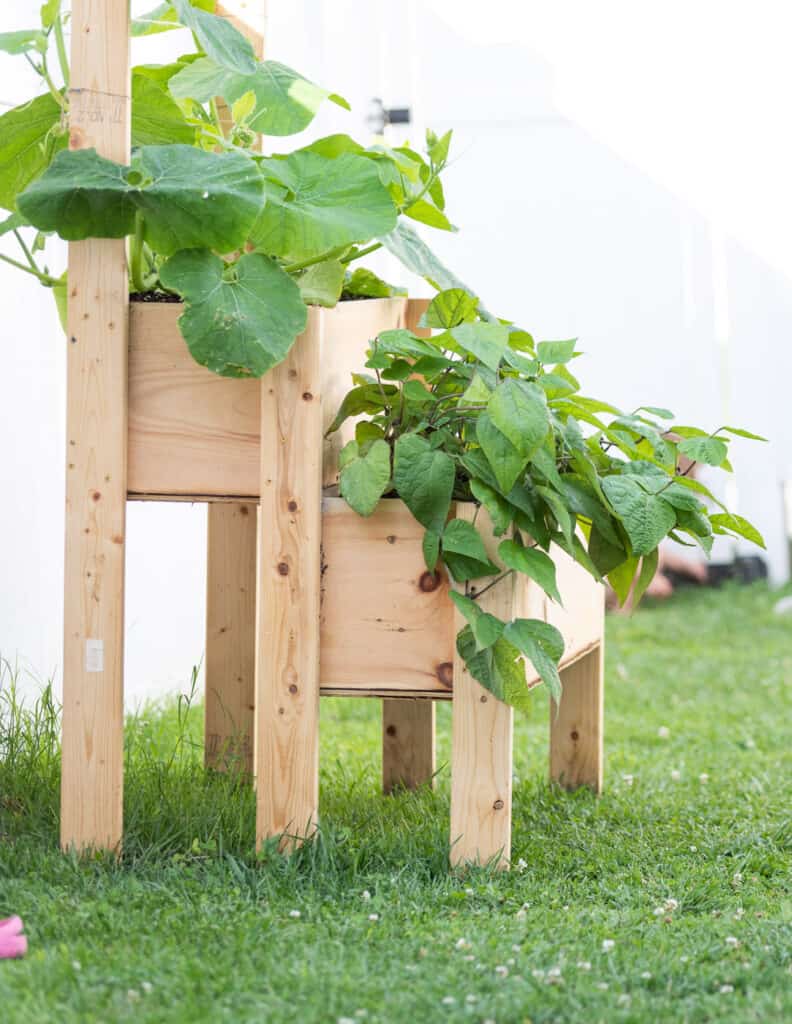
Although you can grow pumpkins in large containers, it will decrease your yields and the plants probably won’t be very happy. One year we were short on space in a temporary rental property and my husband really wanted to grow large gourds, so he built a raised planter. We did grow a few gourds, but the two plants suffered from the lack of space.
Pumpkin seedlings should be planted so that the top of the root ball is just under the soil.
If you used biodegradable pots, gently tear off the bottom and the top rim before planting them. This allows the roots easier access to the soil without disturbing them much. These types of pots frequently take multiple years to break down fully. Ripping portions of the pot allows the plant to grow better.
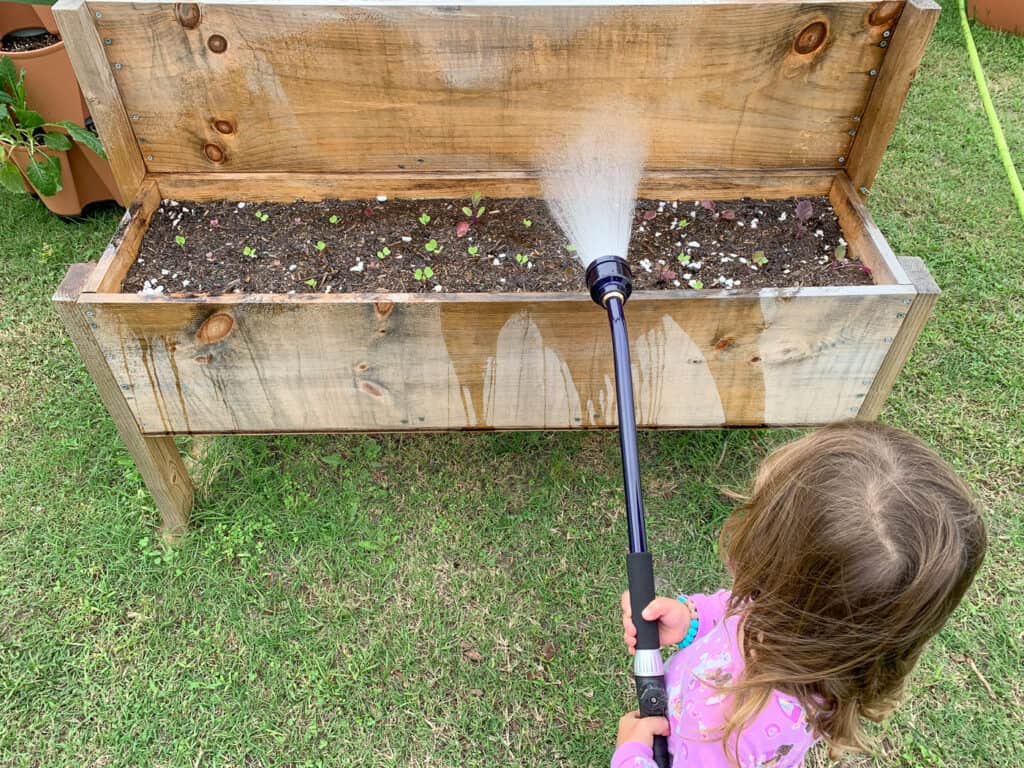
Be sure to water your seedlings well after planting, and your work is done (for now). Use a gentle watering can or watering wand for watering in seedlings. A hose nozzle can easily blast away too much soil and damage your seedlings. Don’t have a watering wand yet? Discover this guide to the best hose watering wands.
Pumpkin Plant Care 101
As your pumpkins continue to grow, watering and weeding are two important tasks to keep up with. Water deeply and infrequently (as opposed to shallowly and often), and avoid getting the leaves wet when you water. Plants need about 1” of water each week.
Weeding should be done carefully because pumpkins have a shallow root system that can easily be disturbed. If your plant is growing on the ground, its foliage will eventually block out many weeds, so you won’t have to weed extensively all season long. Mulching around them is a good way to keep weeds down and moisture in. Discover how to make your own mulch in this post!
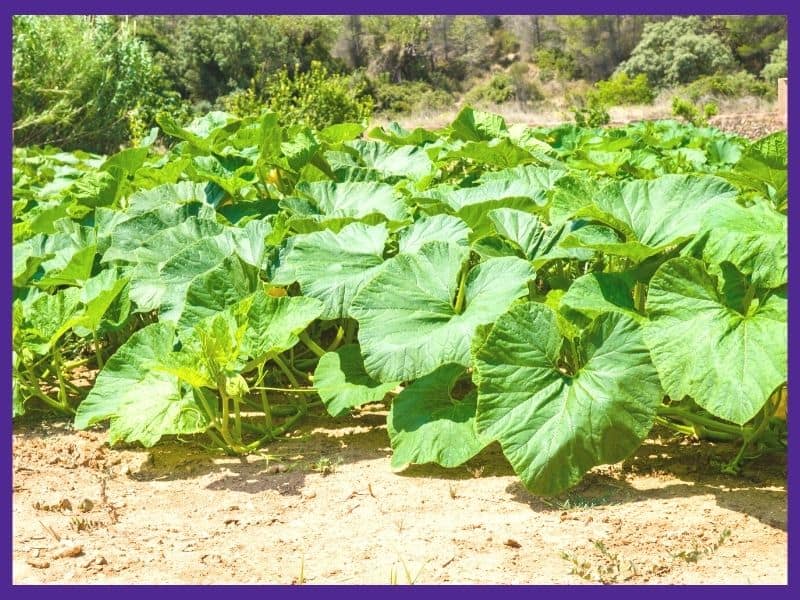
Your pumpkin plants will use a lot of nutrients throughout the growing season. Fertilizing them can be beneficial, especially if you didn’t add compost before planting. Because I grow organically, I use Neptune’s Harvest or Fox Farms whenever I use purchased fertilizer.
If you’re new to organic, sustainable gardening, this suggestion may surprise you, but an easy, effective, and free way to fertilize your pumpkins is…with pee. Human urine has been used as fertilizer for thousands of years, and scientists are finally advocating for its large-scale use again. It’s high in nitrogen and minerals, saves money on your water bill, and there’s always more available.
Avoid peeing, or pouring pee, directly on your plants, and (like with any fertilizer) don’t always apply it in the exact same spot. Although some members of your family may enthusiastically volunteer to fertilize your pumpkin patch directly, you can dilute fresh urine at least 1:10 with water for watering and fertilizing. This post from Permaculture News has more information and specific suggestions.
If you decide to use trellises for your pumpkins, choose something very sturdy because it will end up holding a lot of weight. We have grown large gourds on a trellis made of 2×4 and twine. I don’t recommend it! You can also use a structure like a fence for the vines to climb on. They have tendrils that reach out, seeking for things to wrap around.
You do not “have” to trellis your pumpkins, but it does save space.
Your pumpkin vine will produce male and female flowers. It will most likely produce smaller male flowers first. Pumpkins produce more male flowers than females ones to ensure pollinate occurs. Bees love wallowing around in juicy pumpkin blossoms, but you can also pollinate by hand.
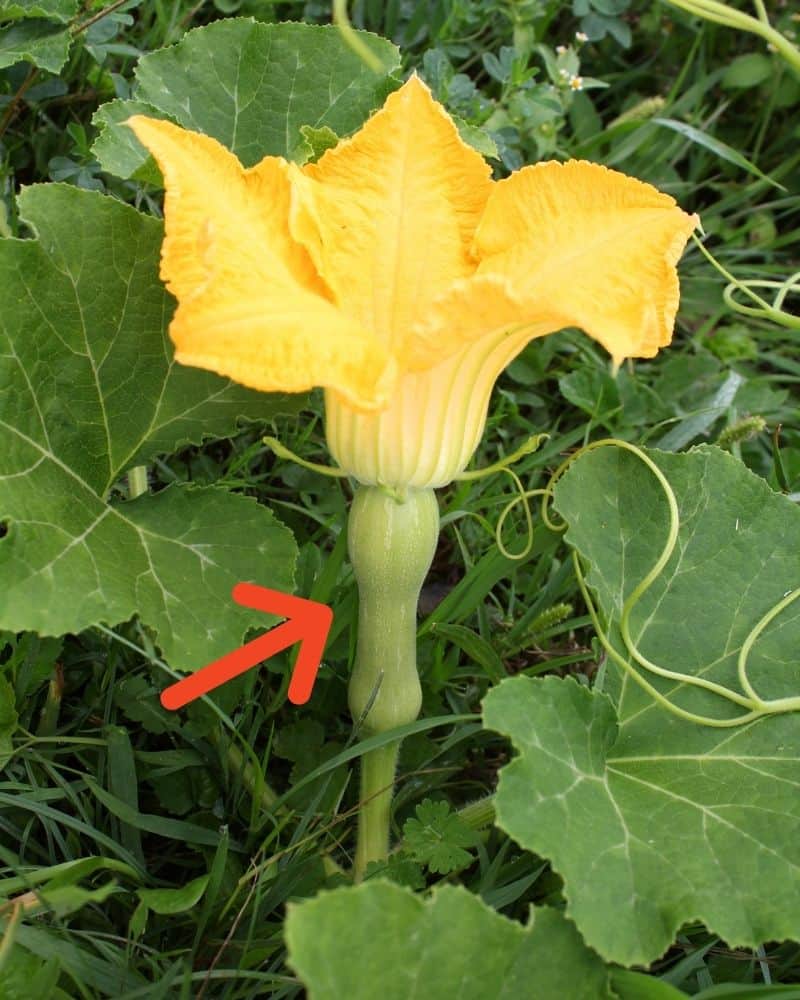
The photo below shows a female squash blossom. Your pumpkin flower will look very similar with a tiny fruit at the base. This immature, unfertilized fruit will look like whatever your pumpkin variety looks like, just super tiny and green. Male flowers are smaller and have stamen with yellow pollen at the tips.
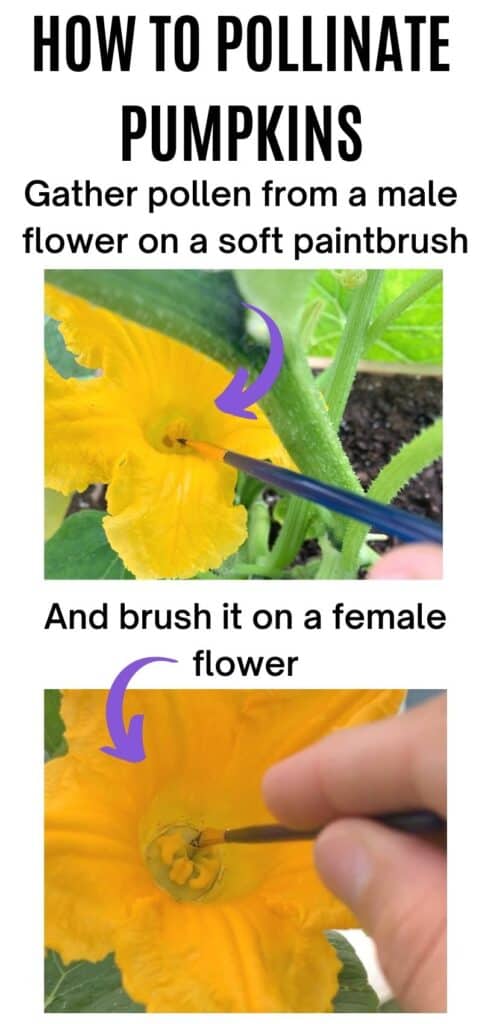
You can easily pollinate pumpkins by using a soft paintbrush or your finger to collect some pollen, then transfer it to the interior base of the female flower where the stigma is located. The photo below shows what to do:
As fruit begins to develop on your plants, it’s important to keep it from sitting on the ground, especially in wet conditions. People use all sorts of things, including rocks, bricks, and thick pieces of cardboard. If you only have a handful of pumpkin plants and are concerned about your harvest, you can use a plastic melon support. Make sure to get a heavy duty model that can hold up your heavy pumpkin.
Some gardeners will let 3-4 pumpkins form on a vine, then prune off the vine tip. This causes the plant to focus all its energy on those fruits instead of growing more leaves.
Tip: It’s a good idea to wear gloves anytime you prune pumpkin vines or train them up a trellis. The vines tend to be prickly and may cause a rash! I always wear long sleeves and a pair of cut resistant gloves. If you’re tired of your old, crummy garden gloves, be sure to check out this post with the best cut resistant gloves for gardening, including options that come in smaller sizes.
Common Pests and Problems
Unfortunately, pumpkins do attract several pests. The most common ones are cucumber beetles, squash bugs, and squash vine borers.
Both cucumber beetles and squash bugs will chew through the leaves of your plants. They typically won’t do fatal damage to large, healthy plants, but can do a number on seedlings and small plants.
Start pumpkins indoors to give them a head start, and use floating row covers over your seedlings if cucumber beetles or squash bugs are a pest in your region. Be sure to remove the covers when flowers open so that pollinators can get to them.
Squash vine borers are trickier to spot and deal with. They hatch from eggs laid by a moth at the base of winter squash plants. The larvae then tunnel into the stems and vines of plants.
Often, the first sign of squash vine borers is pumpkin plants wilting for no apparent reason. You can also examine stems and vines for the telltale “frass” the vine borers leave behind as they eat.
If your plants are at the wilting stage, it may be too late. However, if you catch them early enough, you can do a surgical operation by cutting open an infected vine lengthwise, pulling out the worm, and burying the cut vine under a good amount of soil.
You can throw a few handfuls of dirt over some “nodes” along your pumpkin vine as insurance against squash borers. The vine will grow new roots, which can sustain the plant if a portion of the stem is damaged. David the Good has a great video showing how burying nodes increases the plant’s root system and protects your plants from borers.
Row covers can also be helpful for excluding the vine borer moth early in the season.
Harvesting and Storing Pumpkins
Now that you know how to plant and grow pumpkins, chances are good you’ll want to store some of your crop, especially if you grew pumpkins for eating. Yum! Once you taste pumpkin pie made with homegrown pumpkins, you’ll never settle for canend again.
The first step is to harvest pumpkins when they are fully ripe.
Start by checking the color of the fruit. If it looks like a rich, orange hue (or whatever color your pumpkins should be), move on to the fingernail test. This is when you press into the skin of the pumpkin with your fingernail. If the skin is firm and resists puncture, the pumpkin is ready.
A final test is to tap on a pumpkin you think is ripe. It should have a hollow sound.
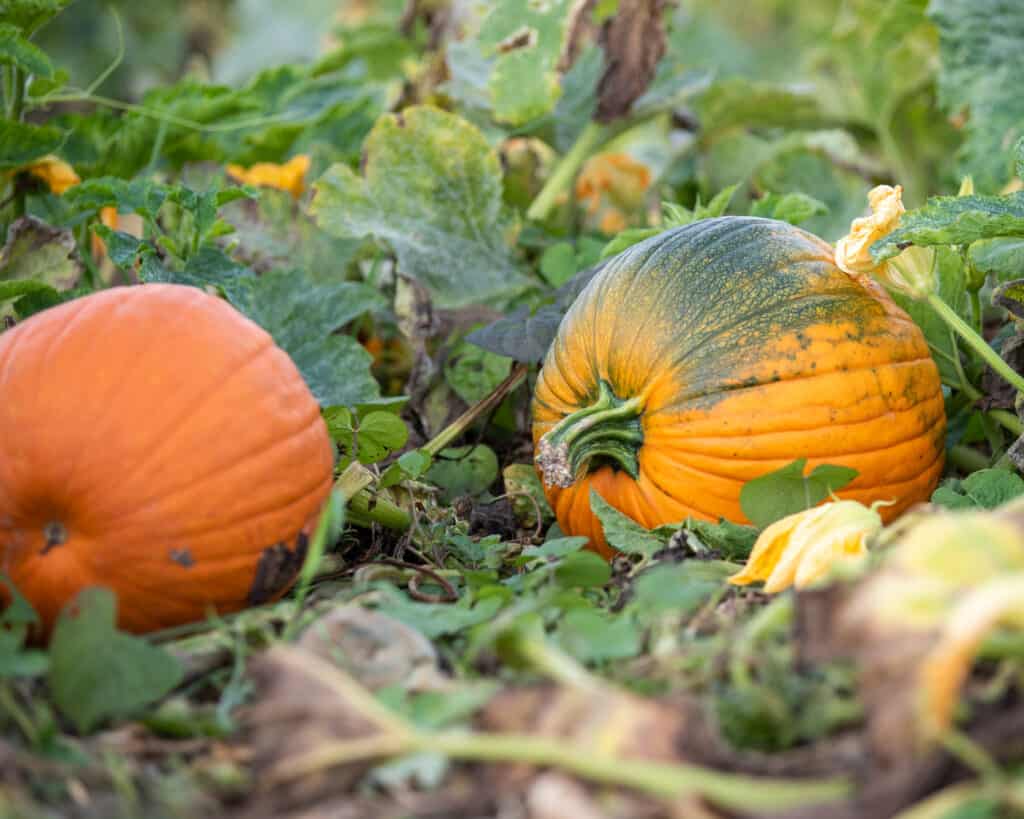
Cut mature pumpkins off the vine with a sharp, clean pair of hand pruners or a sharp knife. Larger varieties may even require large loppers to harvest. Leave a good 2-4” of stem attached to the pumpkin. This piece of stem helps it last longer in storage. You can see what I mean in the photo below:
Always use a sharp, strong pair of garden shears for harvesting pumpkins. The vines can be thick and sturdy – don’t risk damaging the produce you waited months for by yanking on the vine or trying to beaver through it with a pair of scissors. If you’re tired of junky hand pruners that break after a single season, read up on the best garden shears in this post.
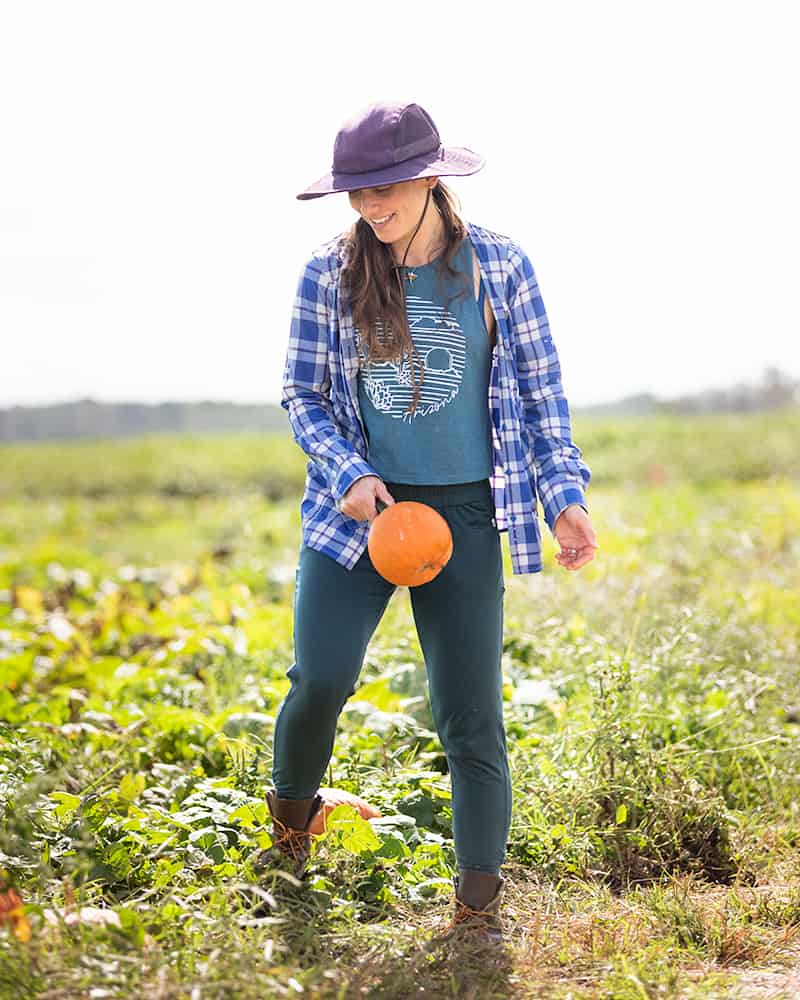
Table could not be displayed.The final step before storing pumpkins is curing them. To do this, simply let them sit out in the sun for 7-14 days. Bring them under shelter if it rains, and cover them or bring them inside if frost threatens. Do not swing your fresh pumpkin around like you see me doing in the photo below. Wait until it’s cured!
The curing process toughens up their skins and also develops flavor in your pumpkins.
Once cured, store your pumpkins somewhere cool and dry at a temperature near 55°F. You can also bake pie pumpkins in the oven, puree the flesh, and freeze it for long-term storage. Pumpkins are best when eaten within a few months.
Enjoying Your Pumpkin Patch
A backyard pumpkin patch is a fun thing to have. You can harvest your own fall decorations or make delicious pies, soup, etc. out of your homegrown crop.
And as you can see, learning how to plant and grow pumpkins isn’t hard. In fact, you may have more trouble with happy plants taking over your garden!
Popular summer vegetables and herbs
Discover how to grow popular vegetables and herbs in your backyard garden or container garden with these in-depth vegetable growing guides.
7 Easiest Vegetables to Grow for an Abundant Harvest (and 5 to avoid!)
Discover the easiest vegetables to grow for beginners so you can have a healthy, successful garden.
Discover these must-know tips for planting yellow squash and common squash growing mistakes and problems.
How to Pick and Preserve Cherry Tomatoes (plus drool-worthy cherry tomato varieties to try)
Discover how to pick and preserve delicious cherry tomatoes.
Must-Know Zucchini Companion Plants (and 5 plants to avoid)
Zucchini are a summer garden must-have. Learn how to companion plant them for a healthier, more productive garden.
How to Harvest Basil (Must-know tip for an abundant harvest!)
One basil plant can provide you enough for fresh eating and drying for homegrown basil all winter long when you discover how to harvest basil the correct way.
How to Harvest Parsley (without killing the plant)
One parsley plant can provide you with an ample harvest all season long...if you know how to pick it the correct way. Discover how to harvest parsley with this comprehensive guide and video!
Harvesting Tomatoes - How and When to Pick your Tomatoes
Discover how to harvest tomatoes and how to tell when they're ready to pick - even heirloom varieties with different colors.
Natasha Garcia-Lopez is an avoid home-gardener and proud owner of 88 acres of land in rural West Virginia. She was a member of the Association for Living History Farms and Agricultural Museums for many years and is currently enrolled in the Oregon State University Master Gardner Short Course program so she can better assist you with your gardening questions.She holds a certificate in natural skincare from the School of Natural Skincare.


Leave a Reply