Spaghetti squash is a fun and unique vegetable to grow. It’s a type of winter squash that develops a pasta-like flesh when cooked and shredded. The flavor is slightly sweet and blends well in recipes with various sauces, cheeses, and herbs.
Homegrown squash taste so much better than anything from the grocery store – if you pick and cure them correctly. In order to get fantastic tasting spaghetti squash, you need to harvest it at the right time. You can also store it for several months if it’s harvested and stored in the right way.
With all that in mind, here’s what you need to know about when to pick spaghetti squash, how to harvest it correctly, and how to cure and store it.
This post includes affiliate links. If you make a purchase using one of these links, Together Time Family will receive a commission at no additional cost to you.
Table of Contents
How to Know When to Pick Spaghetti Squash
It can be difficult to tell when winter squash is ready to be picked, especially if this is your first time growing it. The fruits don’t go through quite as obvious changes as other vegetables like tomatoes or peppers.
Spaghetti squash needs a long growing season. If you have a short growing season, it can be challenging to bring squash to maturity. In order for spaghetti squash to ripen, it needs warmer temperatures.
Signs spaghetti squash is ready to pick
Sometimes people are confused about the term winter squash and think that means they need to grow this variety of winter squash in the fall or winter. Winter squash refers to the squash being suitable for longterm storage so you can eat it in the winter. This is different from summer squashes, like zucchini, that are not well-suited to storage. Your spaghetti squash harvest should be ready in early autumn or late summer. If you planted after your last frost date, harvest time will probably be in late September or early October.
You always need to pick your squashes and pumpkins before danger of frost. Cucurbits are all very frost tender and will die in a frost.
Spaghetti squash days to maturity
The first step to determining if your squash is ready to pick is to calculate the number of days to maturity.
Most spaghetti squash varieties will be ripe in 90-110 days after sowing the seeds. Look at the seed packet to determine the exact maturity period for the squash you’re growing. Use this information to give yourself an approximate harvest date range.
Once this date range gets close, or is past, it’s a good idea to check your squash daily. In my experience, plants almost always take longer than the estimated maturity dates. If you’re before your estimated date, chances are very good that your squash isn’t ripe.
Weather has a large impact on plant growth. The plants also need full sun and fertile soil. A lack of either will delay your mature fruits from appearing. Squash plants also need well-drained soil and can be prone to downy mildew if they get wet.
Spaghetti squash Color
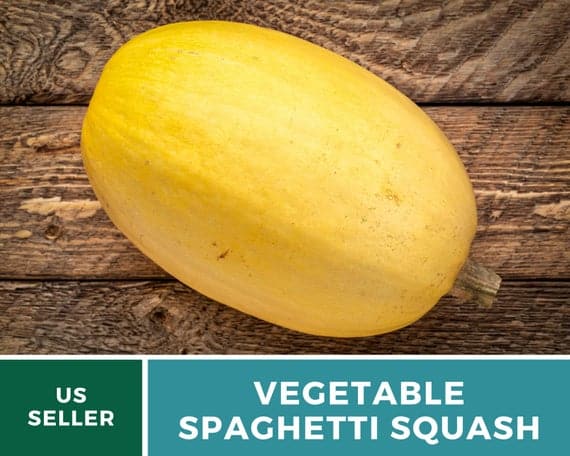
The color of all winter squash deepens and becomes more vibrant as the fruit matures. Spaghetti squash should be a rich golden yellow color when it’s ripe. If the fruits are still pale yellow or a green color, the quash isn’t ripe.
The spaghetti squash in the photo below is definitely not ready to pick.
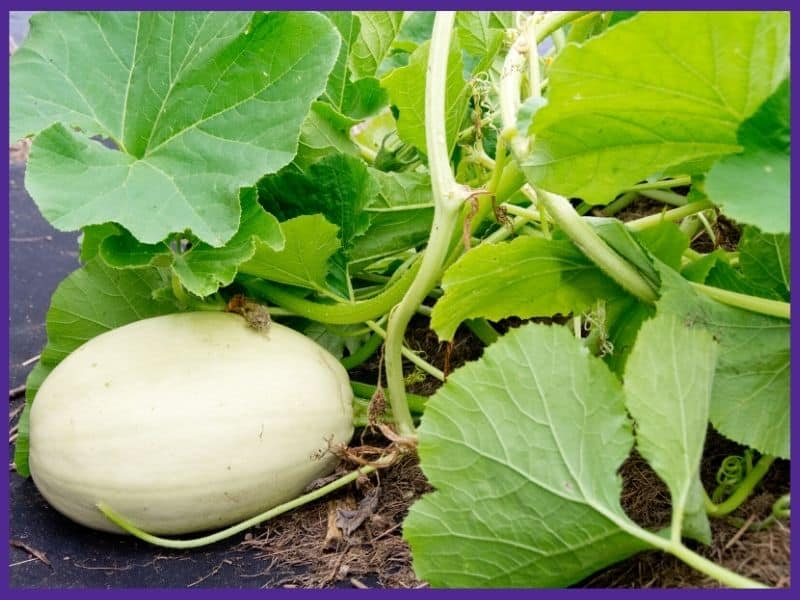
Some spaghetti squash have a green, mottled appearance. The green portions of these squash will remain green when ripe, but the pockets of color between the green webbing will appear golden. Keep an eye out for these color changes.
Skin Dullness
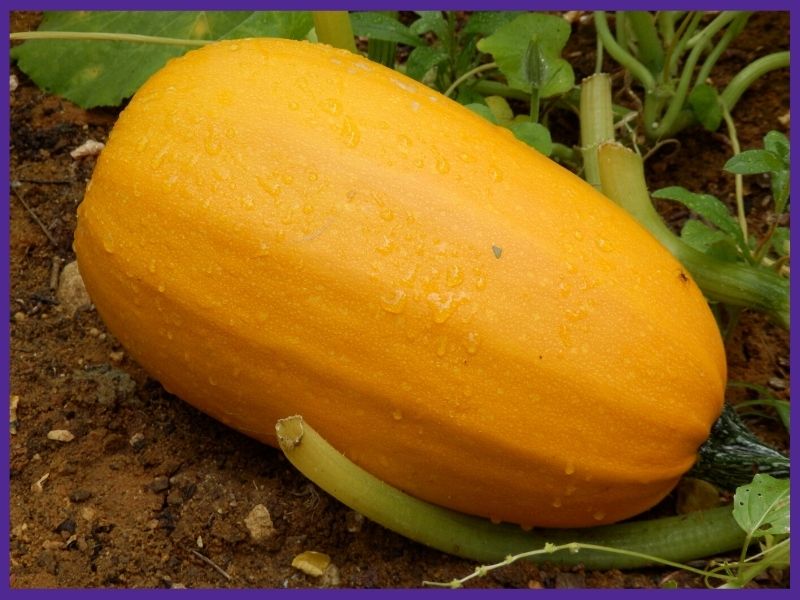
While you want to wait for the skin to become richly colored, you also want to wait until the squash skin loses its glossiness. Shiny, orange skin is the sign of immature winter squash, while non-glossy skin indicates ripeness.
Skin Toughness
One of the most important tests you can perform on spaghetti squash is the fingernail test. Try to puncture the skin of a squash you think is ready with your fingernail. If you easily press through the skin, it’s not ready. If the skin resists, chances are good the squash is ready.
Vine Dryness
When spaghetti squash is ready to pick, the vine will typically look tan or brown, and the stem that comes out of the fruit will likely be dry and brown as well. However, there are other factors that can cause brown vines and stems (like squash vine borers or squash bugs), so look for this sign after you’ve checked on color and skin toughness.
However, the attached inches of stem should turn fully brown during the curing or hardening stage. A brown vine is one indicator that tells you your spaghetti squash is cured and ready for storage.
Keep in mind that squash from the same plant won’t all be ripe at once. You can have ripe squash and unripe squash on the same plant because the fruits will mature at different times. Only harvest the squash that is actually mature, and let the rest continue to ripen on the vine. In the picture below you can see squash in various stages of un-ripeness:
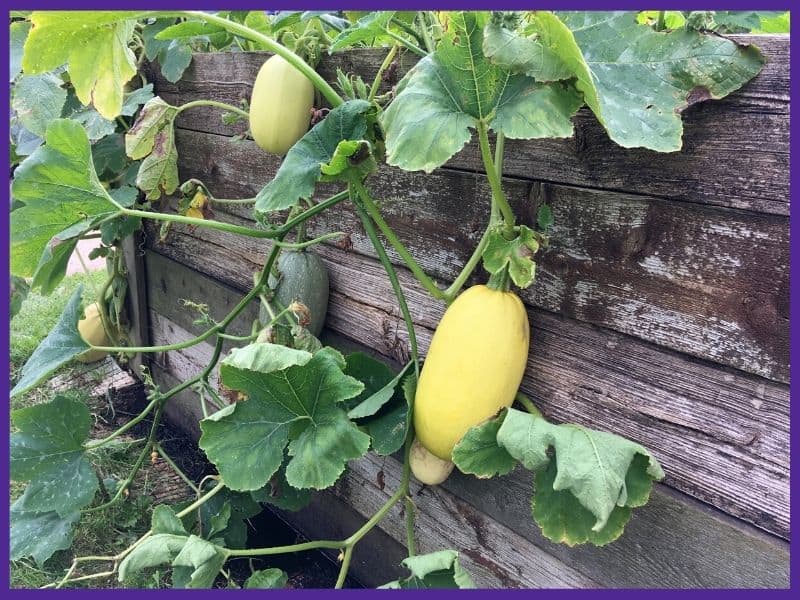
Always harvest winter squash before freezing weather comes through, even if it’s not fully ripe yet. Squash is very frost tender (it doesn’t even like cooler, but still above freezing, temperatures.)
Watch this demonstration of the fingernail test below. It shows examples of both yellow and green spaghetti squash that are ripe and unripe. It’s a great resource if you want to see specific examples, and she has a neat way of growing her squash plants so the fruits are elevated and easy to cure outdoors.
How to Harvest Spaghetti Squash
Knowing when to pick spaghetti squash is important for getting the perfect texture and flavor, but harvesting correctly is important if you want to store any of your squash.
The best way to harvest winter squash is with a sharp (and clean) pair of hand pruners or a sharp knife. Trying to twist the fruits off the vine can damage the plant and make the squash unfit for storage.
Use your chosen tool to cut each spaghetti squash off with a good 3-4” of stem attached. Avoid puncturing the fruit or cutting too close to the top, since both of these make storage difficult.
It’s important to use a sturdy pair of pruners to cut through large squash stems. You need a nice, clean cut, not a jagged, ripping one caused by trying to hack through the stem with too small or too flimsy tools.
The picture below shows harvesting a summer squash that’s supposed to be green, not spaghetti squash, but the process is the same. I recommend wearing cut resistant gloves and long sleeves when harvesting any squash. Squash stems are prickly and can aggravate sensitive skin.
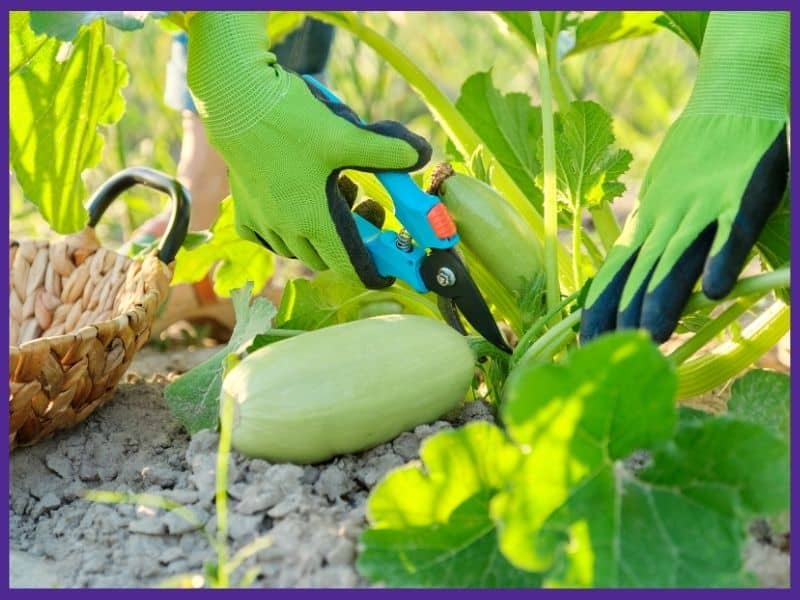
Fiskar’s bypass pruners are my top “budget” pick. For something more durable that will last longer, get Felco Pruning Shears. They’re fantastic for single-handed operation, even with tougher vines, and incredibly durable. (Note – for larger hands, make sure to get the Felco F2 model because they’re bigger.) Felco pruners are Swiss-made and all the parts are replaceable so you can buy new blades as needed without replacing the entire tool.
Table could not be displayed.Uncured squash must be handled gently to avoid damage that will impact storage life. If you do accidentally puncture or bruise any squash, plan to eat these ones first!
Although she doesn’t deal specifically with spaghetti squash, the book The Resilient Gardner is a fantastic resource for anyone interested in growing squash. The author, Carol Deppe, is a geneticist and avid squash-loving gardener who grows most of her staple food needs.
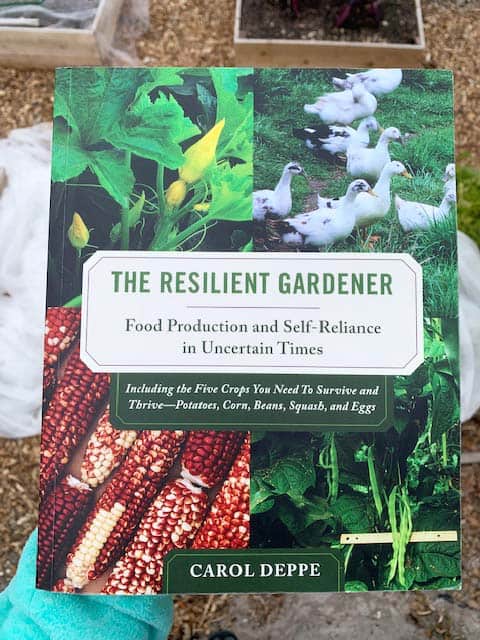
The Resilient Gardner is a guide to meeting important food needs yourself without becoming a full-time homesteader. Deppe doesn’t even garden in her own yard – she rents a piece of land nearby. It an interesting read and has some different perspectives on gardening.
Curing and Storing Your Spaghetti Squash
Hopefully, you have a large spaghetti squash crop by the end of the growing season, which means you get to store some for later.
The first step is to choose full-size, good quality, and undamaged squash to store. Do not wash your squash after harvesting it, since moisture is the enemy when it comes to storage. You can brush off dirt and debris with your hands or a dry rag. Check for soft spots and damaged parts and consume any damaged (but not rotten) squashes first. Any overly damaged squash make a great treat for your chickens or can go straight in the compost.
Before storing your squash, you need to cure it. Some people also calls the curing process hardening the squash. This process toughens and thickens up the skins so the fruits will last longer, and it often deepens the flavor as well.
Many store-bought winter squashes have not been properly cured. Your homegrown spaghetti squash will taste far better than anything you could buy.
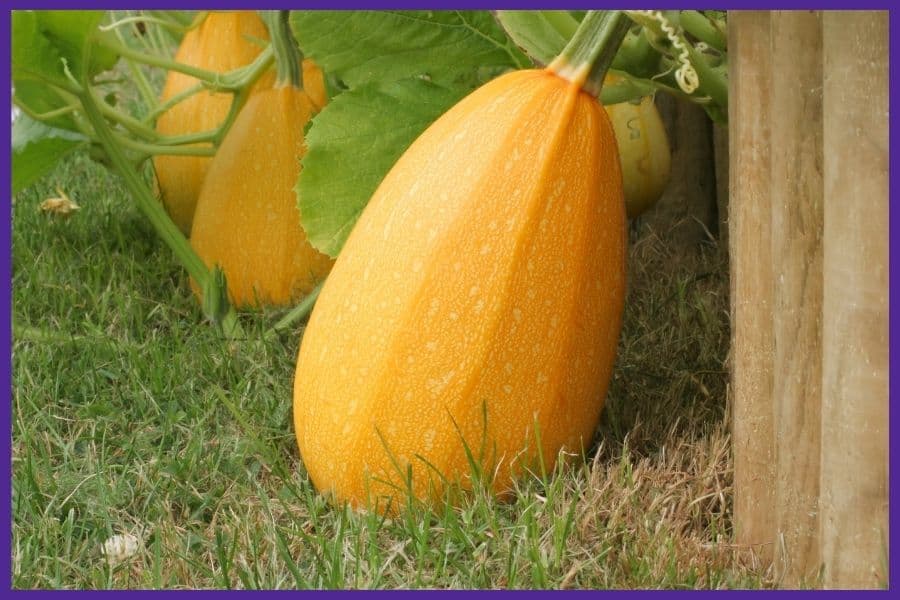
To cure spaghetti squash, place them in a warm spot (preferably outside) that has good air circulation. They can sit out in the sun in your garden but will need somewhere with a roof if rain is in the forecast.
The ideal temperature for curing is 80-85°F, but anywhere warm is good. Let the squash cure for 10-14 days, and make sure it stays dry during this process. Place it in a single layer during the ripening process.
Spaghetti squash long-term storage
After your squash has cured, you’re ready for long term storage. You can store it in a cool, dry room, ideally at 50-55°F. Put your squash on a shelf, rack, or in boxes rather than letting it sit on the floor. Cement floor is slightly porous and can expose your spaghetti squashes to excess moisture. Avoid stacking the spaghetti squash, and don’t store it near any ripening fruit, especially apples or pears. (source)
Deppe writes that she cures her squash inside, all over her house,, then moves it to her garage for storage over the winter. On warm fall or spring days, she cracks the garage door to allow warm air to escape. This also provides good ventilation that helps keep your squash fresh.
If you follow these steps, your squash will last for anywhere between 1 and 6 months, depending on variety, quality, and storage conditions.
Deppe writes that she cures her squash inside, all over her house, then moves it to her garage for storage over the winter. On warm fall or spring days, she cracks the garage door to allow warm air to escape.
If you follow these steps, your squash will last for anywhere between 1 and 6 months, depending on variety, quality, and storage conditions.
Different Types of Squash for Spaghetti Noodles
There are several different cultivars of spaghetti squash. They all have the spaghetti-like strands you expect, but are slightly different in size and days to maturity. Which variety you choose will have some influence on knowing when to pick your spaghetti squash because they have different maturity times.
Here are some options to think about:
- ‘Tivoli’– Typical large spaghetti squash with creamy rather than deep yellow skin. 98 days to maturity.
- ‘Goldetti’– Large squash with orange-gold skin and interior. High yielding. 100 days to maturity.
- ‘Sugaretti’– Very unique cultivar with green stripes and speckles on the skin. Looks like Delicata squash, tastes like spaghetti squash. 90 days to maturity.
- ‘Small Wonder’– Quick maturing variety that’s about half the size of normal spaghetti squash. Plants are prolific and squash stores well. 80 days to maturity.
Whatever seed you buy, I recommend using a smaller seed seller, not seeds from a big box store. These “big box” are more likely to have been mishandled and stored poorly, which can result in poor germination.
Smaller growers take greater care with their seed and ship directly to you. One of my favorite sellers is Southern Seed Exchange. They ship incredibly quickly and I’ve always had great success with their seeds.
Make the Most of Your Squash Harvest
It takes a long season of waiting patiently to get a good crop of spaghetti squash. But if you wait to harvest at the right time, you’ll get the best flavored squash and will be able to put some in storage for later months.
You can think of summer when you pull out a spaghetti squash in the middle of winter and cook it up your favorite way!
Herb and Vegetable Harvest Tips
Not sure when your vegetables are ready to pick? Or how to harvest your herbs without killing the plant? Discover these herb and vegetable harvesting guides!
How to Harvest Basil (Must-know tip for an abundant harvest!)
One basil plant can provide enough basil for your entire year...if you know how to harvest it correctly.
Bitter Lettuce: What to Do About it & How to Prevent it
Are you plagued by bitter lettuce? Discover what to do about bitter lettuce, how to prevent it, and how to make your lettuce less bitter.
How to Harvest Parsley (without killing the plant)
Are you picking your parsley the wrong way? Learn how to harvest parsley without killing the plant so it will continue producing!
How to Harvest Mint (and what to do with lots of mint)
Mint is a garden favorite. Learn how to harvest this vigorous grower to keep it under control and discover tips for what to do with lots of mint.
How to Harvest Thyme: tips for picking thyme & preserving your harvest
Learn how to harvest and store thyme in this compete guide.
How to Harvest Lemongrass
Lemongrass is easy to grow, pest-repellant, and delicious in food or as a lemony tea. Discover how to grow this fantastic scented grass in your garden!
How to Harvest and Store Turnips: Quick & Easy to Grow Veggies for Spring & Fall
Turnips are fast growing vegetables that can be grown in spring and fall. Learn how to harvest and store your turnips and turnip greens!
When to Harvest Butternut Squash
Does your butternut squash have you stressed and confused? Learn how to harvest and store your butternut squash.
When to Harvest Potatoes
It can be hard to know when potatoes are ready to harvest. Discover these potato harvesting tips!
How and When to Harvest Broccoli (are you making a common broccoli picking mistake?)
Are you making a common broccoli harvest mistake that can put your plants at risk? Learn how to harvest and store broccoli the right way!
How to Plant and Grow Radish from Seed: a fast-growing crop you can grow in containers
Radish is one of the fastest-growing vegetables. Learn how to plant and grow radish from seed so you can enjoy fresh vegetables in under a month!
Natasha Garcia-Lopez is an avoid home-gardener and proud owner of 88 acres of land in rural West Virginia. She was a member of the Association for Living History Farms and Agricultural Museums for many years and is currently enrolled in the Oregon State University Master Gardner Short Course program so she can better assist you with your gardening questions.She holds a certificate in natural skincare from the School of Natural Skincare.








This is my first time growing spaghetti squash. Really enjoyed the info here. One question. Can I pick a squash that is ready and eat it that night or do I need to cure it first?
I hope you’re enjoying growing your own squash! Yes, spaghetti squash can be eaten directly after harvest.
Some squashes should not be eaten directly after harvesting and taste better several weeks later. Spaghetti squash doesn’t store well, for a squash, and only lasts a few months in storage. Enjoy your harvest within 2-3 months for the best flavor. Happy growing!
Hi,
Love this info. Regarding hardening spaghetti squash, my area is now in the 70’s. That okay for them to sit out in cooler weather. Also I understand you say harvesting as you go promotes nutrients to the other such on the vibes, correct ?
Are those daytime temperatures or nighttime temperatures? If your day temps are in the 70s, it may be getting pretty cool at night. You can cure spaghetti squash inside, if needed. Higher locations in the kitchen, like on a rack on top of kitchen cabinets, tend to be warmest. A warm garage, as long as there is airflow from a cracked door or fan, can work, too. If spaghetti squash aren’t well-cured, they don’t last as long but are still edible. Harvesting as fruits and vegetables become ripe is always best. Spaghetti squash can become too ripe, and inedible, if left on the vine indefinitely.
You say you save seeds from your squash. How do they not cross with other squashes (ex butternut) or do you only have the one type?
That’s a great question! You can prevent cross pollination in specific blossoms by taping them shut, then hand pollinating them with the appropriate pollen. You place a wrap of masking tape around the center of the blossom to hold it shut. Carol Deppe’s book The Resilient Gardener has step by step photos showing how to do this. She also has another book, which I don’t own yet, on how to breed your own squash varieties. She has a degree in genetics from Harvard and has bread several successful corn and squash varieties. It is a little more work to save seeds when you’re growing multiple cucurbits, but it allows you to be more resilient and ultimately create your own little strains that are best suited to your microclimate. It is also an awesome feeling the first time you harvest from a plant you grew from seed you saved.
I have one green mottled spaghetti squash while the other ones are yellow. Is there any reason for this that you know of?
Sometimes spaghetti squash are green and mottled, especially before they’re fully ripe. It’s probably just normal variation. =)
I have green speckled squash growing they have very hard skin and when I cut one open it looked like unripe spaghetti squash. But when I show gardeners and nursery’s alike no one knows what it is. Can you help?
It’s really hard to guess without a picture, but spaghetti squash can green with white speckles before they’re fully ripe. It could also be a chilacayote squash. They look like a green and white spaghetti squash.